Table of Contents
Advertisement
Quick Links
Advertisement
Table of Contents

Related Manuals for Zonet ZSR4174WE


Summary of Contents for Zonet ZSR4174WE
- Page 1 All manuals and user guides at all-guides.com...
- Page 2 Copyright of the whole product as integration, including its accessories and software, belongs to Zonet Technology Inc. Without the permission of Zonet Technology Inc., any individual or party is not allowed to copy, plagiarize, imitate or translate it into other languages.
-
Page 3: Table Of Contents
All manuals and user guides at all-guides.com Table of Contents Chapter 1 Introduction................1 1.1 Welcome..................1 1.2 Features...................1 1.3 Package contents................1 Chapter 2 Hardware Installation..............2 2.1 Panel Layout..................2 2.1.1 Top Panel..................2 2.1.2 Rear Panel................3 2.1.3 Side Panel................3 2.2 System Requirements................4 2.3 Installation Environment Requirements..........4 2.4 Hardware Connection.................5 Chapter 3 Configure your Computer............6 3.1 TCP/IP Address Setting...............6... - Page 4 All manuals and user guides at all-guides.com 4.5.6 Change Password..............29 4.5.7 System Log................29 Chapter 5 Client+AP Mode...............30 5.1 Setup Wizard...................30 5.2 LAN Settings...................33 5.3 Wireless Settings................33 5.4 System Tools...................33 Chapter 6 WDS+AP Mode.................34 6.1 Setup Wizard...................34 6.2 LAN Settings...................37 6.3 Wireless Settings................37 6.3.1 Basic Settings................38 6.3.2 Wireless Security Settings............38 6.3.3 Advanced Settings..............38...
- Page 5 All manuals and user guides at all-guides.com 7.6 Security Settings................58 7.6.1 Client Filter................58 7.6.2 URL Filter................59 7.6.3 MAC Filter................60 7.6.4 Prevent Network Attack.............61 7.6.5 Remote WEB Management............62 7.6.6 WAN Ping................63 7.7 Routing Settings................64 7.7.1 Routing Table................64 7.8 System Tools...................65 7.8.1 Time Settings................65 7.8.2 DDNS..................65 7.8.3 Backup/Restore...............65 7.8.4 Restore to Factory Default Settings..........65...
-
Page 6: Chapter 1 Introduction
The MAC address filter can protect your network against any malicious intrusion. Moreover, the Web management utility can benefit you to manage the device easily. ZSR4174WE is the best choice for people always moving and need to search a fast, secure, easy-to-use, and feature-rich wireless network. -
Page 7: Chapter 2 Hardware Installation
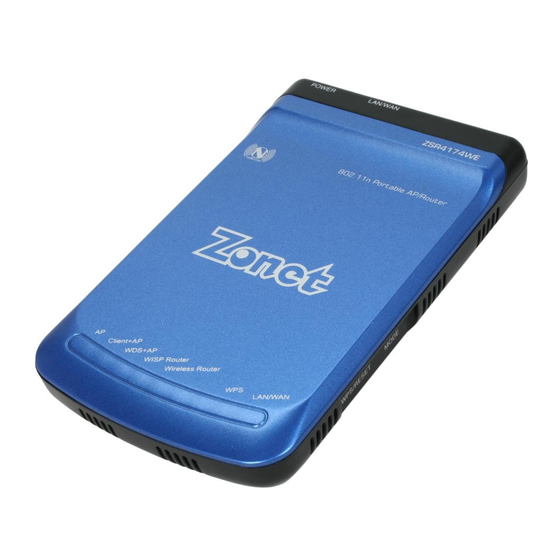
Flashing ZSR4174WE is negotiating with the client in WPS mode WPS off ZSR4174WE is well connected LAN/WAN Flashing ZSR4174WE is transmitting data Note: ZSR4174WE will be ready to use after all lights on the panel blink from left to right and LAN/WAN light starts to flash. -
Page 8: Rear Panel
All manuals and user guides at all-guides.com 2.1.2 Rear Panel Item Name Description Use the USB cable applied with ZSR4174WE to connect with power POWER adapter applied or USB port of PC AP Mode: A LAN 10/100Mbps RJ45 port for connecting to the router/modem, local PC or switch/hub. -
Page 9: System Requirements
Do not in direct sunlight or near a heater or heating vent Do not in cluttered or crowded place. There should be at least 2 inches (5 cm) of clear space on all sides of ZSR4174WE Well ventilated (especially if it is in a closet) Operating temperature: 0°C~40°C... -
Page 10: Hardware Connection
All manuals and user guides at all-guides.com 2.4 Hardware Connection Note: Before connecting ZSR4174WE, be sure to power off your computer, DSL/Cable modem, and ZSR4174WE. Connect one end of the cable to your broadband router, PC or Switch/Hub port and connect the other end to the LAN port of ZSR4174WE. -
Page 11: Chapter 3 Configure Your Computer
All manuals and user guides at all-guides.com Chapter 3 Configure your computer 3.1 TCP/IP Address Setting Default IP Address: 192.168.2.1 Default Subnet Mask: 255.255.255.0 3.1.1 Windows XP Click Start Control Panel Network → → → → → → → → and Internet Connections Click Network Connections. - Page 12 2 to 253), Subnet mask. Of course, you need to input the DNS server address provided by your ISP. Otherwise, you can use the ZSR4174WE’s default gateway as the DNS proxy server. Click OK to save the configurations.
-
Page 13: Windows Vista/7
All manuals and user guides at all-guides.com 3.1.2 Windows Vista/7 Click Start Control Panel Network → → → → → → → → and Internet. Click Network and Sharing Center. Click Local Area Connection and then Local Area Connection Status window will pop-out. - Page 14 All manuals and user guides at all-guides.com Click Properties from Local Area Connection Status. Select Internet Protocol Version 4 (TCP/IPv4) and click Properties.
- Page 15 2 to 253), Subnet mask. Of course, you need to input the DNS server address provided by your ISP. Otherwise, you can use the ZSR4174WE’s default gateway as the DNS proxy server. Click OK to save the configurations.
-
Page 16: Chapter 4 Wireless Ap Mode(Default)
All manuals and user guides at all-guides.com Chapter 4 Wireless AP Mode (Default) 4.1 Log in This section is showing you how to configure your new ZSR4174WE through the Web-based Configuration Utility. 1. Open an Internet Explorer, type 192.168.2.1 in the address bar, and then press Enter. -
Page 17: Setup Wizard
All manuals and user guides at all-guides.com 4.2 Setup Wizard Default mode of ZSR4174WE is AP Mode. 1. When Setup Wizard appears, click Next to continue. Configure Wireless Basic Settings, and then click Next. For more detail, please refer to 4.4.1 Basic Settings. - Page 18 All manuals and user guides at all-guides.com Configure Wireless Security Settings, and then click Next. For more detail, please refer to 4.4.2 Wireless Security Settings. Click Apply and ZSR4174WE will reboot automatically to activate AP mode.
- Page 19 All manuals and user guides at all-guides.com In AP mode, ZSR4174WE will act as a central hub for different wireless LAN clients. For example, when traveling to a hotel that has high-speed internet access, you can connect to the internet through ZSR4174WE which is connected to an Ethernet cable in the room.
-
Page 20: Lan Settings
Dynamic IP: Adjust the connection properties to obtain an IP address and DNS sever automatically in Internet protocol. IP Address: ZSR4174WE’s LAN IP address (not your PC’s IP address). Once you modify the IP address, you need to remember it for the Web-based Utility login next time. -
Page 21: Wireless Settings
SSID: Main Service Set Identifier. It’s the name of your wireless network. Default value is Wireless_N. Broadcast (SSID): Decide if ZSR4174WE will broadcast its own ESSID or not. BSSID: It is a 48bit identity used to identify a particular BSS (Basic Service Set) within an area. - Page 22 All manuals and user guides at all-guides.com Channel Bandwidth: Select the channel bandwidth from 20M or 20/40M to improve the wireless performance. Guard Interval: In telecommunications, guard intervals are used to ensure that distinct transmissions do not interfere with one another. These transmissions may belong to different users (as in TDMA) or to the same user (as in OFDM).The purpose of the guard interval is to introduce immunity to propagation delays, echoes and reflections, to which digital data is normally very sensitive.
-
Page 23: Wireless Security Settings
All manuals and user guides at all-guides.com 4.4.2 Wireless Security Settings Security Settings contains seven Authentication Types, including Disable, Open, Shared, Mixed WEP, WPA-Personal, WPA2-Personal, and Mixed WPA/WPA2-Personal. 4.4.2.1 Mixed WEP WEP (Wired Equivalent Privacy) is an encryption method used to protect your wireless data communications. -
Page 24: Wpa-Personal
All manuals and user guides at all-guides.com Default Key: You can set up to four sets of WEP key, and you can decide which key is being used by default here. WEP Key1, 2, 3, 4: Input WEP key characters here, the number of characters must be the same as the number displayed at “Key Format”... -
Page 25: Wpa2-Personal
All manuals and user guides at all-guides.com 4.4.2.3 WPA2-Personal The WPA2 is a stronger version of WPA. WPA Algorithms: Select one encryption type, AES, TKIP or TKIP&AES. Pass Phrase: Enter the key which must have 8-63 ASCII characters. Key Renewal Interval: Specifies the timer the WPA key must changes. The change is done automatically between the server and the client. -
Page 26: Mixed Wpa/Wpa2-Personal
All manuals and user guides at all-guides.com 4.4.2.4 Mixed WPA/WPA2-Personal WPA Algorithms: Select one encryption type, AES, TKIP or TKIP&AES. Pass Phrase: Enter the key which must have 8-63 ASCII characters. Key Renewal Interval: Specifies the timer the WPA key must changes. The change is done automatically between the server and the client. -
Page 27: Advanced Settings
TX Power: You can set the output power of wireless radio. Unless you’re using ZSR4174WE in a really big space, you may not have to set output power to 100%. This will enhance security (malicious / unknown users in distance will not be able to reach your ZSR4174WE). -
Page 28: Wps Settings
ZSR4174WE. You don’t have to select encryption mode and input a long encryption passphrase every time when you need to setup a wireless client, you only have to press a button on wireless client and ZSR4174WE, and the WPS will do the rest for you. -
Page 29: Access Control
This function will help you to prevent unauthorized users from connecting to ZSR4174WE; only those wireless devices who have the MAC address you assigned here can gain access to your ZSR4174WE. You can use this function with other security measures described in previous section, to create a safer wireless environment. -
Page 30: Connection Status
All manuals and user guides at all-guides.com 4.4.6 Connection Status Click Refresh to update the wireless connection information. MAC Address: Shows the connecting PC’s MAC address. Bandwidth: Displays the channel bandwidth of the wireless client. -
Page 31: System Tools
4.5 System Tools 4.5.1 Time Settings This function is to select the time zone for your location. If you turn off ZSR4174WE, the time settings will disappear. However, ZSR4174WE will automatically obtain the GMT time again once it access to the Internet. -
Page 32: Backup/Restore
Restore to Factory Default Settings: Click to restore to default settings. Factory Default Settings: User Name: admin Password: admin IP Address: 192.168.2.1 Subnet Mask: 255.255.255.0 NOTE: After restoring to default settings, please reboot ZSR4174WE so the settings will take effect. -
Page 33: Upgrade
Browse: Click to browse the path to the upgraded firmware files. Upgrade: Click to start upgrade firmware. IMPORTANT: Do not power off the system during the firmware upgrade to avoid damaging. ZSR4174WE will reboot automatically after the upgrade. 4.5.5 Reboot Reboot the router: Click to reboot ZSR4174WE. -
Page 34: Change Password
New Password: Enter a new password. Re-enter to Confirm: Re-enter to confirm the new password. NOTE: It is highly recommended to change the password to secure your network and ZSR4174WE. 4.5.7 System Log If the log is over 150 records, it will clear them automatically. -
Page 35: Chapter 5 Client+Ap Mode
All manuals and user guides at all-guides.com Chapter 5 Client+AP Mode 5.1 Setup Wizard 1. Select Client+AP on top banner and then select Setup Wizard on the left list. Click Next to continue. 2. Configure Client Settings, and then click Next. SSID: Input the SSID of the AP you want to connect. - Page 36 All manuals and user guides at all-guides.com 3. Configure Wireless Basic Settings, and then click Next. For more detail, please refer to 4.4.1 Basic Settings. 4. Configure Wireless Security Settings, and then click Next. For more detail, please refer to 4.4.2 Wireless Security Settings.
- Page 37 In Client+AP mode, ZSR4174WE associates with another AP within its range. ZSR4174WE behaves like a wireless network adapter. Figure below shows the Client+AP mode ZSR4174WE as a wireless client. Connect the LAN port of the ZSR4174WE with Ethernet interface of the wired network.
-
Page 38: Lan Settings
All manuals and user guides at all-guides.com 5.2 LAN Settings For more detail, please refer to 4.3 LAN Settings. 5.3 Wireless Settings For more detail, please refer to 4.4 Wireless Settings. 5.4 System Tools For more details, please refer to 4.5 System Tools. -
Page 39: Chapter 6 Wds+Ap Mode
Click Next to continue. 2. Configure WDS Settings, and then click Next. NOTE: Maximum four (4) ZSR4174WE is allowed to connect in WDS+AP mode. AP MAC: Input the MAC address of another wireless router or AP with WDS function. Or click Scan button to select the AP you want to connect. - Page 40 All manuals and user guides at all-guides.com 3. Configure Wireless Basic Settings, and then click Next. For more detail, please refer to 4.4.1 Basic Settings. 4. Configure Wireless Security Settings, and then click Next. For more detail, please refer to 4.4.2 Wireless Security Settings.
- Page 41 6. After activating WDS+AP mode successfully, web page will be displayed as below. In WDS+AP mode, ZSR4174WE will work similar as WDS mode. It supports the wireless bridge between the two wired networks; the connection of wireless network is also...
-
Page 42: Lan Settings
All manuals and user guides at all-guides.com 6.2 LAN Settings For more detail, please refer to 4.3 LAN Settings. -
Page 43: Wireless Settings
All manuals and user guides at all-guides.com 6.3 Wireless Settings 6.3.1 Basic Settings For more detail, please refer to 4.4.1 Basic Settings. 6.3.2 Wireless Security Settings For more detail, please refer to 4.4.2 Wireless Security Settings. 6.3.3 Advanced Settings For more detail, please refer to 4.4.3 Advanced Settings. 6.3.4 WPS Settings For more detail, please refer to 4.4.4 WPS Settings. -
Page 44: Wds Settings
WDS Mode: Lazy Mode: You need to configure ZSR4174WE’s BSSID into another device, but don’t need to input another device’s BSSID in ZSR4174WE, and they will connect together automatically. Bridge Mode: You can wirelessly connect two or more wired networks via this mode. -
Page 45: Access Control
All manuals and user guides at all-guides.com 6.3.6 Access Control For more detail, please refer to 4.4.5 Access Control. 6.3.7 Connection Status For more detail, please refer to 4.4.6 Connection Status. -
Page 46: System Tools
All manuals and user guides at all-guides.com 6.4 System Tools For more details, please refer to 4.5 System Tools. -
Page 47: Chapter 7 Wisp Mode
All manuals and user guides at all-guides.com Chapter 7 WISP Mode 7.1 Setup Wizard 1. Select WISP on top banner and then select Setup Wizard on the left list. Click Next to continue. 2. Configure WISP Settings, and then click Next. SSID: Input the SSID of the AP you want to connect. - Page 48 All manuals and user guides at all-guides.com 3. Select one Internet connection type you’re using in Connection Method, and then click Next. a. Dynamic IP (via DHCP) The default method is Dynamic IP. It means your IP address keeps changing every time you connect.
- Page 49 All manuals and user guides at all-guides.com b. Static IP Fill the network address information from your ISP in the IP Address, Subnet Mask, Gateway and Primary DNS server fields and click Next. c. ADSL Virtual Dial-up (via PPPoE) Enter the User Name and Password provided by your ISP, and click Next. d.
- Page 50 All manuals and user guides at all-guides.com e. PPTP Enter the Server IP Address, User Name, and Password provided by your ISP, and click Next. PPTP(PP Tunneling Protocol) provides two address modes. Dynamic IP: If the PPTP offered by your ISP is Dynamic IP, please select Dynamic IP.
- Page 51 All manuals and user guides at all-guides.com 4. Configure Wireless Basic Settings, and then click Next. For more detail, please refer to 4.4.1 Basic Settings. 5. Configure Wireless Security Settings, and then click Next. For more detail, please refer to 4.4.2 Wireless Security Settings.
- Page 52 7. After activating WISP mode successfully, web page will be displayed as below. In WISP mode, ZSR4174WE will behave just the same as the Client mode for wireless function. However, router functions are added between the Wireless WAN side and the Ethernet LAN side.
-
Page 53: Advanced Settings
MAC Address: ZSR4174WE’s physical MAC address on your local network is unchangeable. IP Address: ZSR4174WE’s LAN IP address (not your PC’s IP address). Once you modify the IP address, you need to remember it for the Web-based Utility login next time. -
Page 54: Wan Settings
All manuals and user guides at all-guides.com 7.2.2 WAN Settings 7.2.2.1 PPPoE Connection Mode: Show your current connection mode. Account: Provided by your ISP. Password: Provided by your ISP. MTU: Maximum Transmission Unit. It is the size of largest datagram that can be sent over a network. -
Page 55: Dynamic Ip
All manuals and user guides at all-guides.com 7.2.2.2 Dynamic IP MTU: Maximum Transmission Unit. It is the size of largest datagram that can be sent over a network. The default value is 1500. Do NOT modify it unless necessary. 7.2.2.3 Static IP IP Address: Enter the WAN IP address provided by your ISP. -
Page 56: L2Tp
All manuals and user guides at all-guides.com 7.2.2.4 L2TP L2TP Server IP: Enter the Server IP provided by your ISP. User Name: Enter L2TP username. Password: Enter L2TP password. MTU: Maximum Transmission Unit, you may need to change it for optimal performance with your specific ISP. -
Page 57: Pptp
All manuals and user guides at all-guides.com 7.2.2.5 PPTP PPTP Server IP: Enter the Server IP provided by your ISP. User Name: Enter PPTP username provided by your ISP. Password: Enter PPTP password provided by your ISP. MTU: Maximum Transmission Unit, you may need to change it for optimal performance with your specific ISP. -
Page 58: Dns Settings
All manuals and user guides at all-guides.com 7.2.3 DNS Settings DNS Settings: Select the checkbox to enable the DNS server. Primary DNS Address: Enter the necessary address provided by your ISP. Secondary DNS Address: Enter the second address if your ISP provides, which is optional. -
Page 59: Wireless Settings
All manuals and user guides at all-guides.com 7.3 Wireless Settings For more detail, please refer to 4.4 Wireless settings. -
Page 60: Dhcp Server
Lease Time: choose a lease time (the duration that every computer can keep a specific IP address) of every IP address assigned by ZSR4174WE from dropdown menu. Ex. If the lease time is an hour, then DHCP server will reclaim the IP address each hour. -
Page 61: Virtual Server
All manuals and user guides at all-guides.com 7.5 Virtual Server 7.5.1 Port Range Forwarding This section deals with the port range forwarding mainly. The Port Range Forwarding allows you to set up a range of public services such as web servers, ftp, e-mail and other specialized Internet applications to an assigned IP address on your LAN. -
Page 62: Dmz Settings
All manuals and user guides at all-guides.com 7.5.2 DMZ Settings The DMZ(Demilitarized Zone) function is to allow one computer in LAN to be exposed to the Internet for a special-purpose service as Internet gaming or videoconferencing. DMZ Host IP Address: The IP address of the computer you want to expose. Enable: Select the checkbox to enable the DMZ host. -
Page 63: Security Settings
All manuals and user guides at all-guides.com 7.6 Security Settings 7.6.1 Client Filter To benefit your further management to the computers in the LAN, you can control some ports access to Internet by data packet filter function. Client Filtering Settings: Select the checkbox to enable client filter. Access Policy: Select one number from the drop-down menu. -
Page 64: Url Filter
All manuals and user guides at all-guides.com 7.6.2 URL Filter If you want to prevent computers in local network from accessing certain website (like pornography, violence, or anything you want to block), you can use this function to stop computers in local network from accessing the site you defined here. URL Filtering Setting: Select the checkbox to enable URL filter. -
Page 65: Mac Filter
All manuals and user guides at all-guides.com 7.6.3 MAC Filter MAC Filtering Settings: Select the checkbox to enable MAC address filter. Access Policy: Select one number from the drop-down menu. Enable: Select the checkbox to enable the access policy. Delete the Policy: Click Clear button to clear all settings for the policy. Filtering Mode: Select one button to enable or disable to access the Internet. -
Page 66: Prevent Network Attack
This function is to protect the internal network from exotic attack such as SYN Flooding attack, Smurf attack, LAND attack, etc. Once detecting the unknown attack, ZSR4174WE will restrict its bandwidth automatically. The attacker’s IP address can be found from System Log. -
Page 67: Remote Web Management
Enable: Select the checkbox to enable remote web management. Port: The management port open to outside access. Default value is 8080. Note: If you want to login ZSR4174WE’s Web-based interface via port 8080, you need use the format of WAN IP address: port (ex. http://219.134.32.101: 8080) to implement remote login. -
Page 68: Wan Ping
All manuals and user guides at all-guides.com 7.6.6 WAN Ping The ping test is to check the status of your internet connection. When disabling the test, the system will ignore the ping test from WAN. Disable the Ping for WAN: Select the checkbox to enable it. -
Page 69: Routing Settings
7.7 Routing Settings 7.7.1 Routing Table The main duty for ZSR4174WE is to look for a best path for every data frame, and transfer this data frame to destination. So, it’s essential for ZSR4174WE to choose the best path. In order to finish this function, many transferring paths are saved in... -
Page 70: System Tools
DDNS (Dynamic Domain Name System) is to assign a fixed host and domain name to a dynamic Internet IP address, which is used to monitor hosting website, FTP server and so on behind ZSR4174WE. If you want to activate this function, please select Enable and a DDNS service provider to sign up. -
Page 71: Upgrade
All manuals and user guides at all-guides.com 7.8.5 Upgrade For more detail, please refer to 4.5.4 Upgrade. 7.8.6 Reboot For more detail, please refer to 4.5.5 Reboot. 7.8.7 Change Password For more detail, please refer to 4.5.6 Change Password. 7.8.8 System Log For more detail, please refer to 4.5.7 System log. -
Page 72: Chapter 8 Wireless Router Mode
All manuals and user guides at all-guides.com Chapter 8 Wireless Router Mode 8.1 Setup Wizard 1. Select Wireless Router on top banner and then select Setup Wizard on the left list. Click Next to continue. 2. Select one Internet connection type you’re using in Connection Method, and then click Next. - Page 73 All manuals and user guides at all-guides.com b. Static IP Fill the network address information from your ISP in the IP Address, Subnet Mask, Gateway and Primary DNS server fields and click Next. c. ADSL Virtual Dial-up (via PPPoE) Enter the User Name and Password provided by your ISP, and click Next. d.
- Page 74 All manuals and user guides at all-guides.com e. PPTP Enter the Server IP Address, User Name, and Password provided by your ISP, and click Next. PPTP(PP Tunneling Protocol) provides two address modes. Dynamic IP: If the PPTP offered by your ISP is Dynamic IP, please select Dynamic IP.
- Page 75 All manuals and user guides at all-guides.com 3. Configure Wireless Basic Settings, and then click Next. For more detail, please refer to 4.4.1 Basic Settings. 4. Configure Wireless Security Settings, and then click Next. For more detail, please refer to 4.4.2 Wireless Security Settings.
- Page 76 6. After activating Wireless Router mode successfully, web page will be displayed as below. In Wireless Router mode, ZSR4174WE will behave as the router with wireless NAT function and DHCP sever. And PCs can get the IP address automatically assigned by...
-
Page 77: Advanced Settings
All manuals and user guides at all-guides.com 8.2 Advanced Settings 8.2.1 LAN Settings For more detail, please refer to 7.2.1 LAN settings. 8.2.2 WAN Settings For more detail, please refer to 7.2.2 WAN settings. 8.2.3 MAC Address Clone MAC Address: The MAC address registered with your Internet service provider. Clone MAC address: Register your PC's MAC address. -
Page 78: Wireless Settings
All manuals and user guides at all-guides.com 8.3 Wireless Settings For more detail, please refer to 6.3 Wireless Settings. 8.4 DHCP Server For more detail, please refer to 7.4 DHCP Server. 8.5 Virtual Server For more detail, please refer to 7.5 Virtual Server. 8.6 Security Settings For more detail, please refer to 7.6 Security Settings. -
Page 79: Appendix 1: Product Features & Specifications
Supports wireless Roaming technology and ensures high-efficient wireless connections Supports wireless SSID stealth mode and MAC address access control Supports Auto MDI/MDIX Provides system log to record the status of ZSR4174WE Supports MAC address filtering, NAT Supports UPnP & DDNS Supports DHCP server... - Page 80 All manuals and user guides at all-guides.com Specifications: Standards IEEE 802.11n, IEEE 802.11g, IEEE 802.11b standards Chipset Ralink: RT3050 Windows 2000, XP, Vista, 7 User interface Easy to use user configuration software Transmit distance Indoor up to 150m (limited to environment) Support multipoint auto roaming and configuration;...
-
Page 81: Appendix 2: Troubleshooting
? ? ? ? Step 1: Check ZSR4174WE if it works well. Once the device is powered on for a few seconds, the LAN/WAN indicator on the panel will start flashing. If it is not, please contact us. - Page 82 “Apply” to activate it. Q6. How to share my computer’s source with other users in Internet? If you want Internet users to access the internal server via ZSR4174WE such as e-mail server, Web, FTP, you can configure the “Virtual Server” to come true.
Need help?
Do you have a question about the ZSR4174WE and is the answer not in the manual?
Questions and answers