Table of Contents
Advertisement
Quick Links
Advertisement
Table of Contents

Related Manuals for Zonet ZSR9104WE


Summary of Contents for Zonet ZSR9104WE
- Page 1 All manuals and user guides at all-guides.com...
- Page 2 Copyright of the whole product as integration, including its accessories and software, belongs to Zonet Technology Inc. Without the permission of Zonet Technology Inc., any individual or party is not allowed to copy, plagiarize, imitate or translate it into other languages.
-
Page 3: Table Of Contents
Chapter 1 Introduction................. 1 Welcome ....................1 Contents of Package ................1 System Requirement ................1 Getting to Know Your ZSR9104WE ............2 Chapter 2 Installation ................. 4 Hardware Installation ................4 Wall Mount Installation ................7 Chapter 3 Configure Your Computer ........... 9 TCP/IP Address Setting ................ - Page 4 All manuals and user guides at all-guides.com Chapter 10 Security Settings...............43 Client Filter ..................43 URL Filter ....................44 MAC Filter ...................45 Prevent Network Attack ................45 Remote WEB Management ..............46 Wan Ping ....................46 Chapter 11 Routing Settings ...............47 Routing Table ..................47 Chapter 12 System Tools..............48 Time Settings ..................48 DDNS ....................48 Backup/Restore ...................49...
-
Page 5: Chapter 1 Introduction
Moreover, the user-friendly Setup Wizard on the installation CD can assist you to set up ZSR9104WE easily. It also can be managed or configured through Local/Remote easy-to-use Web-based utility. -
Page 6: Getting To Know Your Zsr9104We
All manuals and user guides at all-guides.com Getting to Know Your ZSR9104WE Top Panel LED Indicator Status Description POWER ZSR9104WE is switched on and correctly powered Flashing Indicates the system works normally. Indicates WAN port is connected Indicates WAN activity (transferring or receiving Flashing... - Page 7 Wide Area Network (WAN / Internet) port. 1-4 (LAN Ports) Local Area Network (LAN) ports 1 to 4 Reset ZSR9104WE to factory default settings (clear all settings) or start WPS function. Press this button and hold RESET/WPS for 7 seconds to restore all settings to factory defaults,...
-
Page 8: Chapter 2 Installation
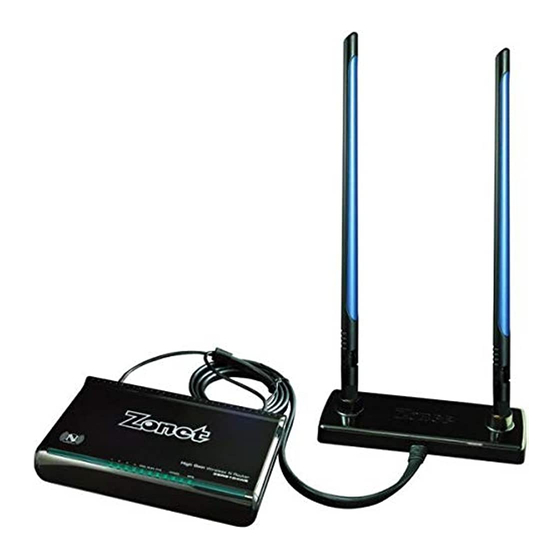
All manuals and user guides at all-guides.com Chapter 2 Installation Hardware Installation Note: Before connecting ZSR9104WE, be sure to power off your computer, DSL/Cable modem, and ZSR9104WE. 1. Screw 2 applied antennas to the antenna base. 2. Attach the antennas to ZSR9104WE by connecting 2 antenna connectors at... - Page 9 3. Connect all your computers, network devices (network-enabled consumer devices other than computers, like game console, or switch / hub) to the LAN port of ZSR9104WE. 4. Connect the power adapter to the wall socket, and then connect it to the “Power” socket of ZSR9104WE.
- Page 10 All manuals and user guides at all-guides.com 5. Connect your xDSL / cable modem to the WAN port of ZSR9104WE by Ethernet cable. 6. Please check all LEDs on the top panel. POWER LED should be steadily on. WAN and LAN LEDs should be on if the computer / network device connected to the respective port of ZSR9104WE is powered on and correctly connected.
-
Page 11: Wall Mount Installation
All manuals and user guides at all-guides.com Wall Mount Installation ZSR9104WE comes with an antenna base which can be mounted onto the wall. When installing the antenna base on a wall, the mounting kit must be first installed onto the wall. - Page 12 All manuals and user guides at all-guides.com 5. Mount the antenna on to the wall. 6. For the best performance, adjust the antennas to an optimal position.
-
Page 13: Chapter 3 Configure Your Computer
All manuals and user guides at all-guides.com Chapter 3 Configure Your Computer TCP/IP Address Setting a. Windows 2000 / Windows XP 1. Click Start → → → → Control Panel → → → → Network and Internet Connections 2. Click Network Connections... - Page 14 All manuals and user guides at all-guides.com 3. Right click Local Area Network Connection and select Properties. 4. Select Internet Protocol (TCP/IP) and click Properties.
- Page 15 All manuals and user guides at all-guides.com 5. Select Obtain an IP address automatically and Obtain DNS server address automatically. Click OK to save the configurations.
- Page 16 All manuals and user guides at all-guides.com b. Windows Vista / Windows 7 1. Click Start → → → → Control Panel → → → → Network and Internet 2. Click Network and Sharing Center...
- Page 17 All manuals and user guides at all-guides.com 3. Click Local Area Connection and then Local Area Connection Status window will pop-out. 4. Click Properties from Local Area Connection Status.
- Page 18 All manuals and user guides at all-guides.com 5. Select Internet Protocol Version 4 (TCP/IPv4) and click Properties. 6. Select Obtain an IP address automatically and Obtain DNS server address automatically. Click OK to save the configurations.
-
Page 19: How To Check The Network Connection
All manuals and user guides at all-guides.com How to Check the Network Connection 1. Select Start → → → → Programs → → → → Accessories → → → → Command Prompt. 2. Input ping 192.168.0.1 and press Enter. If the screen displays as below, it means your PC is connected to your router successfully. -
Page 20: Chapter 4 Basic Configurations
All manuals and user guides at all-guides.com Chapter 4 Basic Configurations This section is to show you how to configure your new ZSR9104WE through the Web-based Configuration Utility. How to Access the Web-based Configuration Utility 1. After your computer obtained an IP address from ZSR9104WE, please start your web browser, and input the default IP address of ZSR9104WE http://192.168.0.1... -
Page 21: Setup Wizard
All manuals and user guides at all-guides.com Setup Wizard 1. When Welcome to Setup Wizard pop out, Click Next to continue. 2. Select one Internet connection type you’re using. If you’re not sure, click Detect or contact your Internet Service Provider. Click Next. - Page 22 All manuals and user guides at all-guides.com a. ADSL Virtual Dial-up (Via PPPoE) Enter the Account and Password provided by your ISP, and click Next. b. Dynamic IP (Via DHCP) If your connection type is Dynamic IP, it means your IP address keeps changing every time you connect.
- Page 23 All manuals and user guides at all-guides.com After configuration, please click Next. e. PPTP Enter the Server IP Address, User Name, and Password provided by your ISP PPTP(PP Tunneling Protocol) provides two address modes. Dynamic IP: If the PPTP offered by your ISP is Dynamic IP, please select Dynamic IP.
- Page 24 All manuals and user guides at all-guides.com 3. Click Apply and reboot ZSR9104WE, or select Reboot in System Tools of the left menu and click Reboot the router button. 4. While rebooting, please wait for few minutes and DO NOT power off.
-
Page 25: Chapter 5 Advanced Settings
MAC Address: ZSR9104WE’s physical MAC address on your local network is unchangeable. IP Address: ZSR9104WE’s LAN IP address (not your PC’s IP address). Once you modify the IP address, you need to remember it for the Web-based Utility login next time. Default value is 192.168.0.1 Subnet Mask: ZSR9104WE’s subnet mask for measurement of the... -
Page 26: Wan Settings
All manuals and user guides at all-guides.com WAN Settings a. PPPoE Connection Mode: Show your current connection mode. Account: Provided by your ISP. Password: Provided by your ISP. MTU: Maximum Transmission Unit. It is the size of largest datagram that can be sent over a network. - Page 27 All manuals and user guides at all-guides.com b. Dynamic IP MTU: Maximum Transmission Unit. It is the size of largest datagram that can be sent over a network. The default value is 1500. Do NOT modify it unless necessary. c. Static IP IP Address: Enter the WAN IP address provided by your ISP.
- Page 28 All manuals and user guides at all-guides.com d. L2TP L2TP Server IP: Enter the Server IP provided by your ISP. User Name: Enter L2TP username. Password: Enter L2TP password. MTU: Maximum Transmission Unit, you may need to change it for optimal performance with your specific ISP.
- Page 29 All manuals and user guides at all-guides.com e. PPTP PPTP Server IP: Enter the Server IP provided by your ISP. User Name: Enter PPTP username provided by your ISP. Password: Enter PPTP password provided by your ISP. MTU: Maximum Transmission Unit, you may need to change it for optimal performance with your specific ISP.
-
Page 30: Mac Address Clone
All manuals and user guides at all-guides.com MAC Address Clone MAC Address: The MAC address registered with your Internet service provider. Clone MAC address: Register your PC's MAC address. Restore default MAC address: Restore the default hardware MAC address. DNS Settings DNS: Choose the checkbox to enable the DNS server. -
Page 31: Chapter 6 Wireless Settings
802.11b/g/n mixed modes. SSID: Main Service Set Identifier. It’s the name of your wireless network. Broadcast (SSID): Decide if ZSR9104WE will broadcast its own ESSID or not. BSSID: It is a 48bit identity used to identify a particular BSS (Basic Service Set) within an area. - Page 32 All manuals and user guides at all-guides.com Operating Mode Supports two modes: Mixed Mode: In this mode packets are transmitted with a preamble compatible with the legacy 802.11a/g – the legacy Short Training Field(STF), the legacy Long Training Field(LTF) and the legacy signal field are transmitted so they can be decoded by legacy 802.1a/g devices.
-
Page 33: Wireless Security Settings
All manuals and user guides at all-guides.com Wireless Security Settings a. Mixed WEP WEP (Wired Equivalent Privacy) is an encryption method used to protect your wireless data communications. WEP uses a combination of 64-bit or 128-bit keys to provide access control to your network and encryption security for every data transmission. - Page 34 All manuals and user guides at all-guides.com b. WPA-Personal Wi-Fi Protected Access (WPA) is an advanced security standard. It uses TKIP and AES to change the encryption key frequently. WPA Algorithms: Select one encryption type, AES, TKIP or TKIP&AES. Pass Phrase: Enter the key which must have 8-63 ASCII characters. Key Renewal Interval: Specifies the timer the WPA key must changes.
- Page 35 All manuals and user guides at all-guides.com c. WPA2-Personal The WPA2 is a stronger version of WPA. WPA Algorithms: Select one encryption type, AES, TKIP or TKIP&AES. Pass Phrase: Enter the key which must have 8-63 ASCII characters. Key Renewal Interval: Specifies the timer the WPA key must changes. The change is done automatically between the server and the client.
- Page 36 All manuals and user guides at all-guides.com d. Mixed WPA/WPA2-Personal WPA Algorithms: Select one encryption type, AES, TKIP or TKIP&AES. Pass Phrase: Enter the key which must have 8-63 ASCII characters. Key Renewal Interval: Specifies the timer the WPA key must changes. The change is done automatically between the server and the client.
-
Page 37: Advanced Wireless Settings
2347. TX Power: You can set the output power of wireless radio. Unless you’re using ZSR9104WE in a really big space, you may not have to set output power to 100%. This will enhance security (malicious / unknown users in distance will not be able to reach your ZSR9104WE). -
Page 38: Wps Settings
ZSR9104WE, or click PBC button in the web configuration interface to enable WPS Note: Press WPS button of ZSR9104WE for one second and WPS indicator will blinking for 2 minutes. During the blinking time, you can enable another Router to implement the WPS/PBC negotiation between them. -
Page 39: Wds Settings
WDS Mode: Lazy Mode: You need to configure ZSR9104WE’s BSSID into another device, but don’t need to input another device’s BSSID in ZSR9104WE, and they will connect together automatically. Bridge Mode: You can wirelessly connect two or more wired networks via this mode. -
Page 40: Wireless Access Control
Repeater Mode: You can select the mode to extend the distance between the two WLAN devices. Functioning as a WDS repeater, ZSR9104WE connects to both a client card as an AP and to another AP. In typical repeater applications, APs connecting to other APs equipped with WDS functionality must also support WDS. -
Page 41: Wireless Connection Status
All manuals and user guides at all-guides.com Wireless Connection Status Click Refresh to update the wireless connection information. MAC Address: Shows the connecting PC’s MAC address. Bandwidth: displays the channel bandwidth of the host to be connected. -
Page 42: Chapter 7 Dhcp Server
IP Address Start/End: Enter the range of IP address for DHCP server distribution. Lease Time: choose a lease time (the duration that every computer can keep a specific IP address) of every IP address assigned by ZSR9104WE from dropdown menu. -
Page 43: Dhcp Server List & Binding
All manuals and user guides at all-guides.com DHCP Server List & Binding IP Address: Input the IP address for the computer on the LAN network. MAC Address: Enter the MAC address of the computer you want to assign. And then click Add to add to the list. Hostname: The name of the computer. -
Page 44: Chapter 8 Virtual Server
All manuals and user guides at all-guides.com Chapter 8 Virtual Server Port Range Forwarding This section deals with the port range forwarding mainly. The Port Range Forwarding allows you to set up a range of public services such as web servers, ftp, e-mail and other specialized Internet applications to an assigned IP address on your LAN. -
Page 45: Dmz Settings
All manuals and user guides at all-guides.com DMZ Settings The DMZ(Demilitarized Zone) function is to allow one computer in LAN to be exposed to the Internet for a special-purpose service as Internet gaming or videoconferencing. DMZ Host IP Address: The IP address of the computer you want to expose. -
Page 46: Chapter 9 Traffic Control
All manuals and user guides at all-guides.com Chapter 9 Traffic Control Traffic control is used to limit communication speed in the LAN and WAN. Up to 20 entries can be supported with the capability for at most 254 PCs' speed control, including for IP address range configuration. Traffic Control: Select the checkbox to enable the internal IP bandwidth control. -
Page 47: Chapter 10 Security Settings
All manuals and user guides at all-guides.com Chapter 10 Security Settings Client Filter To benefit your further management to the computers in the LAN, you can control some ports access to Internet by data packet filter function. Client Filtering Settings: Select the checkbox to enable client filter. Access Policy: Select one number from the drop-down menu. -
Page 48: Url Filter
All manuals and user guides at all-guides.com URL Filter If you want to prevent computers in local network from accessing certain website (like pornography, violence, or anything you want to block), you can use this function to stop computers in local network from accessing the site you defined here. -
Page 49: Mac Filter
This function is to protect the internal network from exotic attack such as SYN Flooding attack, Smurf attack, LAND attack, etc. Once detecting the unknown attack, ZSR9104WE will restrict its bandwidth automatically. Prevent Network Attack: Select the checkbox to enable it. -
Page 50: Remote Web Management
Enable: Select the checkbox to enable remote web management. Port: The management port open to outside access. Default value is 8080. Note: If you want to login ZSR9104WE’s Web-based interface via port 8080, you need use the format of WAN IP address: port (ex. http://219.134.32.101: 8080) to implement remote login. -
Page 51: Chapter 11 Routing Settings
Chapter 11 Routing Settings Routing Table The main duty for ZSR9104WE is to look for a best path for every data frame, and transfer this data frame to destination. So, it’s essential for ZSR9104WE to choose the best path. In order to finish this function, many transferring paths... -
Page 52: Chapter 12 System Tools
DDNS (Dynamic Domain Name System) is to assign a fixed host and domain name to a dynamic Internet IP address, which is used to monitor hosting website, FTP server and so on behind ZSR9104WE. If you want to activate this function, please select Enable and a DDNS service provider to sign up. -
Page 53: Backup/Restore
Restore: Click to restore ZSR9104WE’s configurations. Upgrade Browse: Click to browse the path to the upgraded firmware files. Upgrade: Click to start upgrade firmware. IMPORTANT: Do not power off the system during the firmware upgrade to avoid damaging. ZSR9104WE will reboot automatically after the upgrade. -
Page 54: Restore To Factory Default Settings
Restore to Factory Default Settings: Click to restore to default settings. Factory Default Settings: User Name: admin Password: admin IP Address: 192.168.0.1 Subnet Mask: 255.255.255.0 NOTE: After restoring to default settings, please reboot ZSR9104WE so the settings will take effect. Reboot Reboot the router: Click to reboot ZSR9104WE. -
Page 55: Change Password
New Password: Enter a new password. Re-enter to Confirm: Re-enter to confirm the new password. NOTE: It is highly recommended to change the password to secure your network and ZSR9104WE. System Log If the log is over 150 records, it will clear them automatically. -
Page 56: Appendix 1 Product Features & Specifications
All manuals and user guides at all-guides.com Appendix 1: Product Features & Specifications Features: Integrates router, wireless access point, four-port switch and firewall in one Complies with IEEE802.11n, IEEE802.11b and IEEE802.11g standards MIMO technology utilizes reflection signal to increase 8 times transmission distance of original 802.11g standard and reduces the "dead spots"... - Page 57 All manuals and user guides at all-guides.com Specifications: General Features Standards IEEE 802.11n, IEEE 802.11g, IEEE 802.11b Windows 2000, XP, Vista, 7; Linux; Macintash User interface Easy to use user configuration software Transmit distance Indoor up to 100M, Outdoor up to 300M Support multipoint auto roaming and configuration;...
-
Page 58: Appendix 2 Troubleshooting
IP address in the address field? ? ? ? Step 1: check ZSR9104WE if it works well. Once the device is powered on for a few seconds, the POWER indicator on the panel will be turned on. If it is not, please contact us. - Page 59 MAC address and click “Apply” to activate it. Q6. How to share my computer’s source with other users in Internet? If you want Internet users to access the internal server via ZSR9104WE such as e-mail server, Web, FTP, you can configure the “Virtual Server” to come true.
Need help?
Do you have a question about the ZSR9104WE and is the answer not in the manual?
Questions and answers