Advertisement
Table of Contents
- 1 Table of Contents
- 2 Machine Parameters
- 3 Machine Structure Diagram
- 4 Packing List
- 5 Machine Installation
- 6 Operation Screen Introduction
- 7 Auto Leveling
- 8 Model Test
- 9 Resume Printing Description
- 10 Software Installation
- 11 Online Print
- 12 Troubleshooting Guide
- 13 Circuit Wiring
- Download this manual
Advertisement
Table of Contents

Related Manuals for Elegoo NEPTUNE 3


Summary of Contents for Elegoo NEPTUNE 3
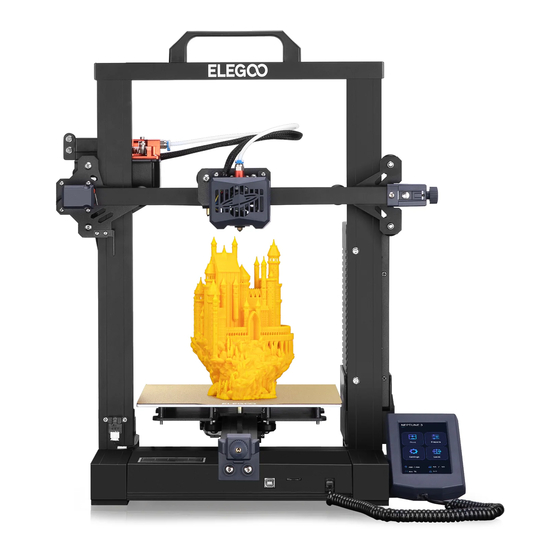
- Page 1 User Manual for NEPTUNE 3 3D Printer Pictures are only for illustration purpose, please take actual product as standard.
- Page 2 For questions or problems not covered in this manual, please contact us at this email address: 3dp@elegoo.com. ELEGOO team is always ready to provide you with quality service. To give you a better experience of our products, you can also gain knowledge of the operation of the equipment in the following ways:...
- Page 3 Cautions 1. Do not place the printer in vibrating or other unstable environments, as the shaking of the machine will affect the print quality. 2. Do not touch the nozzle and heatbed when the printer is working to prevent high-temperature scald and personal injury.
-
Page 4: Table Of Contents
Contents Machine Parameters ---------------------------------------------------- Machine Structure Diagram -------------------------------------------- Packing List ---------------------------------------------------------------- Machine Installation ------------------------------------------------------ Operation Screen Introduction ---------------------------------------- Auto Leveling ------------------------------------------------------------- Model Test ------------------------------------------------------------------ Resume Printing Description ------------------------------------------ Software Installation ----------------------------------------------------- Online Print ---------------------------------------------------------------- Troubleshooting Guide ------------------------------------------------- Circuit wiring --------------------------------------------------------------... -
Page 5: Machine Parameters
Output Format:Gcode Nozzle Diameter:0.4mm Connection Type:TF Card、USB Wire Print Speed:30~180mm/s(60mm/s is recommanded) Power Supply Parameters Temperature Parameters Power Input:100-120V/200-240V Power Output:24V Ambient Enviroment Temperature:5°C~40°C Physical Parameters Maximum Temperature of Nozzle:260°C Maximum Temperature of Hotbed:100°C Machine Dimensions:442*452*530mm Neptune 3 Machine Weight:8.1kg... -
Page 6: Machine Structure Diagram
Machine Structure Diagram Filament tube Filament holder Handle Material breakage detector Sensor PTFE tube X-axis limit adapter kit switch X-axis X-axis belt Nozzle kit Power stepper tensioner supply Z+:Photoele Build ctric limit Power Switch platform switch Z-axis Y-axis limit stepper Y-axis belt switch tensioner... -
Page 7: Packing List
Packing List Fasteners (HM5*45)4pcs (HM4*18)2pcs (HM4*10)2pcs ELEGOO 3D Printer Tools (1.5 / 2.0 / 2.5 / 3.0 / 4.0) -
Page 8: Machine Installation
Machine Installation Before turning on the power supply, be sure to check the voltage mode and adjust the voltage to match the local voltage. If the local voltage is 100V-120V, please adjust the power switch to 115V, otherwise adjust to 230V (default is 230V). The TF card of the machine comes with an installation instruction video. - Page 9 1. Please note that the material rack is pre-installed with screws and nuts. When installing, just loosen the screw until the nuts can move, then install the material rack in the top profile slot and tighten the screws, see the picture. ③...
- Page 10 ⑤ Filament detector switch Z-:port X-axis limit switch X-axis stepper Please adjust the voltage Extruder stepper to match the local voltage before use. Z+:Photoelectric limit switch Z-axis stepper...
- Page 11 Supplymentary Introduction Special Case : The bottom slide block has been adjusted before leaving the factory, but the pulley of the machine may become loose due to the transportation. If the build platform of the machine is shaky and loose, an open spanner can be used to slowly twist the eccentric isolation column under the platform until the slide block slides smoothly and does not shake.
-
Page 12: Operation Screen Introduction
Operation Screen Introduction Moving distance Left and right page keys Set Y=0 Set X=0 Reset to zero Gcode file display Set Z=0 Main Interface Motor unlock Three interfaces: movement, temperature, Print Documents Prepare Interface Extruder Temperature display Language switching Preset temperature Fan control Compensation settings Motor unlock... -
Page 13: Auto Leveling
Auto Leveling When first running the machine, the distance between the platform and the nozzle needs to be calibrated in the leveling mode, which is about the thickness of a piece of A4 paper (0.08-0.1mm). ① When the machine is powered on, select 【Level】 The machine will enter the heating state: the nozzle is heated to 140°C, and the hot bed is 50°C. -
Page 14: Model Test
Model Test Print Head Feeding Check First push the filaments to the bottom of the print head. Click 【Prepare】 - 【Extrudert】, click 【Load】, the temperature of the nozzle will be automatically heated to 200°C. After the nozzle is preheated to 200°C, click the feed to extrude the filaments from the nozzle. Clean the melted filament of the nozzle before printing. -
Page 15: Resume Printing Description
As shown in the picture: ① ③ When fine-tuning, please switch the moving distance to 0.01mm or 0.1mm to prevent the nozzle from extruding the platform excessively or filament hanging in the air. ② Resume Printing Description Power Loss Recovery: If you want to continue printing because of a sudden power outage or accidentally turn off the power of the machine, this function does not need to be set manually. -
Page 16: Software Installation
The software installation steps are as follows: Open the TF card of the machine to select the path \ Software and Software Drivers folder \ ELEGOO Software folder \ Double- click the ELEGOO-Cura application to install it. - Page 17 Instructions for Use Other operation tips: ① Scroll the middle mouse wheel to zoom the viewpoint, and hold down the middle wheel to move the platform position. ② Press and hold the right mouse button to Import model move the mouse to change the viewpoint. ③...
-
Page 18: Online Print
Online Print Please be sure to check the relevant data files in the TF card! l Connect the printer and computer with USB cable, double-click to open the slicing software, select the corresponding model and then click on the monitor, if the interface shows a blank then it proves that the connection is not successful, you need to install the driver. - Page 19 l The installation method of the driver, Mac processes it as follows: Open the random TF card data and select path\software and software driver folder\software driver folder\Mac-USB driver folder\CH34X_MAC folder\double-click CH34x_install_V1. 5.pkg to install. Continue the installation as prompted. (As shown below) ..
- Page 20 After the driver installation is complete, reconnect the USB cable, open the ELEGOO slicing software, and then click on the monitor, if it display the printer model and other information, the computer has been successfully connected. l After importing the model, set the print temperature, layer thickness and other relevant information, and then click on the 【slice】, select the USB online printing.
-
Page 21: Troubleshooting Guide
Troubleshooting Guide A stepper of the X/Y/Z axis is not moving or making a noise when zeroed ① The stepper cable is loose. Please recheck the wiring connection. ② The corresponding limit switch does not trigger properly, please check whether there is any interference in the movement of the corresponding shaft and whether the limit switch wire is loose. -
Page 22: Circuit Wiring
Circuit wiring X axis Y axis Z axis E axis E1 axis stepper stepper stepper stepper stepper Filament detector Model fan X- :X axis limit switch Main board fan/print head fan Y- :Y axis limit switch Z- :Z axis limit switch Heating head interface Z+:Photoelectric limit switch Heatbed thermosensitive... - Page 23 After-sales service registration card 售后服务登记卡 Place of purchase Date of purchase : : 购买地点 购买日期 Printer : : 机器 序列号 Fault description : 故障描述 Contact Phone number 联系人: 电话号码: Address 地址:...
- Page 24 ELEGOO official website: www.elegoo.com...
Need help?
Do you have a question about the NEPTUNE 3 and is the answer not in the manual?
Questions and answers