
Related Manuals for Eneo ISM-62F0028W0A


Summary of Contents for Eneo ISM-62F0028W0A
- Page 1 Quick Installation Guide 1/2.8” Network Board Camera, Day/Night, WDR, H.265, PoE, 12VDC ISM-62F0028W0A ISM-65F0028W0A ISM-68F0028W0A...
-
Page 2: Table Of Contents
Table of content Components ........................5 Overview ........................6 Extension Cable .................................6 Connection ..................................6 Installation monitor ..............................6 Connecting with power supply ..........................7 Connecting to the network ............................7 Quick Network Setup ....................8 Live Screen ...................................9 Further information ..............................10... - Page 3 Safety instructions General safety instructions • Before switching on and operating the system, first read this safety advice and the operating instructions. • Keep the operating instructions in a safe place for later use. • Installation, commissioning and maintenance of the system may only be carried out by authorised individuals and in accordance with the installation instructions - ensuring that all applicable standards and guidelines are followed.
- Page 4 Class A device note This is a Class A device. This device can cause malfunctions in the living area; in such an event, the operator may need to take appropriate measures to compensate for these. WEEE (Waste Electronical & Electronic Equipment) Correct Disposal of This Product (Applicable in the European Union and other European countries with separate collection systems).
-
Page 5: Components
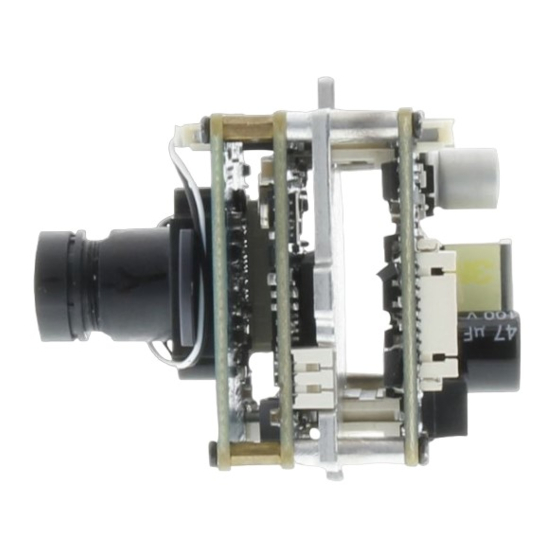
Components This system comes with the following components; • Camera • Quick Guide • RJ45 Waterproof Accessory • Cable Joint Block • Silica Gel Notice: Check your package to make sure that you received the complete system, including all components listed above. Notice: Adapter for DC 12V is not supplied. -
Page 6: Overview
Overview Extension Cable NO Item Description Used to change format, restart the camera, and reset to factory default depending on it’s operating method. - To change analog format : Press and hold for l ess than 5 seconds. Control Button - To restart the camera : Press and hold for more than 5 seconds. -
Page 7: Connecting With Power Supply
Connecting to the network To connect with a PC ina local network If you connect the network camera with a PC in the same network, you can perform mon- itoring and setting process by using the PC’s Web Viewer. 1. Connect the network port on the back panel with a router or hub. 2. -
Page 8: Quick Network Setup
IP addresses. The network camera‘s default IP address is: 192.168.1.10. 5. Right clicking the device name in the eneo Site Manager will bring up the context menu. Use the ‘Open Device Web Site’ option to access the camera. 6. The web viewer login page will open up in your default web browser. -
Page 9: Live Screen
Live Screen NO Name Description MFZ setup Move to the MFZ screen. Manually sets the zoom/focus of the lens. Stream Change If selecting Dual Stream, the streams are shifted in the order of the 1st (the first stream) < 2nd (the second stream). Full Screen Displays the image in full screen. -
Page 10: Further Information
• the product detail pages on the eneo website (www.eneo-security.com), • the eneo download portal (https://datacloud.videor.com/s/eneodownloadpor- tal). In case that previous link is broken, the latest link to the eneo download portal can be found on the respective eneo product page at www.eneo-security.com. - Page 11 Inhaltsverzeichnis Komponenten ......................14 Übersicht ........................15 Verlängerungskabel ..............................15 Verbindung ..................................15 Installationsmonitor ..............................15 Anschließen an die Stromversorgung ......................16 Anschluss an das Netzwerk ........................... 16 Schnelle Netzwerkkonfiguration ................17 Live-Ansicht ..................................18 Weitere Informationen ..............................19...
- Page 12 Sicherheitsanweisungen Sicherheitshinweise allgemein • Bevor Sie das System anschließen und in Betrieb nehmen, lesen Sie zuerst diese Sicherheitshinweise und die Betriebsanleitung. • Bewahren Sie die Betriebsanleitung sorgfältig zur späteren Verwendung auf. • Montage, Inbetriebnahme und Wartung des Systems darf nur durch dafür autorisierte Personen vorgenom- men und entsprechend den Installationsanweisungen - unter Beachtung aller mitgeltenden Normen und Richtlinien - durchgeführt werden.
- Page 13 • Bei abgedunkelter Umgebung und direktem Blick in den IR-Scheinwerfer ist ein Sicherheitsabstand von > 1 m zum Scheinwerfer einzuhalten. • Unsichtbare LED Strahlung nicht direkt mit optischen Instrumenten (z.B. Lupe, Vergrößerungsglas oder Mikroskop) betrachten, da sie eine Augengefährdung verursachen kann, LED Klasse 1M. •...
-
Page 14: Komponenten
Komponenten Das System wird mit den folgenden Komponenten geliefert: • Kamera • Kurze Anleitung • Wasserdichtes RJ45-Zubehör • Kabelverbindungsblock • Kieselgel Hinweis: Prüfen Sie den Packungsinhalt, um sicherzustellen, dass Sie das vollständige System mit allen oben genannten Komponenten erhalten haben. Hinweis: Adapter für 12V DC ist nicht im Lieferumfang enthalten. -
Page 15: Übersicht
Übersicht Verlängerungskabel Nr. Element Beschreibung Dient zum Ändern des Formats, zum Neustart der Kamera und zum Zurücksetzen auf die Werkseinstellungen, je nach Betriebsmodus der Kamera. Steuerungstaste - Um das analoge Format zu ändern: Drücken und halten Sie die Taste nicht länger als 5 Sekunden. - Neustart der Kamera: Halten Sie die Taste für mehr als 5 Sekunden gedrückt. -
Page 16: Anschluss An Das Netzwerk
Anschluss an das Netzwerk So stellen Sie eine Verbindung mit einem PC in einem lokalen Netzwerk her Wenn Sie die Netzwerkkamera mit einem PC im selben Netzwerk verbinden, können Sie die Überwachung und Einstellung mit dem Web Viewer des PCs durchführen. 1. -
Page 17: Schnelle Netzwerkkonfiguration
IP-Adressen zu vermeiden. Die Standard-IP-Adresse der IP-Kamera ist: 192.168.1.10. 5. Klicken Sie mit der rechten Maustaste auf den Gerätenamen im eneo Site Mana- ger, um das Kontextmenü anzuzeigen. Wählen Sie die Option ‘Open Device Web Site’ (Geräte-Webseite öffnen), um auf die Kamera zugreifen. -
Page 18: Live-Ansicht
Live-Ansicht Nr. Name Beschreibung MFZ-Einrichtung Wechseln Sie zum MFZ-Bildschirm. Zum manuellen Einstellen von Zoom/Fokus des Objektivs. Bei der Auswahl von Dual Stream werden die Streams in der Reihenfolge 1 (der erste Stream) < 2 (der zweite Stream ändern Stream) verschoben. Vollbild Zeigt das Bild im Vollbildmodus an. -
Page 19: Weitere Informationen
Bitte halten Sie die Firmware stets aktuell, damit Sie die neuesten Funktionen des Geräts nutzen können. Die aktuellsten Firmware-Versionen finden Sie auf unserer Website unter www.eneo-security.com. Das Benutzerhandbuch und weitere Software-Tools sind auf der eneo Website unter www.eneo-security.com verfügbar. Informationen zu kompatiblen Video Management Software-Lösungen finden Sie in der Kategorie Software unter www.eneo-security.com. - Page 20 VIDEOR E. Hartig GmbH Exclusive distribution through specialised trade channels only. VIDEOR E. Hartig GmbH Carl-Zeiss-Straße 8 63322 Rödermark/Germany Tel. +49 (0) 6074 / 888-0 Technical changes reserved Fax +49 (0) 6074 / 888-100 www.videor.com...
Need help?
Do you have a question about the ISM-62F0028W0A and is the answer not in the manual?
Questions and answers