Advertisement
Quick Links
Advertisement

Related Manuals for Omega OUM52X


Summary of Contents for Omega OUM52X
- Page 1 Instruction Manual OMEGA 52CM UNDERMOUNT RANGEHOOD STAINLESS STEEL OUM52X...
- Page 2 Thank you for purchasing an Omega appliance Tailored for the modern aesthetic and lifestyle of busy people, your new Omega Appliance will make a welcome addition to the family. Omega caters to style-savvy customers who look for balance between stunning form and clever function.
-
Page 3: Table Of Contents
The manufacturer will not be responsible for any damage to property or to persons caused by incorrect installation or improper use of the appliance. Due to continual product development, Omega reserves the right to alter specifications and appearances without notice. -
Page 4: Important Safety Warnings
Important Safety Warnings IMPORTANT: Read the assembly instruction section and safety precautions of this booklet carefully before removing the contents of this carton. In certain circumstances electrical appliances may be a safety hazard. This appliance is not intended for use by persons (including children) with reduced physical, sensory or mental capabilities, or lack of experience or knowledge, unless they have been given supervision or instruction concerning the use of the appliance by a person responsible for their safety. -
Page 5: Appliance Details
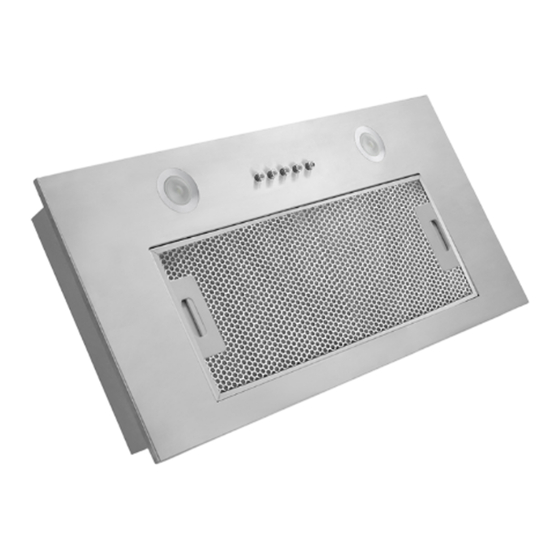
Appliance Details OUM52X Rangehood Rated Voltage 220 to 240V ~ 50Hz Motor Input Power 265 W Lamp (LED) 2 x 1.5 W Rated Input Power 268 W Max Airflow 660.5 m Outlet Diameter 150 mm Power Connection 10 Amp Plug... -
Page 6: Installation Instructions
Installation Instructions WARNING: Failure to install the screws or fixing device in accordance with these instructions may result in electrical hazards. INSTALLATION 1. Before installation, turn the unit off and unplug it from the outlet. 2. The cooker hood should be placed at a distance of 60~75cm above the cooking surface for best effect. - Page 7 Installation Instructions 4. Put the hood into the cabinet, tighten up the screws by screwdriver, and make sure the hood was fixed. See below picture. 5. Install the outlet on the hood. Fix the expansion pipe on the outlet and tie it tight with cable tie, then lead it to outdoor.
-
Page 8: Operating Instructions
Operating Instructions Electronic button There are five buttons: (Low), (Mid), (High), (Lamp), (Power).See picture above. 1. After connecting to power, indicator light will lit on, all the output close and the hood will enter standby mode. The indicator light will be off automatically after reminding if no operation. 2. -
Page 9: Maintenance And Cleaning
Maintenance and Cleaning Safety Precaution • Before cleaning your rangehood or performing any maintenance, please ensure that the range hood is turned off at the power point. • External surfaces are susceptible to scratches and abrasions, so please follow the cleaning instructions to ensure the best possible result is achieved without damage. - Page 10 Maintenance and Cleaning BULB REPLACEMENT WARNING: The bulb must be replaced by the manufacturer, its service agent or similarly qualified persons. Changing the lights: Use a screwdriver to prize out the LED light. Then slightly pull the light connecting wire out and •...
-
Page 11: Troubleshooting
Troubleshooting Fault Possible Cause Solution Fan switch turned off Select a fan switch position. Light on, but motor does not Fan switch failed Contact Service Department. work Motor failed Contact Service Department. House fuses blown Reset/Replace fuses. Light does not work, motor Refit cord to power outlet.
Need help?
Do you have a question about the OUM52X and is the answer not in the manual?
Questions and answers