
Related Manuals for Omega ORC97G


Summary of Contents for Omega ORC97G
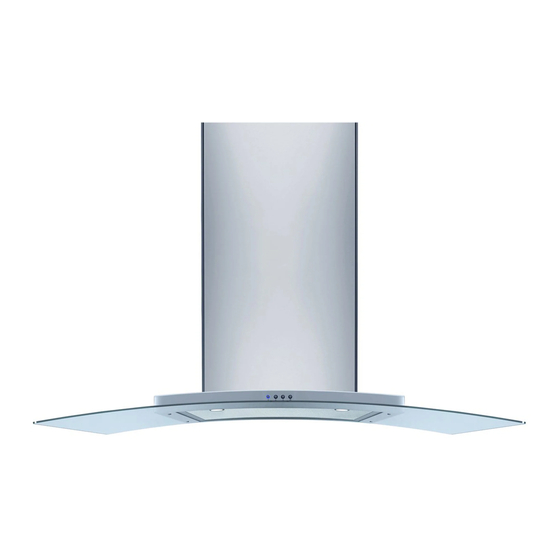
- Page 1 Instructions for the Use and Care and Installation of ORC97G Glass Canopy Rangehoods...
-
Page 2: Table Of Contents
It is important that you retain these instructions, proof of purchase as well as other important documents about this product for future reference. Due to continual product development, Omega reserves the right to alter specifications or appearances without notice. Dispose of packaging responsibly – recycle where facilities are... -
Page 3: Notice
(1) NOTICE 1. Thank you for choosing our cooker hood. Please read the instruction manual carefully before use. 2. The installation work must be undertaken by a qualified electrician and competent installer. 3. The manufacturer disclaims all liability for any damage or injury caused as a result of not following instructions for installation contained in the following text. -
Page 4: Features
(2) FEATURES The cooker hood uses high quality materials, and is made with a streamlined design. 2. Equipped with a high power electric motor and centrifugal fan, it produces strong suction with low noise, and features a non stick grease filter which is easy to clean. 3. -
Page 5: Installation
(3) INSTALLATION 1)The cooker hood should be placed at a distance of 65-75cm (26-30inch) from the cooking surface for the best effect. See Pic 1. 2)Install the hook on a suitable place once the installation height is fixed, and keep it in line. The fixed position of the inside chimney bracket is the place of chimney. -
Page 6: Notice Of Installation
(4) NOTICE OF INSTALLATION 1. Before installation, please ensure the area is clean, to avoid suction of the remaining bits of broken wood and dust. 2. The canopy hood cannot share the same air ventilation ducting as other appliances, such as gas and electric heaters. -
Page 7: Safety Warning
(5) SAFETY WARNING Young children should be supervised to ensure that they do not play with the appliance. The appliance is not intended for use by persons (including children) with reduced physical, sensory or mental capabilities, or lack of experience and knowledge, unless they have been given supervised or instruction concerning use of the appliance by a responsible person for their safely. -
Page 8: Use Instructions
(6) USE INSTRUCTIONS The re-usable aluminium grease filters supplied with this rangehood should be cleaned every month or so to avoid grease build-up. To remove the grease filter, release the locking mechanism at the front of the filter, and lower the filter slightly to unhook it at the back. Whilst the filter is removed, clean off any residual grease from the housing to avoid fire risk. - Page 9 SPEED ADJUSTMENT - See pictures 1. Push the “Low” button, the indicating light 1 is on, and the motor runs at low speed. Push it again and the motor will stop. 2. Push the “Mid” button, the indicating light 2 is on, and the motor runs at mid speed.
-
Page 10: Maintenance
(7) MAINTENANCE 7.1 Cleaning the grease filter mesh The filter mesh is made of high-density stainless steel. Please do not use corrosive detergent on it. Keeping this filter clean will keep the appliance running correctly. Please strictly follow the guidelines below. -
Page 11: Troubleshooting
G. If the supply cord is damaged, it must be replaced by the manufacturer or its service agent or a similarly qualified person in order to avoid a hazard. (8) TROUBLESHOOTING Fault Cause Solution The fan is blocked Remove the source of the blockage Light on, but motor The capacitor damaged... -
Page 12: Specification
The hanging screw not Tighten the hanging tight enough screw and make it horizontal (9) SPECIFICATION Model ORC97G Rated Input 220V-240V, 50Hz Rated Power 305W Lighting Power 20W X 2 (halogen capsule lamp) Motor Power 265W Air tube diameter 150MM...
Need help?
Do you have a question about the ORC97G and is the answer not in the manual?
Questions and answers