
Related Manuals for Crestron PTZ Series


Summary of Contents for Crestron PTZ Series
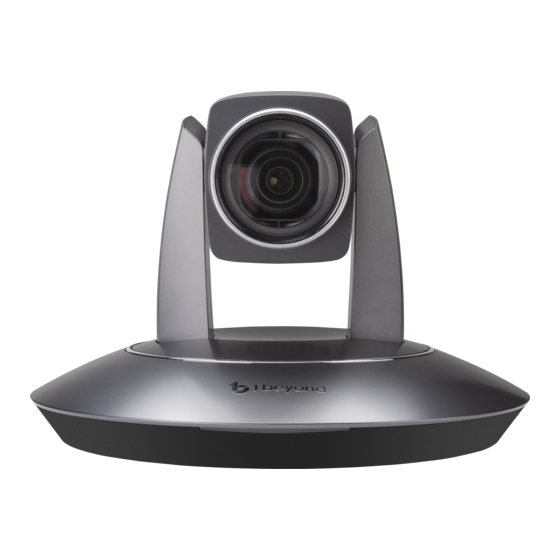
- Page 1 IV-CAMPTZ-12-N-W-1B, IV-CAMPTZ-12- N-SLVR-1B, IV-CAMPTZ-12-W-1B, and IV- CAMPTZ-12-SLVR-1B 1 Beyond PTZ Series Product Manual Crestron Electronics, Inc.
- Page 2 Corporation in the United States and/or other countries. Other trademarks, registered trademarks, and trade names may be used in this document to refer to either the entities claiming the marks and names or their products. Crestron disclaims any proprietary interest in the marks and names of others. Crestron is not responsible for errors in typography or photography.
-
Page 3: Table Of Contents
Contents Overview Features High Quality Video Manual Control Options Quiet, Fast Switching Between Presets Multicamera Capability with Automate Systems Mounting Options IV-CAMPTZ-12-N-W-1B and IV-CAMPTZ-12-N-SLVR-1B Exclusive Feature Physical Description Specifications Dimension Drawings Installation In the Box Mounting Mount to a Table Mount to a Shelf Mount to a Ceiling Plate Wiring... - Page 4 CALL, SET, CLEAR (Preset Buttons) ENTER 1B-Cam-Manager Monitor RTSP Streams Reserved Presets VISCA Commands ACK / Completion Messages Error Messages Commands Inquiry Commands Troubleshooting Resources Crestron Support and Training Product Certificates Related Documentation iv • Contents Product Manual — Doc. 9320A...
- Page 5 v • Contents Product Manual — Doc. 9320A...
-
Page 6: Overview
Overview 1 Beyond intelligent video technology brings an essential video conferencing solution into the Crestron ecosystem. Enabling the best video experience for both in-room and remote attendees is vital to hybrid work and ensuring productive and effective collaboration. Technologies like speaker tracking, group framing, and presenter tracking ensure that every person can be seen, no matter where they are, and provide the best view for the remote attendees. -
Page 7: Features
3G-SDI or HDMI ports. Manual Control Options Use VISCA over IP to control the camera with a Crestron® control system. 1B Cam Manager Software is included for easy configuration from a computer on the network. Quiet, Fast Switching Between Presets Up to 256 pan, tilt, and zoom combination presets can be configured. -
Page 8: Iv-Camptz-12-N-W-1B And Iv-Camptz-12-N-Slvr-1B Exclusive Feature
IV-CAMPTZ-12-N-W-1B and IV-CAMPTZ-12-N-SLVR- 1B Exclusive Feature NDI|HX for High Quality Network Video NDI|HX supports efficient and flexible IP configuration with other networked NDI-enabled devices. NDI|HX allows for easy installation and scalability with a single network pull. Product Manual — Doc. IV-CAMPTZ-12-N-W-1B, IV-CAMPTZ-12-N-SLVR-1B, IV-CAMPTZ-12-W-1B, and IV-CAMPTZ- 9320A 12-SLVR-1B •... -
Page 9: Physical Description
Physical Description The PTZ camera provides the following connectors and indicators. Front View Rear View 4 • IV-CAMPTZ-12-N-W-1B, IV-CAMPTZ-12-N-SLVR-1B, IV-CAMPTZ-12-W-1B, and IV- Product Manual — Doc. CAMPTZ-12-SLVR-1B 9320A... - Page 10 Bottom View Description PTZ Camera Power Indicator Remote Control Indicator 1 Gbps RJ-45 Ethernet port USB Port for future use HDMI Output supports uncompressed video output at up to 1080p60 TF (MicroSD) Card Slot CAUTION: For the NDI|HX models, do not remove the MicroSD card. Analog Audio In/Out used to feeds audio signal into the network stream 3G-SDI Output supports uncompressed video output at up to 1080p60 RS-232 / IR Extender Input...
-
Page 11: Specifications
Specifications Product specifications for the PTZ series cameras. Optics and Processing Image Sensor 1/2.8 in. Sony Exmor CMOS, 2.14MP Focal Lens & Iris f=3.9-46.8 mm, F1.6 - F2.8 Field of View 72.5° - 6.3° Focus System Auto, Manual, PTZ Trigger Minimum Illumination 0.5 Lux (30FPS) - Page 12 Power Power 12VDC, <30 W, PoE+ PoE+ Rating 25.5 W Environmental Temperature 32° to 104°F (0° to 40°C) Humidity 10% to 95% RH (non-condensing) Construction Mounting 1/4 in. threaded mount hole, compatible with Wall Mount and J-Mount ceiling bracket ≥50dB Dimensions Dimensions 8.9 in.
-
Page 13: Dimension Drawings
Dimension Drawings 8 • IV-CAMPTZ-12-N-W-1B, IV-CAMPTZ-12-N-SLVR-1B, IV-CAMPTZ-12-W-1B, and IV- Product Manual — Doc. CAMPTZ-12-SLVR-1B 9320A... - Page 14 Product Manual — Doc. IV-CAMPTZ-12-N-W-1B, IV-CAMPTZ-12-N-SLVR-1B, IV-CAMPTZ-12-W-1B, and IV-CAMPTZ- 9320A 12-SLVR-1B • 9...
-
Page 15: Installation
95%RH. Do not remove any screws from the camera. There are no user-serviceable parts inside. Contact Crestron's True Blue Support Team if the camera is damaged or malfunctioning. Do not aim the camera lens at the sun or extremely bright lights. Doing so can cause damage to the image sensor. -
Page 16: In The Box
In the Box Qty. Description 1 Beyond PTZ Intelligent Camera Additional Items Power Supply IR remote control Serial Control Breakout IVA-WMT-SHELF-1B Mounting Ensure there is enough space for both the camera and the cables you need to connect to it before mounting the camera. Mount to a Table Place the camera on a flat and level surface. -
Page 17: Mount To A Shelf
Mount to a Shelf Install the camera using the included shelf mount to ensure optimum stability. For the best possibleperformance, observe the following mounting requirements. Center the camera horizontally, facing the meeting participants. Mount the camera at a height between 4 ft (1 m) and 6 ft (2 m). If the camera is mounted lower than 4 ft (1 m) or higher than 6 ft (2 m) facial detection and shot quality may be affected. - Page 18 To mount the camera: 1. Following to diameter and position of the four installation holes on the bracket, drill four holes on the wall. 2. Use the included screws to attach the bracket to the wall. 3. Use a tripod-style screws to affix the camera to the bracket. Product Manual —...
-
Page 19: Mount To A Ceiling Plate
Mount to a Ceiling Plate Use the 1 Beyond Ceiling Plate (sold separately) to suspend the camera from the ceiling to achieve optimum distance from the presentation area. To mount the camera: 1. Using the following diagram, position the 3 installation holes on the plate and drill 3 holes in the ceiling. - Page 20 5. Fix the two plates together using the M3x8 screws (not included). Product Manual — Doc. IV-CAMPTZ-12-N-W-1B, IV-CAMPTZ-12-N-SLVR-1B, IV-CAMPTZ-12-W-1B, and IV-CAMPTZ- 9320A 12-SLVR-1B • 15...
-
Page 21: Wiring
PoE+ compatibility. To power the camera from your network switch, make sure that it is a PoE+ certified switch that can supply 30 W of power for each camera to be connected. Alternatively, a PoE+ injector can be used to inject power between the switch and camera. Consult Crestron's True Blue Support Team for supported models. -
Page 22: Configuration
Configuration This section provides the following information: IR Remote Control on the next page 1B-Cam-Manager on page 22 VISCA Commands on page 29 Product Manual — Doc. IV-CAMPTZ-12-N-W-1B, IV-CAMPTZ-12-N-SLVR-1B, IV-CAMPTZ-12-W-1B, and IV-CAMPTZ- 9320A 12-SLVR-1B • 17... -
Page 23: Ir Remote Control
IR Remote Control Use the IR remote to control the camera when autoframing is turned off. Home Press to move the camera back to the home position where pan, tilt, and zoom are at 0. Camera Selection Select one of four PTZ cameras to control. The selected camera number lights when pressing any button. -
Page 24: Focus
FOCUS Press to switch to Auto Focus. Press to switch to Manual Focus. Press to focus close. Press to focus far. Press to engage Auto Focus. Triggers Auto Focus until a preset is called. Auto Focus can also be triggered by activating Zoom. IRIS Press to reset the iris to default. -
Page 25: C (Cancel)
C (Cancel) Press to cancel a number input or to return to the previous OSD menu POWER Press to put the camera into or out of standby mode. F1-F4 (Function Buttons) F1, F2, F3 and F4 reserved for future use. PATTERN Activates pattern 1 and/or 2. -
Page 26: Direction Buttons
Press to confirm the menu selection. Direction Buttons Press to control pan or tilt operation or navigate the OSD menu. CALL, SET, CLEAR (Preset Buttons) Press CALL, SET, or CLEAR following a number input to call, store, or erase a preset. Examples: 95 + CALL calls preset 95. -
Page 27: 1B-Cam-Manager
1B-Cam-Manager The 1 Beyond Camera Manager software is the central hub for configuring, monitoring, and controlling 1 Beyond IP cameras. It allows monitoring of up to 4 video streams simultaneously and lets you configure the latest 1 Beyond cameras. For details on how to use the software, refer to the 1B Cam Manager Product Manual. - Page 28 Onscreen (OSD) Menu All 1 Beyond cameras feature an integrated on-screen menu which can be accessed by pressing Menu in the PTZ controller section of 1 Beyond Camera Manager. The menu then displays overlaid on the camera’s / Main View video output. Here you can adjust various settings to tailor the camera’s performance to the set up. Navigate the menu using the directional buttons in the software.
- Page 29 EXPOSURE MODE FULL AUTO Automatically adjust exposure. MANUAL Manually adjust exposure. SHUTTER PRI Shutter priority mode. IRIS PRI Iris priority mode. BRIGHT PRI Brightness priority mode. EXP COMP ON/OFF Exposure compensation on / off. LEVEL -7 - +7 Adjust level of exposure compensation. ON/OFF Turn Back Light Compensation on / off.
- Page 30 SYSTEM ADDRESS 1 - 7 Choose cam address for serial comm. PROTOCOL VISCA Choose protocol for serial communication. PELCO-D PELCO-P BAUDRATE 2400 - Set baud rate for serial port. 34800 IR ADDRESS 1 - 4 Set cam address for IR remote control. VIDEO FORMAT 720p50 - Change video resolution &...
- Page 31 Exposure Settings The EXPOSURE menu is used to adjust image brightness and the properties of the camera’s automatic exposure adjustment features. In FULL AUTO, the camera automatically adjusts gain (ISO), iris (aperture), shutter speed, and exposure compensation to maintain image brightness. Exposure settings can also be tailored to the needs of your venue using a variety of different parameter priority or manual modes.
-
Page 32: Reserved Presets
setting, pressing the OK button on the remote control toggles between a faster and slower Pan/Tilt speed. High speed: 15° ~ 50° / sec (max. zoom ~ min. zoom) Low speed: 4° ~ 11° / sec (max. zoom ~ min. zoom) PAN/TILT LIMIT: Use this setting to define a custom boundary for the camera’s pan / tilt range adjustable in 1°... - Page 33 Preset Number Function Clear ALL User Presets Reboot Camera 1920 x 1080p50 1920 x 1080p25 1920 x 1080i50 1280 x 720p50 1920 x 1080p60 1920 x 1080p30 1920 x 1080i60 1280 x 720p60 28 • IV-CAMPTZ-12-N-W-1B, IV-CAMPTZ-12-N-SLVR-1B, IV-CAMPTZ-12-W-1B, and IV- Product Manual —...
-
Page 34: Visca Commands
VISCA Commands 1 Beyond PTZ cameras can be controlled using the VISCA protocol through either a serial (RS-232 / RS-485) or IP connection. By default, the port for IP control is set to 5500. For serial communication, make sure the baud rate of the controller is set to 9600 bps. Below is a comprehensive list of VISCA commands that can be used to control the cameras. - Page 35 Command Set Command Command Packet Comments IF_Clear Broadcast 88 01 00 01 FF I/F Clear Command 8x 2p FF p: Socket No. (=1or2) Cancel CAM_Power 8x 01 04 00 02 FF Power On/Off 8x 01 04 00 03 FF CAM_Zoom Stop 8x 01 04 07 00 FF Tele(Standard)
- Page 36 Command Set Command Command Packet Comments CAM_RGain Rest 8x 01 04 03 00 FF Manual Control of R Gain 8x 01 04 03 02 FF Down 8x 01 04 03 03 FF Direct 8x 01 04 43 00 00 0p 0q p,q: R Gain CAM_BGain Rest...
- Page 37 Command Set Command Command Packet Comments CAM_Bright Reset 8x 01 04 0D 00 FF Bright Setting 8x 01 04 0D 02 FF Down 8x 01 04 0D 03 FF Direct 8x 01 04 4D 00 00 0p 0q p,q: Bright Position CAM_ExpComp 8x 01 04 3E 02 FF Exposure Compensation...
-
Page 38: Inquiry Commands
Command Set Command Command Packet Comments Pan‐tiltDrive 8x 01 06 01 VV WW 03 01 VV: Pan speed 0 x01 (low speed) to 0 x18 (high speed) Down 8x 01 06 01 VV WW 03 02 Left 8x 01 06 01 VV WW 01 03 Right 8x 01 06 01 VV WW 02 03 WW: Tilt Speed 0 x 01 (low... - Page 39 Command Inquiry Command Inquiry Packet Comments Packet CAM_ZoomPosInq 8x 09 04 47 y0 50 0p 0q 0r 0s p,q,r,s: Zoom Position CAM_FocusModeInq 8x 09 04 38 y0 50 02 FF Auto Focus y0 50 03 FF Manual Focus CAM_FocusPosInq 8x 09 04 48 y0 50 0p 0q 0r 0s p,q,r,s: Focus Position CAM_WBModeInq...
- Page 40 Command Inquiry Command Inquiry Packet Comments Packet CAM_ApertureInq 8x 09 04 42 y0 50 00 00 0p p,q: Aperture Gain 0q FF CAM_ 8x 09 04 63 y0 50 00 FF PictureEffectMode Inq y0 50 02 FF Neg.Art y0 50 04 FF B&W CAM_MemoryInq 8x 09 04 3F...
- Page 41 Command Inquiry Command Inquiry Packet Comments Packet Pan‐tiltPosInq 8x 09 06 12 FF y0 50 0w 0w 0w wwww = Pan Position zzzz = Tilt Position 0z 0z 0z 0z FF Pan‐tiltModeInq 8x 09 06 10 y0 50 pq rs FF p,q,r,s: Pan/Tilt Status Zoom Ratio / Position (CAM_Zoom) (CAM_Zoom Direct –...
- Page 42 Exposure Comp (CAM_ExpComp) (CAM_ExpComp Direct – p,q ExpComp Position) 0000 1851 22BE 28F6 2D45 3086 3320 3549 371E 38B3 3A12 3B42 3C47 3D25 4000 Product Manual — Doc. IV-CAMPTZ-12-N-W-1B, IV-CAMPTZ-12-N-SLVR-1B, IV-CAMPTZ-12-W-1B, and IV-CAMPTZ- 9320A 12-SLVR-1B • 37...
-
Page 43: Troubleshooting
Troubleshooting The following table provides troubleshooting information. If further assistance is required, contact Crestron's True Blue Support Team. PROBLEM POSSIBLE CAUSES CORRECTIVE ACTIONS No movement or video signal Power supply failure Check power supply output using a when powered on multimeter. - Page 44 PROBLEM POSSIBLE CAUSES CORRECTIVE ACTIONS Video loss during Camera is powered Check output voltage of power supply pan/tilt/zoom insufficiently and reconnect. Video cable is not Replace with a working video cable or connected properly double check the stability of your existing connection.
-
Page 45: Resources
Resources The following resources are provided for the PTZ camera. NOTE: You may need to provide your Crestron.com web account credentials when prompted to access some of the following resources. Crestron Support and Training Crestron True Blue Support Crestron Resource Library Crestron Online Help (OLH) support.crestron.com/app/answers/detail/a_id/1001561... - Page 46 This page is intentionally left blank. Product Manual — Doc. IV-CAMPTZ-12-N-W-1B, IV-CAMPTZ-12-N-SLVR-1B, IV-CAMPTZ-12-W-1B, and IV-CAMPTZ- 9320A 12-SLVR-1B • 41...
- Page 47 Product Manual — Doc. 9320A Crestron Electronics, Inc. 15 Volvo Drive, Rockleigh, NJ 07647 06/16/22 Tel: 888.CRESTRON Specifications subject to Fax: 201.767.7656 change without notice. www.crestron.com...
Need help?
Do you have a question about the PTZ Series and is the answer not in the manual?
Questions and answers