
Subscribe to Our Youtube Channel
Related Manuals for Crestron 1 Beyond Hawk IV-CAMHK-12-SLVR-1B


Summary of Contents for Crestron 1 Beyond Hawk IV-CAMHK-12-SLVR-1B
- Page 1 IV-CAMHK-12-SLVR-1B 1 Beyond Hawk™ Intelligent Dual-Camera Tracking Solution, 12x Optical Zoom Product Manual Crestron Electronics, Inc.
- Page 2 Other trademarks, registered trademarks, and trade names may be used in this document to refer to either the entities claiming the marks and names or their products. Crestron disclaims any proprietary interest in the marks and names of others. Crestron is not responsible for errors in typography or photography.
-
Page 3: Table Of Contents
Contents Overview Features Participant Tracking with Production-Style Switching Combine with Your Preferred Microphone and Speaker High Quality Video Conferencing Compatibility Quiet, Fast Switching Between Presets Manual Control Options Physical Description Specifications Installation In the Box Mounting Positioning Wiring Network Connection Video Output Reference Audio Configuration... - Page 4 Monitor RTSP Streams Automatic Side-by-Side Serial Wiring Reserved Presets VISCA Commands Start/Stop Tracking ACK / Completion Messages Error Messages Commands Inquiry Commands Troubleshooting Resources Crestron Support and Training Product Certificates Related Documentation iv • Contents Product Manual — Doc. 9311A...
- Page 5 v • Contents Product Manual — Doc. 9311A...
-
Page 6: Overview
Overview 1 Beyond intelligent video technology brings an essential video conferencing solution into the Crestron® ecosystem. Enabling the best video experience for both in-room and remote attendees is vital to hybrid work and ensuring productive and effective collaboration. Technologies like speaker tracking, group framing, and presenter tracking ensure that every person can be seen, no matter where they are, and provide the best view for the remote attendees. -
Page 7: Features
Features Refer to the following sections for more information on the features provided by the Hawk IV-CAMHK-12-SLVR-1B camera. Key features include: Automatically tracks, frames, and switches between participants using voice and facial detection Clean switching with broadcast-style cuts Side-by-side dialog mode captures multiple participants in conversation Intended for spaces up to 25 ft from the participants Smooth tracking and quiet operation High quality video supporting resolutions up to 1080p60... -
Page 8: Quiet, Fast Switching Between Presets
A quiet, fast motor (120°/s pan speed) sets camera angles quickly. Manual Control Options Use VISCA over IP to control the camera with a Crestron® control system. 1B Cam Manager Software is included for easy configuration from a computer on the network. -
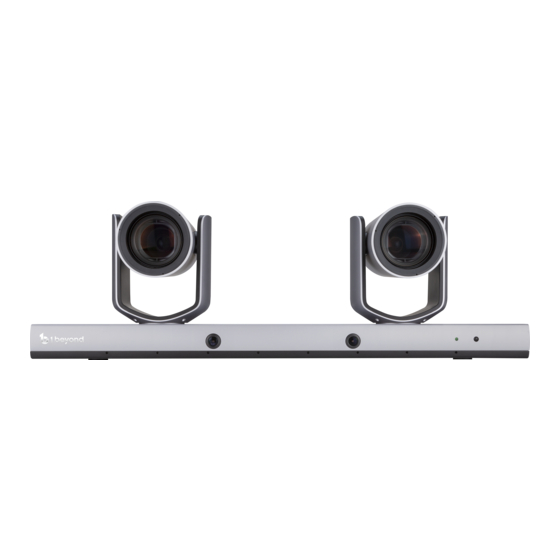
Page 9: Physical Description
Physical Description The camera provides the following connectors and indicators. Front Rear Name Description Dip Switches Override the Onscreen Menu (OSD) and force resolution settings. Use the Dip switches only when absolutely necessary Ethernet Port Connects the camera to the network. A network connection is required for initial configuration but not for day-to-day operation. - Page 10 Name Description Reference Audio Feeds the echo cancellation signal into the camera. This is required for conferencing operation. Refer to Echo Cancellation on page 24. Audio Input Feeds audio into RTSP stream. USB Port For future use. HDMI Output Uncompressed video output at up to 1080p60. 3G-SDI Output Uncompressed video output at up to 1080p60.
-
Page 11: Specifications
Specifications Product specifications for the Hawk IV-CAMHK-12-SLVR-1B camera. Optics and Processing Image Sensor Tracking Cameras: 1/2.8 in. Sony Exmor CMOS, 2.14MP; Wide-Angle Camera: 1/2.8 in. CMOS, 2.14MP Focal Length & f=3.9-46.8 mm, F1.6 - F2.8 Iris-Tracking Cameras Field of View 72.5°... - Page 12 Audio Input 2x Line In (one with echo cancellation), 1x Line Out Power Power 12VDC, <50 W Environmental Temperature 32° to 104°F (0° to 40°C) Construction Mounting 3x 1/4 in. threaded mount hole for 90° Wall Shelf Mount; Wall shelf mount included Recommended Height: 4-6 in., Distance: 3-28 ft Mounting...
-
Page 13: Installation
95%RH. Do not remove any screws from the camera. There are no user-serviceable parts inside. Contact Crestron's True Blue Support Team if the camera is damaged or malfunctioning. Do not aim the camera lens at the sun or extremely bright lights. Doing so can cause damage to the image sensor. - Page 14 Qty. Description 1 Beyond wall mount shelf, IVA-WMT-SHELF-HK-1B Mounting screws Drywall anchors, plastic Tripod-style screws, 1/4-20 UNC (ISO 1222:2010) Product Manual — Doc. 9311A IV-CAMHK-12-SLVR-1B • 14...
-
Page 15: Mounting
Mounting Install the camera using the included 2-point shelf mount to ensure optimum stability. Since both PTZs are moving frequently, a mount with a center-only connection to the camera can cause undesirable shaking. For the best possible tracking performance, observe the following mounting requirements. Center the camera horizontally, facing the meeting participants. -
Page 16: Positioning
Positioning The camera is able to detect faces at a distance of up to 28 ft (9 m). In rooms where people are further away from the camera, satisfactory operation cannot be guaranteed. Product Manual — Doc. 9311A IV-CAMHK-12-SLVR-1B • 16... -
Page 17: Wiring
Wiring Connect the camera to power using the included 12VDC power supply. If cabling needs to be extended to reach the camera, utilize a longer IEC power cord Network Connection The camera must be connected to a network for initial configuration. Once configured, the camera does not need be connected to a network. -
Page 18: Configuration
Configuration A one-time configuration is required to tailor the tracking parameters to your environment. Once configured, the camera will work autonomously, and the software will not be required for operation. This section provides the following information: • IR Remote Control • ... -
Page 19: Ir Remote Control
IR Remote Control Use the IR remote to control the camera when autoframing is turned off. Home Press to move the camera back to the home position where pan, tilt, and zoom are at 0. 19 • IV-CAMHK-12-SLVR-1B Product Manual — Doc. 9311A... -
Page 20: Camera Selection
Camera Selection Select one of up to four cameras (the Hawk and two additional PTZ cameras (not included)) to control. The selected camera number lights when pressing any button. Camera 1 is assigned to the left PTZ camera and Camera 2 assigned to the right PTZ camera. FOCUS Press to switch to Auto Focus. -
Page 21: Number Buttons)
0-9 (Number Buttons) Input numbers for calling /storing presets. C (Cancel) Press to cancel a number input or to return to the previous OSD menu POWER Press to put the camera into or out of standby mode. F1-F4 (Function Buttons) F1 enables Tracking. -
Page 22: Blc
Press to activate/deactivate Backlight Compensation, which helps to properly expose subjects in front of a bright projection screen or window. ZOOM Press to zoom in. Press to zoom out. Return Press to return to the previous page of the OSD menu. Press to confirm the menu selection. -
Page 23: Call, Set, Clear (Preset Buttons)
CALL, SET, CLEAR (Preset Buttons) Press CALL, SET, or CLEAR following a number input to call, store, or erase a preset. Examples: 95 + CALL calls preset 95. 75 + SET stores the current camera position as preset 75. 15 + CLEAR will delete preset 15. ENTER Press to confirm the menu selection. -
Page 24: Echo Cancellation
Echo Cancellation The camera utilizes audio-locating technology to determine who is speaking in the room. Echo cancellation will need to be set up for the camera to be able to distinguish the audio between remote meeting participants and the rest of the people in the room. By feeding the audio output of the conferencing codec into the Ref. Audio input on the camera, the camera automatically performs echo cancellation. -
Page 25: Setup Using Vb-Audio Voicemeeter Software
3. Navigate to the recording tab, scroll down to locate the Stereo Mix device, right-click and click Enable. If it is not visible, right-click and select Show Disabled Devices. 4. Right-click the device again, click on Properties, and navigate to the Listen Tab. 5. -
Page 26: Routing From Audio Hardware
1. Install and open Voicemeeter. Voicemeeter can be downloaded at vb-audio.com/Voicemeeter/ 2. Locate the A1 and A2 drop-down menus. A1: Select the conferencing audio device A2: Select the headphone/line output of the computer. 3. In the Windows sound control panel, Click on Voicemeeter Input and Set Default to set the default system audio device. -
Page 27: Configuration Via The 1 Beyond Camera Manager
Configuration via the 1 Beyond Camera Manager The 1 Beyond Camera Manager software is the central hub for configuring, monitoring, and controlling 1 Beyond IP cameras. It allows monitoring of up to four video streams simultaneously and lets you configure the latest 1 Beyond cameras. Add to Camera List Once 1 Beyond Camera Manager is installed on the host computer and the camera is connected to the network or directly via Ethernet, launch the software to start configuring the camera. -
Page 28: Access Video Feeds
2. To change the camera’s network settings to match your network’s IP scheme, click Modify netinfo which will bring up the network settings panel. 3. Under Network information, confirm that the ConnType (Connection Type) is correct for how the camera is connected. It can be set to either Static IP or DHCP. By default, the camera ships with the static IP address 192.168.18.77 and a subnet mask of 255.255.255.0 . -
Page 29: Blocking Zones
Close Up (2) - Right PTZ Panorama (2) - Switched Output Up to four streams can be displayed at the same time. Blocking Zones To enter the tracking preferences, select the panorama camera feed and click on the feed in the multi-view area. - Page 30 To set a Blocking Zone, click one of the eight Blocking Zone check boxes. The cursor moves to the video feed. Similarly to drawing a Tracking Zone (refer to Set the Tracking Zone on page 33), draw the desired blocking zone by clicking and dragging the cursor. Product Manual —...
-
Page 31: Basic Settings
Up to eight blocking zones can be set up to exclude any areas of the room that might contain faces such as displays, windows, or reflective surfaces. NOTE: Never allow a blocking zone to cover a sitting or standing person because the camera will not be able to use facial detection to frame them. - Page 32 With tracking active, detected faces show as green rectangles, a bounding rectangle is drawn around all faces in the room as a red rectangle showing who the camera will frame if no one in the room is talking. The location of audio in the room is shown as a vertical blue bar. Observe the tracking performance: The faces of everyone sitting in the room is highlighted with a green rectangle.
-
Page 33: Advanced Settings
On the second panorama stream or the camera’s SDI/HDMI output, the camera switches cleanly between meeting participants with each switch taking no longer than 5 seconds, depending on the speaker’s distance from the camera. If any of the parameters described above appear spotty or working inconsistently, Advanced Settings below will explain how to correct these issues. - Page 34 1. Click Tracking in the lower half of the settings panel. The cursor will move into the video frame. 2. While holding down the left mouse button, drag the mouse to draw the tracking zone. 3. Let go of the left mouse button to release the cursor from the video frame. 4.
-
Page 35: Position Camera
Track Sensitivity This setting controls how quickly facial detection scans for faces in the room and thus how quickly face detection follows a moving subject. NOTE: High sensitivity can lead to erratic switching behavior. The sensitivity can be lowered to combat erratic switching. Zoom Sensing Zoom Sensitivity is the camera’s way of determining distance in the room. - Page 36 Use the drop-down menu to select which PTZ you wish to correct. Then click the POS Correct button. A secondary window appears, displaying the selected PTZ’s video feed overlaid with a blue cross hair. Move this window over to one side so you can see both the wide-angle feed as well as the PTZ feed.
-
Page 37: Monitor Rtsp Streams
1. Have someone speak in the center of the room, ideally in the center of the frame, and observe where the vertical blue bars for their audio location appear. In the example above the audio is skewed slightly to the right. 2. - Page 38 rtsp://xx.xx.xx.xx:554/4.h264 Substitute “sub” for the secondary stream from the wide-angle camera or “3” / “4” for subsequent streams. To monitor the camera’s other streams type in the following strings after the “/”: main.h264 - Left PTZ sub.h264 - Wide-Angle 3.h264 - Right PTZ 4.h264 - Switched Output To learn how to adjust the bit rate and resolution settings for the camera’s RTSP streams, refer to the...
- Page 39 Navigate the menu using the directional buttons in the software. In the software, press Enter to confirm a menu selection, and use the left and right directional buttons to adjust the selected parameter. To return to a previous menu page, press Return. Pressing the Menu button on any control device while anywhere in the menus will close the menu entirely.
- Page 40 COLOR WB MODE AUTO Fully automatic white balance. Auto-Tracing white balance mode. ONE PUSH Trigger one-time WB adjustment. INDOOR Best for warm lighting. OUTDOOR Best for natural sunlight. MANUAL Fully manual white balance adjustment. SODIUM LAMP Best for sodium gas light. FLUO LAMP Best for fluorescent light sources.
- Page 41 Video Settings The VIDEO menu adjusts various settings that can help adjust the camera’s video output to your specific needs. DNR – Digital Noise Reduction The Sony Exmor image sensor in this camera offers integrated 2-step noise reduction that helps combat noise than can appear when the camera has to compensate for dim lighting.
- Page 42 EXP-COMP: Once EXP-COMP is set to ON, you will be able to set a level between -7 and +7 to darken or brighten the image. BLC: Back Light Compensation can be activated if the background of the frame is a bright light source (for example, windows or a projection screen behind a presenter) to maintain proper exposure for foreground subjects.
-
Page 43: Automatic Side-By-Side
Automatic Side-by-Side If desired, the camera can automatically switch to a side-by-side view of two meeting participants if they talk back and forth at least four times. To enable this mode, access the OSD via the process described in the Onscreen (OSD) Menu on page 38, navigate to SYSTEM and switch CLOSEUP MODE to DIALOGUE. - Page 44 Preset Number Function Clear ALL User Presets Reboot Camera Output Left PTZ Camera Output Right PTZ Camera Output Side-by-Side of both PTZ cameras Product Manual — Doc. 9311A IV-CAMHK-12-SLVR-1B • 44...
-
Page 45: Visca Commands
VISCA Commands 1 Beyond PTZ cameras can be controlled using the VISCA protocol through either a serial (RS-232 / RS-485) or IP connection. By default, the port for IP control is set to 5500. For serial communication, make sure the baud rate of the controller is set to 9600 bps. Below is a comprehensive list of VISCA commands that can be used to control the cameras. -
Page 46: Commands
Command Message Comments No Socket z0 6y 05 FF Returned when no command is executed in a socket specified (y:Socket No.) by the cancel command, or when an invalid socket number is specified. Command z0 6y 41 FF Returned when a command cannot be executed due to current (y:Execution conditions. - Page 47 Command Set Command Command Packet Comments CAM_Focus Stop 8x 01 04 08 00 FF Far(Standard) 8x 01 04 08 02 FF Near(Standard) 8x 01 04 08 03 FF Far(Variable) 8x 01 04 08 2p FF p: 0(Low)to 7 (High) Near(Variable) 8x 01 04 08 3p FF Direct 8x 01 04 48 0p 0q 0r 0s...
- Page 48 Command Set Command Command Packet Comments CAM_AE Full Auto 8x 01 04 39 00 FF Automatic Exposure mode Manual 8x 01 04 39 03 FF Manual Control mode Shutter Priority 8x 01 04 39 0A FF Shutter Priority Automatic Exposure mode Iris Priority 8x 01 04 39 0B FF Iris Priority Automatic...
- Page 49 Command Set Command Command Packet Comments CAM_Backlight 8x 01 04 33 02 FF Back Light Compensation ON/OFF 8x 01 04 33 03 FF CAM_Aperture Reset 8x 01 04 02 00 FF Aperture Control 8x 01 04 02 02 FF Down 8x 01 04 02 03 FF Direct 8x 01 04 42 00 00 0p 0q...
-
Page 50: Inquiry Commands
Command Set Command Command Packet Comments Pan‐tiltDrive 8x 01 06 01 VV WW 03 01 VV: Pan speed 0 x01 (low speed) to 0 x18 (high speed) Down 8x 01 06 01 VV WW 03 02 Left 8x 01 06 01 VV WW 01 03 Right 8x 01 06 01 VV WW 02 03 WW: Tilt Speed 0 x 01 (low... - Page 51 Command Inquiry Command Inquiry Packet Comments Packet CAM_ZoomPosInq 8x 09 04 47 y0 50 0p 0q 0r 0s p,q,r,s: Zoom Position CAM_FocusModeInq 8x 09 04 38 y0 50 02 FF Auto Focus y0 50 03 FF Manual Focus CAM_FocusPosInq 8x 09 04 48 y0 50 0p 0q 0r 0s p,q,r,s: Focus Position CAM_WBModeInq...
- Page 52 Command Inquiry Command Inquiry Packet Comments Packet CAM_ApertureInq 8x 09 04 42 y0 50 00 00 0p p,q: Aperture Gain 0q FF CAM_ 8x 09 04 63 y0 50 00 FF PictureEffectMode Inq y0 50 02 FF Neg.Art y0 50 04 FF B&W CAM_MemoryInq 8x 09 04 3F...
- Page 53 Command Inquiry Command Inquiry Packet Comments Packet Pan‐tiltPosInq 8x 09 06 12 FF y0 50 0w 0w 0w wwww = Pan Position zzzz = Tilt Position 0z 0z 0z 0z FF Pan‐tiltModeInq 8x 09 06 10 y0 50 pq rs FF p,q,r,s: Pan/Tilt Status Zoom Ratio / Position (CAM_Zoom) (CAM_Zoom Direct –...
- Page 54 Exposure Comp (CAM_ExpComp) (CAM_ExpComp Direct – p,q ExpComp Position) 0000 1851 22BE 28F6 2D45 3086 3320 3549 371E 38B3 3A12 3B42 3C47 3D25 4000 Product Manual — Doc. 9311A IV-CAMHK-12-SLVR-1B • 54...
-
Page 55: Troubleshooting
Troubleshooting The following table provides troubleshooting information. If further assistance is required, contact Crestron's True Blue Support Team. PROBLEM POSSIBLE CAUSES CORRECTIVE ACTIONS No movement or video signal Power supply failure Check power supply output using a when powered on multimeter. - Page 56 PROBLEM POSSIBLE CAUSES CORRECTIVE ACTIONS Shots of meeting participants Camera was Restart the camera by powering it off and on are off-center bumped while using the power switch. powered on, calibration is Perform Position Correction. misaligned Cameras are moving but No tracking zone set Set a Tracking Zone.
-
Page 57: Resources
Resources The following resources are provided for the IV-CAMHK-12-SLVR-1B. NOTE: You may need to provide your Crestron.com web account credentials when prompted to access some of the following resources. Crestron Support and Training Crestron True Blue Support Crestron Resource Library Crestron Online Help (OLH) support.crestron.com/app/answers/detail/a_id/1001561... - Page 58 This page is intentionally left blank. Product Manual — Doc. 9311A IV-CAMHK-12-SLVR-1B • 58...
- Page 59 Product Manual — Doc. 9311A Crestron Electronics, Inc. 15 Volvo Drive, Rockleigh, NJ 07647 06/08/22 Tel: 888.CRESTRON Specifications subject to Fax: 201.767.7656 change without notice. www.crestron.com...
Need help?
Do you have a question about the 1 Beyond Hawk IV-CAMHK-12-SLVR-1B and is the answer not in the manual?
Questions and answers