
Related Manuals for GBC PIPE 6


Summary of Contents for GBC PIPE 6
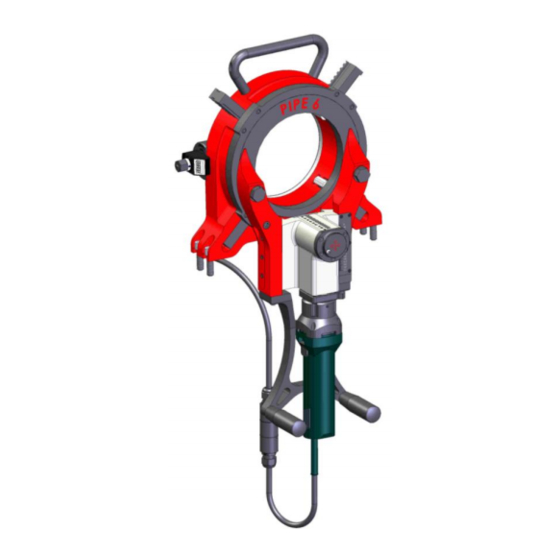
- Page 1 INSTRUCTION MANUAL PIPE 6 G.B.C. Industrial Tools S.p.A. Via Sandro Pertini 41/43 – 25046 Cazzago San Martino (Bs) – Italia – Tel. + 39 030 7451154 – Fax. + 39 030 73 56 629...
-
Page 2: Table Of Contents
PIPE 6 Original Instructions - Rev.00-2014 - In compliance with the § 1.7.4 of the Machine Direc- tive 2006/42/CE INDEX Presentation of the company and scope of this manual General Warranty Clauses Intended Use of the Machine Technical Data Machine Standard Equipment... -
Page 3: Presentation Of The Company And Scope Of This Manual
PIPE 6 Original Instructions - Rev.00-2014 - In compliance with the § 1.7.4 of the Machine Direc- tive 2006/42/CE PRESENTATION OF THE COMPANY AND INTRODUCTION TO THE INSTRUCTION MANUAL G.B.C. Industrial Tools S.p.A. is known worldwide for the quality of its machines and accessories for pipe cutting and beveling applications of any sort and plate beveling machines. -
Page 4: General Warranty Clauses
PIPE 6 Original Instructions - Rev.00-2014 - In compliance with the § 1.7.4 of the Machine Direc- tive 2006/42/CE GENERAL WARRANTY CLAUSES G.B.C. Industrial Tools S.p.a. guarantees the reliability of the machine and its con-formity to the specifications herewith reported. The warranty covers the machine in its whole for a time period of one year from the shipment date (ref. -
Page 5: Intended Use Of The Machine
PIPE 6 Original Instructions - Rev.00-2014 - In compliance with the § 1.7.4 of the Machine Direc- tive 2006/42/CE INTENDED USE OF THE MACHINE The PIPE6 is an orbital pipe saw used for cutting and e- ventually beveling tubes and... -
Page 6: Technical Data
PIPE 6 Original Instructions - Rev.00-2014 - In compliance with the § 1.7.4 of the Machine Direc- tive 2006/42/CE TECHNICAL DATA ELECTRIC 23 ÷ 170 OD Locking Capacity (0.90 ÷ 6.69) (inches) 74 ÷ 291 Idle Speed gg/min (Rpm) 1 ÷ 11 Tube/Pipe Thickness (0.039 ÷... -
Page 7: Machine Standard Equipment
PIPE 6 Original Instructions - Rev.00-2014 - In compliance with the § 1.7.4 of the Machine Direc- tive 2006/42/CE MACHINE STANDARD EQUIPMENT The machine is supplied with: N° 1 Cutting Blade Brush and Lubricating Oil Service Tools ... -
Page 8: Safety Prescriptions And Acoustic Emissions
PIPE 6 Original Instructions - Rev.00-2014 - In compliance with the § 1.7.4 of the Machine Direc- tive 2006/42/CE SAFETY PRESCRIPTIONS G.B.C. Industrial Tools S.p.A. designs and assembles its machines in strict compliance with the safety regulations provided by the applicable EC directives and by the Italian laws regulating this matter. -
Page 9: Details For Transport
PIPE 6 Original Instructions - Rev.00-2014 - In compliance with the § 1.7.4 of the Machine Direc- tive 2006/42/CE Using properly the safety gear entails the only risks to be generated by the user’s system and not by inborn de- fects of our machines. -
Page 10: Machine Stability
PIPE 6 Original Instructions - Rev.00-2014 - In compliance with the § 1.7.4 of the Machine Direc- tive 2006/42/CE MACHINE STABILITY MACHINE STABILITY MACHINE STABILITY Considering the mass of the machine there is no specific problem related to the operator safety. -
Page 11: Machine Setup And Use Instructions
PIPE 6 Original Instructions - Rev.00-2014 - In compliance with the § 1.7.4 of the Machine Direc- tive 2006/42/CE MACHINE SETUP AND USE INSTRUCTIONS MACHINE SETUP AND USE INSTRUCTIONS MACHINE SETUP AND USE INSTRUCTIONS Place the machine on a workbench as shown on the above pictures and find the deisred placement of the unit. - Page 12 PIPE 6 Original Instructions - Rev.00-2014 - In compliance with the § 1.7.4 of the Machine Direc- tive 2006/42/CE Preparazione della macchina Raise the blade initial position by turning the screw until it reaches the 20mm notch printed on the gauge.
- Page 13 PIPE 6 Original Instructions - Rev.00-2014 - In compliance with the § 1.7.4 of the Machine Direc- tive 2006/42/CE To install the blade remove the fixing screw and remove the blade locking pin. Insert the blade paying attention that it’s placed in the correct direction of rotation as shown in the above picture and put back in place the locking pin and the fixing screw.
- Page 14 PIPE 6 Original Instructions - Rev.00-2014 - In compliance with the § 1.7.4 of the Machine Direc- tive 2006/42/CE Turn the bolt indicated by the arrow to lower the blade position allowing an easy insertion of the workpiece in the prismatic jaws and through the machine as you don’t want to hit the blade with it.
- Page 15 PIPE 6 Original Instructions - Rev.00-2014 - In compliance with the § 1.7.4 of the Machine Direc- tive 2006/42/CE reading visualized on the display is the measure that you will have to match on the side gauge which is slightly bigger than the actual workpiece OD to allow some clearance to the blade.
- Page 16 PIPE 6 Original Instructions - Rev.00-2014 - In compliance with the § 1.7.4 of the Machine Direc- tive 2006/42/CE Before every cutting / beveling operation it is highly recommended ( when possible ) to apply some lubricant oil on the blade in order to preserve its life as much as possible.
- Page 17 PIPE 6 Original Instructions - Rev.00-2014 - In compliance with the § 1.7.4 of the Machine Direc- tive 2006/42/CE Using the side handles indicated in the picture above you can start cutting by slowly rotate clockwise the machine. G.B.C. Industrial Tools S.p.A.
- Page 18 PIPE 6 Original Instructions - Rev.00-2014 - In compliance with the § 1.7.4 of the Machine Direc- tive 2006/42/CE Adjust the blade RMP in relation to the material and to the wall thickness of the workpiece by rotating the speed regulator knob located on the rear end of the motor.
-
Page 19: Execution Of The Bevel
PIPE 6 Original Instructions - Rev.00-2014 - In compliance with the § 1.7.4 of the Machine Direc- tive 2006/42/CE EXECUTION OF THE BEVEL Raise the blade by turning the screw indicated by the arrow in the above drawing until you reach the 20mm notch on the side gauge. - Page 20 PIPE 6 Original Instructions - Rev.00-2014 - In compliance with the § 1.7.4 of the Machine Direc- tive 2006/42/CE Remove the screw and the locking pin. Iinstall the beveling blade making sure it is installed in the correct direction of rotation as shown in the above picture.
- Page 21 PIPE 6 Original Instructions - Rev.00-2014 - In compliance with the § 1.7.4 of the Machine Direc- tive 2006/42/CE Turn the bolt indicated by the arrow to lower the blade position allowing an easy insertion of the workpiece in the prismatic jaws and through the machine as you don’t want to hit the blade with it.
- Page 22 PIPE 6 Original Instructions - Rev.00-2014 - In compliance with the § 1.7.4 of the Machine Direc- tive 2006/42/CE Before every cutting / beveling operation it is highly recommended ( when possible ) to apply some lubricant oil on the blade in order to preserve its life as much as possible.
- Page 23 PIPE 6 Original Instructions - Rev.00-2014 - In compliance with the § 1.7.4 of the Machine Direc- tive 2006/42/CE Using the side handles indicated in the picture above you can start cutting by slowly rotate clockwise the machine. G.B.C. Industrial Tools S.p.A.
- Page 24 PIPE 6 Original Instructions - Rev.00-2014 - In compliance with the § 1.7.4 of the Machine Direc- tive 2006/42/CE Adjust the blade RMP in relation to the material and to the wall thickness of the workpiece by rotating the speed regulator knob located on the rear end of the motor.
- Page 25 PIPE 6 Original Instructions - Rev.00-2014 - In compliance with the § 1.7.4 of the Machine Direc- tive 2006/42/CE ORDINARY MAINTENANCE ORDINARY MAINTENANCE ORDINARY MAINTENANCE It is advisable to perform a service c/o G.B.C. Industrial Tools S.p.A. premises every 400 hours working cycles.
-
Page 26: Ordinary Maintenance And Periodical Check
PIPE 6 Original Instructions - Rev.00-2014 - In compliance with the § 1.7.4 of the Machine Direc- tive 2006/42/CE TROUBLESHOOTING The machine does not start. Check that the machine is connected to the power supply. Ensure that the electric power is compatible with the machine specifications.
Need help?
Do you have a question about the PIPE 6 and is the answer not in the manual?
Questions and answers