Table of Contents
Advertisement
Quick Links
Maximo Sauce
Dispensing Unit
UNIT
MODEL:
SPPG
PUMP
MODEL:
BP-1
Thank You
for purchasing your Maximo Sauce Dispensing Unit. This
efficient, environmentally-friendly system delivers precise
portions and is a reliable alternative to the constant
expense of disposable pumps.
CONSISTENT PORTIONS—SERVE BETTER
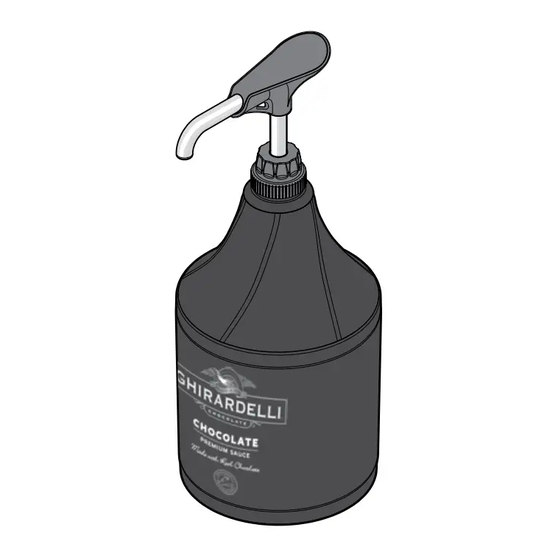
Chocolate
Maximo Unit
0.33 fl oz portions
Server 87974
71195
0.50 fl oz portions
Server 87975
71197
Caramel
Maximo Unit
0.33 fl oz portions
Server 87977
71196
0.625 fl oz portions
Server 87976
71198
Ghirardelli Maximo
Sauce Dispensing
System Video
Directions:
Advertisement
Table of Contents

Subscribe to Our Youtube Channel
Related Manuals for Server Krispy Kreme SPPG


Summary of Contents for Server Krispy Kreme SPPG
- Page 1 SPPG PUMP MODEL: BP-1 Chocolate Caramel Maximo Unit Maximo Unit 0.33 fl oz portions 0.33 fl oz portions Server 87974 Server 87977 71195 71196 0.50 fl oz portions 0.625 fl oz portions Server 87975 Server 87976 71197 71198 Ghirardelli Maximo...
-
Page 2: System Parts
Be aware of the product you are serving and the NSF International lists this pump as: temperature the product is required to maintain. “Not acceptable for dispensing potentially Server Products, Inc. cannot be responsible for the hazardous foods.” serving of potentially hazardous product. SYSTEM PARTS... - Page 3 PUMP DETAILS FOR 87986, 87982, 87991 Portion size is marked on top. HEAD ASSEMBLY Example: “0.33 SP” indicates 0.33 fl oz Syrup Pump. DISCHARGE TUBE LOCKING COLLAR GAGING COLLAR Collar snaps onto head assembly to set proper portion size. Portion size is marked on collar. PISTON SEAL ASSEMBLY (Seal &...
- Page 4 PRACTICE SAFETY. WASH ALL PARTS ASSEMBLY PROPERLY BEFORE USE. See page 10. INSTALL O-RING into seal. Apply food equipment lubricant on O-ring INSTALL SEAL onto head assembly piston. Apply small amount of food equipment lubricant inside seal. TIP: Flared end of seal should face away from piston head.
- Page 5 INSTALL HEAD ASSEMBLY INTO CYLINDER Apply a small amount of food equipment lubricant to the outside of seal. Slide locking collar down onto cylinder threading. Tighten firmly to secure head assembly to cylinder. Page 5...
- Page 6 ASSEMBLY Continued from pages 4 & 5. ATTACH PUMP TO LID ATTACH PUMP TO POUCH • Place sauce pouch on countertop with pouch fitment circle facing upward. • Position pump connector directly over center of pouch fitment. • Press pump connector down to pierce through film in pouch fitment.
- Page 7 PUSH LID DOWN onto base. Snap into position to secure. SNAP PRIME PUMP Press pump several times until sauce is dispensed. READY MAXIMIZE POUCH EVACUATION WHEN SAUCE POUCH SEEMS EMPTY (AFTER PUMPING), USE POUCH SCRAPER. REMOVE PUMP, LID & POUCH COMBINATION FROM BASE STRETCH POUCH FLAT on countertop.
- Page 8 UNIT TAKE-DOWN REMOVE PUMP, LID & POUCH from shroud. REMOVE POUCH from pump. Completely empty pouch may be discarded. REMOVE PUMP DISASSEMBLE & CLEAN PUMP Page 8...
-
Page 9: Pump Disassembly
PUMP DISASSEMBLY DISASSEMBLE AND WASH ALL PARTS PROPERLY BEFORE USE. See page 10. During disassembly, collect small parts in a container to prevent loss. SEPARATE CYLINDER ASSEMBLY & HEAD Loosen locking collar to release. REMOVE SPRING & CAP FROM CYLINDER REMOVE PINCH VALVE from head assembly. -
Page 10: Pump Cleaning
PUMP CLEANING YES! FLUSH & RINSE all pump surfaces with hot water. Use dishwashing soap, Place lower end of pump into container hot water of hot water and operate pump until all and nylon brush remaining product is expelled and only hot water is discharged. -
Page 11: Care Of Stainless Steel
CLEAN-IN-PLACE PROCEDURE FOR PUMPS CLEAN • Pump out all (if any) remaining food product from inside pump body. • Wash and rinse off outside of pump body. • Flush out and rinse inside of pump. • Place lower end of pump into container full of water and operate pump until all (if any) remaining product is expelled and only warm water flows from discharge... -
Page 12: Troubleshooting
SERVER PRODUCTS GENERAL SERVICE, LIMITED WARRANTY REPAIR OR RETURNS Before sending any item to Server Products for service, repair, or return, contact Server Products customer service to request a Return Authorization Number. Merchandise must be sent to Server Products with this number. Service is extremely prompt.
Need help?
Do you have a question about the Krispy Kreme SPPG and is the answer not in the manual?
Questions and answers