Server IxD Series Manual
Condiment dispenser
Hide thumbs
Also See for IxD Series:
- Manual (18 pages) ,
- Quick start manual (2 pages) ,
- Manual (10 pages)
Advertisement
Table of Contents
Thank you for purchasing the IxD
Dispenser. This unit dispenses up to six condiments with a push of a
button and is clean-in-place certified for easy clean-up.
S I M P L I F Y I N G C O N D I M E N T M A N A G E M E N T
Model: General Market
Dispense up to six signature
sauce and condiments from
a single automated system,
ensuring accurate flavor and
faster service every day.
Electronic Dispense
Series MULTI+
Condiment
™
™
WI-FI
Advertisement
Table of Contents

Subscribe to Our Youtube Channel
Related Manuals for Server IxD Series


Summary of Contents for Server IxD Series
- Page 1 Model: General Market Dispense up to six signature sauce and condiments from a single automated system, ensuring accurate flavor and faster service every day. Electronic Dispense WI-FI Thank you for purchasing the IxD Series MULTI+ Condiment ™ ™ Dispenser. This unit dispenses up to six condiments with a push of a button and is clean-in-place certified for easy clean-up.
- Page 2 Be aware of the product you are serving and the temperature the product is required to maintain. This requires all three prongs (terminals) on Server Products, Inc. cannot be responsible for cord plug to be plugged into power source. the serving of potentially hazardous product.
- Page 3 Multi+™ Models model/item description capacity Multi+™ Condiment Dispenser (2) 1.5 or 3 Gallon 101876 Dispensing Head with Drip Tray Assembly (101297) with Pouch Model - Fitmented Pouches Below Counter (101795) Multi+™ Condiment Dispenser (2) 1.5 Gallon Direct 101879 Dispensing Head with Drip Tray Assembly (101297) with Direct Pour Model - Pour Vessels Below Counter (101797) Multi+™...
- Page 4 Parts REPLACEMENT PARTS Above Counter 101685 - DRIP TRAY ASSEMBLY 101322 - POUCH SUPPORT 101681 - DIRECT POUR BIN & LID ASSEMBLY 101465 - DISPENSING CAP WITH THREAD SEAL 101050 - 1/2 HOSE BARD CONNECTOR 85264 - CONNECTOR, ADAPTER, 16MM 101066 - CLAMP, TURN-KEY, SIZE 6, 3/8-7/8 101055 - 24"...
- Page 5 Parts • Pouch Support (2) - 101322 • 16mm Connector Adapter (2) - 85264 Below Counter Pouched Models • Dispensing Cap (2) - 101465 • 1/2 Hose Barb Connector (2) - 101050 • Shelf - 101039 • Motor Assembly - 101793 - Primary / 101794 - Secondary •...
- Page 6 Multiple Motor Models # of 101799 models description capacity motors included Jumper Cables Multi+™ Condiment Dispenser 101877 Dispensing Head with (1) Pouch 1.5 or 3 (1) Primary 101793 Model - Below Counter Primary Gallon 101883 (1) Secondary 101794 (101795) & (1) Secondary Fitmented (no drip tray) (101796)
- Page 7 Initial Assembly - How it should look Fully Assembled Unit Above Counter Model with Drip Tray Under Counter Under Counter Direct Pour Model Pouch Model Under Counter Under Counter Direct Pour (6) Condiment Model (6) Condiment Pouch Model...
-
Page 8: You Will Need
Assembly & Setup - What you will need You will need: Drill with 3” Drill Bit: KAY-5 Sanitizer/Cleaner Sanitizer Solution (2L per flavor) Empty Container to hold 2L (Per flavor) of sanitizer/cleaner solution Empty Container to catch flushed sanitizer/cleaner solution 1L of rinse sanitizer (per flavor) if cleaning with detergent Clean, dry towels... - Page 9 Assembly Unbox Drill a 3" hole into counter. Drill not components. included. For Direct Pour models, prewash bin and lid (101681) and dispensing cap (101645). Slide the locking With the locking ring over the ring removed from bottom of the the bottom of the tubes and USB dispensing head...
- Page 10 Assembly For models with multiple motors, Full Assembly - Back connect the secondary motor(s) 101794 101793 101794 (101794) to the primary motor (101793) with the jumper cable(s) (101799). 101799 101799 For each pump, For each using a turn-key pump, using clamp, put the a turn-key long 48"...
- Page 11 Setup When you Select the initially plugged connection the unit in, it type, choose powered up the network the dispensing and add the head. Follow password. the startup screen prompts. Select the default setup. You'll be prompted to set the date and time and type of measurement.
- Page 12 Setup There is also a step to pull tubes Start the cleaning process. Follow out of the solution for a drying the on-screen prompts. There will stage. For pouch models, let the be a step to put tubes into rinse water for pouch models or put tubes hang free.
-
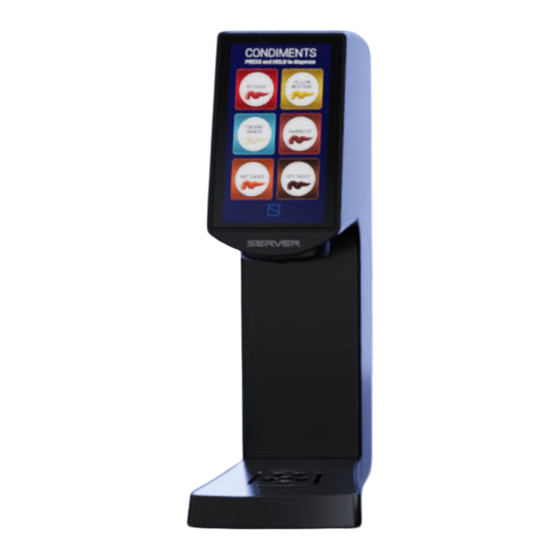
Page 13: How To Use
How to use To operate, place portion cup or food Pushing the icon item under dispense head and push at the bottom of the desired sauce. the screen will take you to the menu. "About" has all the information on the unit. - Page 14 Cleaning Sanitizer If applicable, rinse out Mix a packet of Kay-5 containers, lids and For pouch models, place sanitizer in water between Disconnect tubes from dipsensing caps and wash, bottom of tubes into 75° and 90° F following the pouches or remove from rinse, and sanitize to local container of at least 2L of instructions on the packet.
-
Page 15: Troubleshooting
Troubleshooting Problem Problem Cause Solution Power supply is not plugged into power outlet Plug power supply into power outlet that has that has electrical power to it. electrical power to it. When using a power strip, it's not plugged into a Plug power strip into a power outlet that has power outlet that has electrical power to it or it electrical power to it and turn it on. - Page 16 Troubleshooting Problem Problem Cause Solution There is no product in the supply pouch or direct Use a full supply pouch or fill the direct pour bin. pour bin. Connectors aren't securely attached to the prod- Securely attach connectors to the product pouch/ uct pouch/direct pour bin or pump.
-
Page 17: Need Help
Parts Town. The RA Number ensures proper processing and a prompt turnaround of a replacement unit. This Server product is backed by a one-year limited warranty against defects in materials and workmanship. See Server-Products.com... - Page 18 © 2024 Server Products, Inc. IxDM_Multi+_101812_RevA...
Need help?
Do you have a question about the IxD Series and is the answer not in the manual?
Questions and answers