Table of Contents
Advertisement
Quick Links
FEATURES
BHT-001Series Round Thermostat
On Appearance
User Guide
2. Modern appearance leads to modern life.
3. Beau
5. 86mm hidden box and european 60mm round box is suitable.
6. White, black housing creates your colorful life.
2. 0.5°C Accuracy keeps temperature within the level you set.
3.
4. Data memory when power is off.
5. 7 days six periods programmable maximize comfort and economy.
6. Interated with
8. No limit to add rooms and support device sharing with family.
WIFI TYPE
DIMENSION
Welcome
Thank you for your purchase.
Your new thermostat will provide uniform and comfortable
temperature control throughout every room in your property. We
bring together technology,
materials to provide you with a safe, reliable product combined with
sleek, contemporary design.
88.0
programming manual for comprehensive
thermostat. Please also
ensure a suitably qualified person installs your thermostat and
In the box you will find
1pc
Screws
2pc
Thermostat
User Guide
1pc
Floor Sensor (2.5m) 1pc
1pc
QC Passed
ABOUT YOUR THERMOSTATS
TECHNICAL DATA
The BHT-001 series range has been developed to control electric
Power Supply: 95 ~ 240 VAC, 50 ~ 60HZ
Current Load:
Sensor: NTC3950, 10K±1%
Accuracy: ±0.5℃
MODEL DEFINITION
Set Temp. Range: 5 -35
Dispaly Temp. Range: 5 ~ 99
5
Ambient Temp.: 0 ~ 45 ℃
Storage Temp.: -5 ~ 45 ℃
GC: Water/Gas Boiler, 5A
L: Backlight
Timing Error: < 1%
P: Weekly Programmable
Shell Material: PC +ABS ( Fireproof)
W: Wifi
Wire Terminals: Wire 2 x 1.5 mm2 or 1 x 2.5 mm2
S2: Both internal sensor and floor external sensor
For example: BHT-001 GCLW
Humidity sensor helps you know the humidity around you.
Amazon Echo ,Google Home.
60.0
50.3
88.0
50.3
14.0
25.5
90mm
Back
Front
Unit: mm
Side
5A (
℃
℃
20
BEFORE WIRING AND INSTALLING
3. Installer must be a trained, experienced service technician.
CAUTION
Electrical Shock or Equipment Damage Hazard. Can shock
individuals or short equipment circuitry.
WIRING
GA
AC 95~240V
NTC
N
L
IP20
M
GB
Close
Open
5
1
2
3
4
6
A (RED)
AC 95~240V
B (WHITE)
N
L
NTC
IP20
LOAD
Modbus
N1
L1
5
GC
1
3
4
2
6
A (RED)
AC 95~240V
B (WHITE)
N
L
NTC
IP20
Modbus
Dry Contact
5
1
2
3
4
6
A (RED)
B (WHITE)
Modbus
INSTALLATION
Step 1. Keep power off. See Fig 1.
Fig 1
Fig 2
Step 3. Connect power supply, load into the appropriate terminals.
(see "Wiring your thermostat" for details and Fig 3).
the box. See Fig 4.
Fig 3
Fig 4
Fig 5
Fig 6
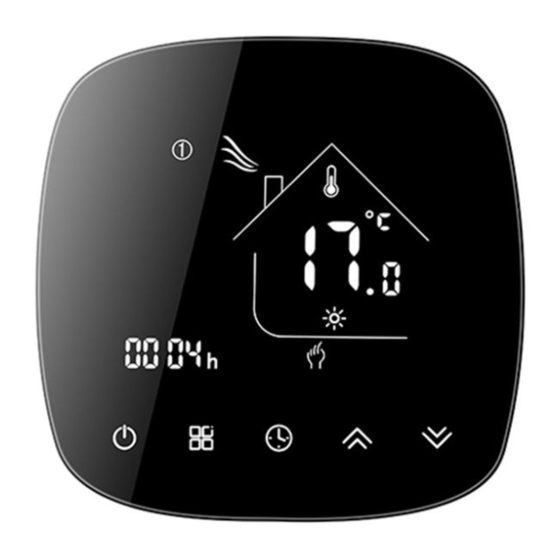
HOME SCREEN QUICK REFERENCE
Mon.
21
20
①
Lock
Wifi EZ Mode
Wifi EZ Mode
①
②
06:00
Room Temp.
③
②
08:00
③
④
Temp. Display
19
⑤
Floor Temp.
11:30
Set Temp.
⑥
④
13:30
⑦
⑤
17:00
⑧
Wifi AP Mode
⑥
⑦
⑨
Clock
22:00
⑧
18
⑩
Manual
⑪
Down
17
⑨
Up
⑫
⑩
⑯
⑬
⑭
Mode
Power On/off
⑮
⑯
ON OFF
17
Time Display
PM AM
18
⑮
⑭
⑬
⑫
⑪
19
Period 1 to Period 6
20
Monday To Sunday
OPERATION
21
During Power On
1. Power On/off:
Press
to turn the thermostat on/off.
2. Manual & Programmable
Touch
(mode) to change between manual mode and programme
the screen .
In programmable mode, the period icon will show on the right side.
could not be
adjusted.If the user want to change, please go to manual mode or
programmable mode.
In the mode of manual, press
to set the desired temperature.
C
Touch the icon
to set minute, hour and weekday (1 = Monday,
2 = Tuesday etc.) by using the
arrows.
5. Locking your Thermostat
Press and hold the
for 3 seconds to lock/unlock your thermostat
P
S
accept the program schedule made via the APP on your device (see
your thermostat (NOT via your smartphone/tablet) simply follow the
as below:
thermostat and smartphone/tablet.
o T
u
h c
o t
h c
n a
e g
e b
w t
e
n e
m
n a
u
l a
m
o
e d
a
d n
r p
g o
a r
m
m
e
the screen .
In programme mode, touch and hold the icon
until the weekday.
1 means Monday will show one by one on
the right side).
Press the icon
temperature.
(1st period).
Repeat this process for periods 2, 3, 4 and 5 6.
Press the icon
other days'
.
Press
once more to confirm and exit.
Set
Tue.
Set
Wed.
Set
Thu.
Set
Fri.
Set
Sat.
Set
Sun.
Set
Temp.
Temp.
Temp.
Temp.
Temp.
Temp.
Temp.
06:00
06:00
06:00
06:00
06:00
06:00
20℃
20℃
20℃
20℃
20℃
20℃
20℃
15℃
08:00
20℃
08:00
20℃
08:00
15℃
08:00
15℃
08:00
15℃
08:00
15℃
15℃
11:30
20℃
11:30
20℃
11:30
15℃
11:30
15℃
11:30
15℃
11:30
15℃
15℃
13:30
20℃
13:30
20℃
13:30
15℃
13:30
15℃
13:30
15℃
13:30
15℃
22℃
17:00
20℃
17:00
20℃
17:00
22℃
17:00
22℃
17:00
22℃
17:00
22℃
15℃
22:00
15℃
22:00
15℃
22:00
15℃
22:00
15℃
22:00
15℃
22:00
15℃
7. Checking the Temperature of Floor Sensor
Press and hold the
arrow for 3 seconds to display the temp. of
floor sensor.
During Power Off
When power is off, press and hold
Then press
to scroll through
available
Code
Func on
Se ng and op ons
Default
Temperature
1
-9 to +9℃ (for internal sensor)
-2
Compensa on
2
Deadzone Temp.
0.5-4℃ (for internal sensor)
1
Display Mode
0:display both se emp. and room temp.
3
00
1:display se emp. only
In:Internal Sensor(to control or limi he
temperature)
Ou: External Sensor(to control or limi he
temperature)
4
Sensor Types
AL
Al: Internal and External Sensor(Internal sensor to
control temperature, external sensor to limit
temperature)
Note: Please make sure the right sensor. If choose the
wrong or bad one, LCD will display Err.
Min. Set Temp.
5-15℃
5
5
Max. Set Temp.
15-45℃
6
35
Frost Protec on
7
0: Off; 1: On
1
On/off
Frost Protec on
8
0-10℃
5
se ng.
High Temperature
40-70℃
9
45
Protec on Se ng.
Bu ons Standby
A
3 ~ 99
4
Brightness
Backlight Standby
B
3 ~ 99
4
Brightness
Device Status
0: Keep the power off.
C
1
when power on
1: Keep the status before power off
D
Deadzone Temp.
0.5-5 ℃ (for external sensor)
1
Return to factory
E
0
Advertisement
Table of Contents

Related Manuals for BECA BHT-001 Series


Summary of Contents for BECA BHT-001 Series
- Page 1 Touch the icon to set minute, hour and weekday (1 = Monday, temperature) The BHT-001 series range has been developed to control electric 2 = Tuesday etc.) by using the arrows. Note: Please make sure the right sensor. If choose the Power Supply: 95 ~ 240 VAC, 50 ~ 60HZ wrong or bad one, LCD will display Err.
- Page 2 2、AP Mode ABOUT WIFI Network distribution mode: More settings When the thermostat is off, press and hold the " " until the thermostat screen flashes slowly and the " " icon is displayed Method 2: Ordinary distribution 1、 EZ Mode WI-FI CONNECTION network guidance (if the "...
Need help?
Do you have a question about the BHT-001 Series and is the answer not in the manual?
Questions and answers