Table of Contents
Advertisement
Available languages
Available languages
Quick Links
Advertisement
Chapters
Table of Contents

Subscribe to Our Youtube Channel
Related Manuals for HOFFEN MT-2099


Summary of Contents for HOFFEN MT-2099
- Page 1 TRYMER MĘSKI MEN’S TRIMMER INSTRUKCJA INSTRUCTION MANUAL...
-
Page 3: Table Of Contents
TRYMER MĘSKI MT-2099 (Instrukcja dotyczy różnych wersji kolorystycznych urządzenia) SPIS STREŚCI UŻYCIE ZGODNIE Z PRZEZNACZENIEM . . . . .4 DANE TECHNICZNE . . . . . . . . . . . . . . . . . . . . . . .4 ZASADY BEZPIECZNEGO UŻYTKOWANIA . -
Page 4: Użycie Zgodnie Z Przeznaczeniem
Urządzenie jest przeznaczone tylko do prywatnego użytku wewnątrz pomieszczeń i nie może być używane do celów profesjonalnych. DANE TECHNICZNE Nr partii POJM220099 Model MT-2099 Zasilanie 1 x bateria AA 1,5 V ZASADY BEZPIECZNEGO UŻYTKOWANIA Przed użyciem należy przeczytać całą instrukcję. Przestrzeganie instrukcji zapewnia bezpieczną... - Page 5 unieważnienie gwarancji. Nie używać urządzenia, jeśli jest uszkodzone lub działa w sposób nieprawidłowy. Nie należy używać urządzenia, jeśli wcześniej upadło ono z wysokości lub wykazuje widoczne oznaki uszkodzenia . Produkt nie jest zabawką. Należy zwracać uwagę na dzieci by nie bawiły się urządzeniem. Czyszczenie i konserwacja urządzenia nie może być...
-
Page 6: Objaśnienie Symboli
19 . Nie należy używać nasadek innych niż dołączona do zestawu . 20 . Nie używaj urządzenia w pobliżu źródeł ciepła (grzejników, ognia). 21 . Nie przechowuj urządzenia w warunkach wysokiej temperatury lub bezpośredniego działania promieni słonecznych. 22 . Zachowaj instrukcję oraz jeśli to możliwe, opakowanie. 23 . - Page 7 Całkowita ochrona przed strumieniem wody płynącej z różnych kierunków z wydajnością do 12,5 litra na minutę. Wodoodporność przy deszczu zachlapaniu. Nadaje się dla turystyki pieszej, rowerowej, żeglarstwa. Należy pamiętać, że woda może przedostać się podczas zanurzenia lub skierowania silnego strumienia wody na przedmiot mający opisywaną...
-
Page 8: Budowa
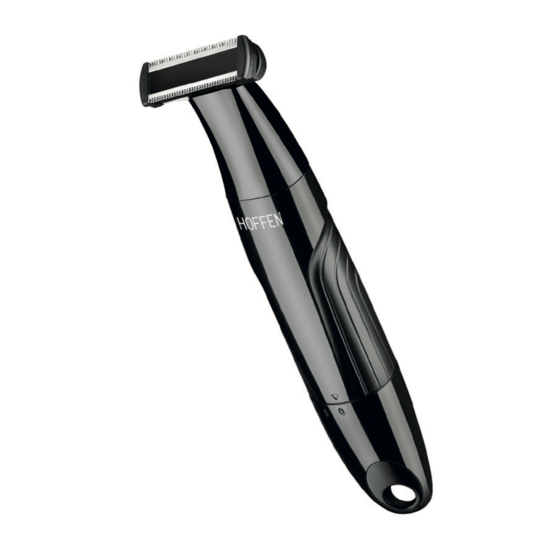
BUDOWA Głowica trymera do twarzy i ciała Mała nasadka na trymer do zarostu (3mm) Pędzelek Duża nasadka na trymer do zarostu (6mm) Obrotowy włącznik/wyłącznik/otwieranie komory baterii Głowica trymera do zarostu Komplet trzech nasadek na trymer do twarzy i ciała (1,5 mm; 3mm; 5 mm) Otwór do zawieszenia... -
Page 9: Zawartość Zestawu
ZAWARTOŚĆ ZESTAWU Ilość Element Trymer męski (urządzenie) Głowica trymera do zarostu Głowica trymera do twarzy i ciała Nasadka na trymer do twarzy i ciała (1,5 mm) Nasadka na trymer do twarzy i ciała (3 mm) Nasadka na trymer do twarzy i ciała (5 mm) Mała nasadka na trymer do zarostu (3mm) Duża nasadka na trymer do zarostu (6mm) Bateria AA 1,5 V... -
Page 10: Użytkowanie
Otwórz opakowanie i ostrożnie wyjmij urządzenie. Sprawdź, czy zestaw jest kompletny i bez uszkodzeń. Upewnij się, że części z tworzyw sztucznych nie są pęknięte. Jeśli stwierdzisz, że brakuje części bądź są uszkodzone, nie używaj urządzenia, lecz skontaktuj się ze sprzedawcą. Zachowaj opakowanie lub zutylizuj zgodnie z lokalnymi przepisami. - Page 11 Wsuń pokrywę komory baterii na swoje miejsce i przekręć tak by strzałka wskazywała „0” Trymer jest gotowy do użycia. Uwaga! • Urządzenie jest przystosowane do zasilania baterią typu AA 1,5 V • Bateria jest dołączona do zestawu. • Przy instalacji nowej baterii odnieś się do oznaczeń...
- Page 12 • Zawsze wyjmuj baterie, gdy nie używasz urządzenia – zapobiegnie to zniszczeniu urządzenia w przypadku wycieknięcia elektrolitu z baterii. • Wyczerpane baterie należy bezzwłocznie wyjąć z urządzenia. • Rozładowane baterie mogą wyciekać, powodując uszkodzenie urządzenia. • W razie kontaktu rąk z kwasem z baterii, opłucz ręce pod bieżącą...
- Page 13 nałożyć trymer, postępuj odwrotnie. Symbole na trymerze i korpusie musza być w pozycji: , a następnie przekręć aby symbol strzałki na korpusie wskazywał na I . 7.3 Montaż /demontaż nasadki trymera do zarostu/twarzy i ciała Nasadki trymera do zarostu mała(2) i duża(4) 1 .
- Page 14 1 . Upewnij się, że urządzenie ma zamontowaną głowicę trymera do twarzy i ciała. 2 . Delikatnie umieść boki nasadki trymera do twarzy i ciała na boczne prowadnice głowicy trymera i dociśnij. 3 . Usłyszysz delikatne charakterystyczne „kliknięcie”. 4 . Aby zdjąć nasadkę trymera do twarzy i ciała należy delikatnie podważyć...
- Page 15 Przycinanie i modelowanie włosów na twarzy i ciele: Użyć głowicy trymera do twarzy i ciała (1) 1 . Upewnij się, że trymer jest wyłączony. Nałóż nasadkę na trymer do twarzy i ciała w zależności od konieczności użycia. 2 . Upewnij się, że głowica trymera i nasadka zostały dobrze nałożone, patrz punkty 7.2 Montaż...
-
Page 16: Czyszczenie I Konserwacja
4 . Zacznij krawędzi linii brody wąsów i delikatnie opuść ostrze trymera na skórę. Użyj ruchów w kierunku krawędzi linii brody / wąsów, aby przyciąć pożądane miejsca w okolicy twarzy i z dala od brody w obszarze wokół twarzy. Uwaga! Nie dociskaj mocno. Możesz skaleczyć skórę lub uszkodzić... -
Page 17: Naprawa
NAPRAWA Urządzenie nie zawiera części serwisowanych przez użytkownika. Nie naprawiaj urządzenia samodzielnie. Zawsze zlecaj naprawę fachowcowi. PRZECHOWYWANIE I TRANSPORT Zawsze przechowuj urządzenie suchym wentylowanym miejscu, niedostępnym dla dzieci. Chronić urządzenie przed wibracjami i wstrząsami podczas transportu. UTYLIZACJA Materiały z opakowania należy zabezpieczyć przed dziećmi, gdyż... -
Page 18: Deklaracja Ce
Składniki niebezpieczne znajdujące się w sprzęcie elektronicznym i elektrycznym wpływają negatywnie na środowisko i zdrowie ludzi. Zastosowane w urządzeniu tworzywa nadają się do powtórnego użycia zgodnie z ich oznaczeniem. Dzięki powtórnemu użyciu, wykorzystaniu materiałów lub innym formom wykorzystania zużytych urządzeń wnoszą... -
Page 19: Gwarancja
GWARANCJA W celu reklamacji produktu należy dostarczyć urządzenie do Punktu Obsługi Klienta w dowolnym sklepie sieci Biedronka. Wszystkie pytania i problemy związane z funkcjonowaniem wyrobu, zgłoszeniem reklamacji można kierować na poniższy adres e-mail: • infolinia@vershold.com • lub kontaktować się telefonicznie: +48 667 090 903 Twoja opinia jest dla nas ważna. - Page 20 dokładny opis wady urządzenia, w szczególności zewnętrzne objawy wady urządzenia. Gwarancja nie obejmuje produktów z uszkodzeniami mechanicznymi nie powstałymi z winy producenta lub dystrybutora, a w szczególności z powodu wadliwego użytkowania lub wynikłymi w następstwie działania siły wyższej. Gwarancją nie są objęte produkty, w których usunięta została plomba zabezpieczająca oraz w których dokonano prób naprawy, przeróbek lub zmian konstrukcyjnych.
- Page 21 MEN’S TRIMMER MT-2099 (This User’s Manual applies to various colour versions of the device) TABLE OF CONTENTS INTENDED USE . . . . . . . . . . . . . . . . . . . . . . . . . . . 2 2 TECHNICAL SPECIFICATIONS .
-
Page 22: Intended Use
The device is intended for indoor use and may not be used for professional purposes . TECHNICAL SPECIFICATIONS Lot No . POJM220099 Model MT-2099 Power supply 1 x AA 1 .5 V battery SAFETY INSTRUCTIONS Read the entire manual before use . - Page 23 Do not use the device if it has previously been dropped or shows visible signs of damage . The product is not a toy . Make sure that children do not play with the device . Cleaning and maintenance of the device must not be performed by children without adult supervision .
-
Page 24: Explanation Of Symbols
24 . The electronic version of the manual is available at http://instrukcje .vershold .com . EXPLANATION OF SYMBOLS Read the manual . The product is compliant with the requirements of the applicable EU directives . The device is intended for indoor use only . - Page 25 Trademark indicating that manufacturer has made a financial contribution to the development and operation of a packaging materials recovery and recycling system . Designation of the packaging material – corrugated cardboard . Segregation sign - Labeling indicating the need for waste segregation . Paper waste - Designation of the container to which the waste should go .
-
Page 26: Device Components
DEVICE COMPONENTS Trimmer head for face and body hair Small trimmer attachment for facial hair (3 mm) Brush Large trimmer attachment for facial hair (6 mm) Rotary ON/OFF switch / battery compartment opening Trimmer head for facial hair A set of three attachments for the face and body trimmer (1 . -
Page 27: Set Contents
SET CONTENTS Element Men’s trimmer (the device) Facial hair trimmer head Face and body trimmer head Face and body trimmer attachment (1 . 5 mm) Face and body trimmer attachment (3mm ) Face and body trimmer attachment (5 mm ) Small trimmer attachment for facial hair (3 mm) Large trimmer attachment for facial hair (6 mm) AA 1 .5 V... -
Page 28: Use
7.1 Inserting and changing batteries 1 . Rotate the rotary ON/OFF switch / battery compartment opening until the arrow symbols on the housing and the head are in the following position: 2 . Take off the battery compartment cover by pulling on it . 3 . - Page 29 • Use only the recommended batteries: AA 1.5 V • Do not dispose of used batteries with municipal waste. Put them into special containers for dead batteries. • Do not recharge batteries not designed for that purpose (non-rechargeable batteries). Do not short-circuit the battery terminals. •...
- Page 30 immediately if a battery is swallowed. 7.2 Facial hair / face and body trimmer head — installation and removal The facial hair trimmer or face and body trimmer are installed and removed in the same way . Make sure that the device is turned off . To remove the trimmer, hold it with one hand, hold the device housing with the other hand, then rotate until the symbols on the housing and the trimmer are in the...
- Page 31 7.3 Attachment installation/removal Small (2) and large (4) facial hair trimmer attachments Make sure that the facial hair trimmer is installed on the device . Install one of the two attachments . making sure that the head blades enter into the space on the attachment on the teeth side, then press to tighten .
- Page 32 2 . To turn the device off, rotate the ON/OFF switch / battery compartment opening until the arrow points at 0 . 7.5 Operation Remember that water can penetrate the housing if the device is immersed, or a strong water jet is directed at it . Trimming and shaping facial and body hair: Use the face and body trimmer head (1) 1 .
-
Page 33: Cleaning And Care
not) the selected trimmer attachment for facial hair, depending on need . 2 . Make sure that the trimmer and attachment are installed properly – see 7.2 Facial hair / face and body trimmer head — installation and removal and 7.3 Attachment installation/removal 3 . -
Page 34: Repair
Clean the trimmer using the included brush or under running water, then leave to dry completely . Wash the attachments under running water and wipe dry . For the sake of hygiene, it is recommended that the trimmer be cleaned immediately after use . Wipe the whole device (its housing) with a dry cloth . -
Page 35: Ce Declaration
Correct disposal of the device: According to the WEEE Directive 2012/19/EU, the crossed-out wheelie bin symbol is used to label all electric and electronic devices requiring segregation . Do not dispose of the spent product with domestic waste: hand it over to an electric and electronic device collection and recycling centre . -
Page 36: Warranty
WARRANTY In order to submit a complaint about the product, submit the device to the Customer Service Point at any Biedronka store. Should you have any questions or issues related to product operation, send them to the following e-mail address: •... - Page 37 other than that caused by the manufacturer or distributor, including specifically any damage resulting from incorrect usage or force majeure . The warranty does not cover products from which the tamper-proof seal has been removed, and products to which repairs, alterations or structural modifications have been made or attempted .
- Page 40 #sprytniezhoffen...
Need help?
Do you have a question about the MT-2099 and is the answer not in the manual?
Questions and answers