Table of Contents
Advertisement
Quick Links
Advertisement
Table of Contents

Related Manuals for ELECTROMATIC PosiTector 6000


Summary of Contents for ELECTROMATIC PosiTector 6000
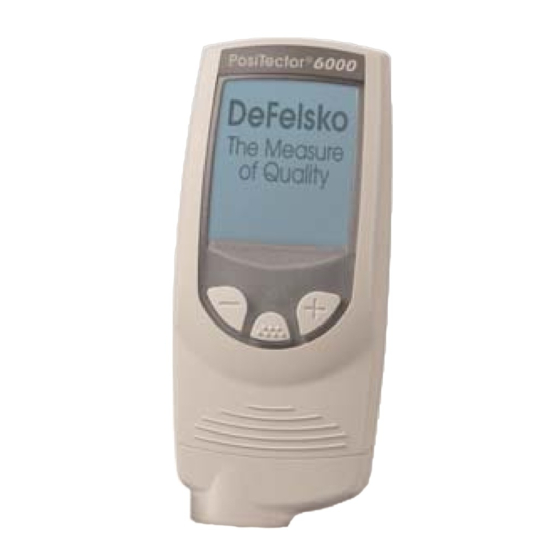
- Page 1 PosiTector 6000 INSTRUCTION MANUAL v. 6.0/M for Memory (3) models Coating Thickness Gages Built-in probe Separate probe ELECTROMATIC O ., 600 Oakland Ave., Cedarhurst, NY 11516–U.S.A. • TEL: 516-295-4300 FAX: 516-295-4399...
- Page 2 Power-up / Power-down Power-up / Power-down The PosiTector 6000 powers-up when any button is pressed. To preserve battery life, the Gage powers- down after approximately 3 minutes of no activity. All...
-
Page 3: Golden Rule
Quick S Quick S 1.Separate probe models - remove black protective rubber cap from probe if supplied. Built-in probe models - remove Gage from protective rubber holster. 2.Turn Gage on with any button. 3.Place the probe FLAT on the surface to be measured. -
Page 4: Menu Operation
Menu Operation Menu Operation Gage functions are menu controlled. To access the Menu, turn the Gage on, then press the button. Some buttons have a tick box to their right to indicate current status. An empty box indicates that feature is not active. Current selection is displayed with darkened background... - Page 5 (pg. 9). NOTE: symbol disappears whenever a calibration adjustment is made to the gage. The PosiTector 6000 is factory calibrated and performs an automatic self-check each time it takes a measurement. For many applications no further...
- Page 6 adjustment is necessary after a Reset (pg.15). Just check ZERO on the uncoated substrate, then measure. But sometimes Gage readings can be influenced by changes in substrate shape, composition, surface roughness or by measuring in a different location on the part. That is why Calibration Adjustments are made possible.
- Page 7 average of a series of readings on the uncoated surface is "0" . (2) Average Zero Calibration Adjustment To establish “0” on a rough or curved surface a preferred method is to take several readings on the uncoated part and average the result. 1.Select the Zero menu option.
- Page 8 used to obtain an average, typically 3 to 10 readings. The greater the variation between readings, the more readings should be taken to obtain an average. 3.Repeatedly measure known thickness reference. The Gage will wait 2 seconds between readings to allow the user to correctly position the probe on the surface.
-
Page 9: Calibration Memory
A “setting” is any calibration adjustment. The PosiTector 6000 always displays the currentcalibra- tionsetting(ex. Cal 3) in the upper right corner of the display. The setting called Cal 1 has unique features. It can be adjusted but never deleted, and is always made active with factory settings after a Reset (see pg.15). - Page 10 which appears at the bottom of the display. A warning message will prevent the creation of a new Cal Memory if a batch is open and has readings. Delete the batch first. (see pg.12) -loads an existing setting. Use the (-)(+) buttons to scroll the List box until the desired setting appears, then press .
-
Page 11: Memory Management
Memory Management Memory Management PosiTector 6000 record 10,000 measurements in up to 1000 groups (batches). Ideal for on-screen statistical purposes, printing to an optional IR printer or PC’s default printer, or for downloading to a personal computer using the included PosiSoft software USB cable. - Page 12 -the PA2 feature helps the user determine if film thickness over a large area conforms to user specified min/max levels. -selects a previously created batch or sub-batch name to open and make current. If it contains measurements, on-screen statistics will immediately reflect values calculated from this batch.
- Page 13 -outputs a statistical summary to the optional IR printer using the built-in IR port, or to a PC’s default printer using the included USB cable. Individual measurements with their time stamp are printed if the Readings box is ticked. A histogram is printed if the Graph box is ticked.
- Page 14 atistical Functions atistical Functions -when Statistics is selected, a icon and statistical summary will appear on the display. Mean Standard (average) Deviation # of Max and Min measurements measurement Last reading Statistics Icon Remove the last measurement by pressing the (-) button.
-
Page 15: Setup Menu
Setup Menu Setup Menu Reset restores factory settings and returns the Gage to a known, out-of-the-box condition. It is handy when settings have been changed, if the Gage behaves unusually, or if a calibration adjustment is not possible. The following occurs: - all batches are closed and stored measurements are erased. - Page 16 When Hi Res is selected, the displayed gage resolu- tion becomes as follows: Resolution Range 0.01 mil 0.00 - 99.00 mils 0.1 mil 100.0 - 999.9 mils 0.1 um 0.0 - 999.9 um 0.01 mm 1.00 - 99.99 mm NOTES: - Gage accuracy is not affected by the Hi Res Mode.
- Page 17 To disconnect, power-down the Gage and pull the plastic probe connector horizontally (in the direction of the arrow) away from the Gage body. When powered-up the PosiTector 6000 automatically determines what type of probe is attached and does a self-check.
- Page 18 N Lock is also useful in instances such as measuring coatings on plated steel. vailable Options vailable Options A variety of accessories are available to help you get the most from your PosiTector 6000 coating thickness gage. emperature emperature Operating range: +32°...
-
Page 19: Changing The Batteries
Changing The Batteries Changing The Batteries The battery icon displays four bars with fresh alkaline batteries installed. As the batteries weaken, the number of bars will be reduced. When the battery Icon is down to one bar , the Gage can still be used, but the batteries should be changed at the ear- liest opportunity. -
Page 20: Warranty
In no event shall DeFelsko be liable for any indirect, special, incidental or consequential damages. The warranty is voided if the Instrument has been opened. Data subject to change without notice. ELECTROMATIC O ., 600 Oakland Ave., Cedarhurst, NY 11516–U.S.A. • TEL: 516-295-4300...
Need help?
Do you have a question about the PosiTector 6000 and is the answer not in the manual?
Questions and answers