
Subscribe to Our Youtube Channel
Related Manuals for Levoit VortexIQ 40


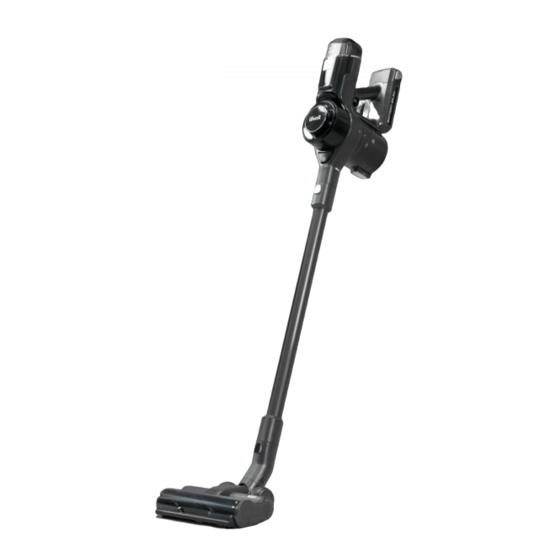
Summary of Contents for Levoit VortexIQ 40
- Page 1 U SE R MANUAL VortexIQ™ 40 Cordless Stick Vacuum Model: LSV-VF401-AUS Questions or Concerns? Please contact us Mon–Fri, 9:00 am–5:00 pm PST/PDT at support@levoit.com or at (888) 726-8520.
-
Page 2: Table Of Contents
Table of Contents Specifications Package Contents Battery Type DC 25.9V, 2500mAh Specifications Li-ion battery Safety Instructions Charging Input AC 100–240V, Getting to Know Your Vacuum 50/60Hz 0.5A Control Panel Using Your Vacuum Charging Time 4–5 hours Care & Maintenance Cleaning Dimensions 9.8 ×... -
Page 3: Safety Instructions
IMPORTANT SAFETY INSTRUCTIONS When using this vacuum, basic precautions should always be followed, including the following: READ ALL INSTRUCTIONS WARNING – To reduce the risk of fire, electric shock, or injury: • • Do not leave the vacuum unattended while it is Risk of injury. - Page 4 SAFETY INSTRUCTIONS (CONT.) Battery & Charger WARNING: Read all safety warnings and instructions. Failure to follow the warnings and instructions may result in electric shock, fire, and/or serious injury. • • Do not pull or carry the vacuum by the charging Under abusive conditions, liquid may be ejected cable, use the cable as a handle, close a door on from the battery.
- Page 5 G E T T I N G TO K N O W YO U R VAC U U M Control Panel Charging Port (Dock) HEPA-Type Pre-Filter Charging Dock with Accessory Holder Vacuum Body Release Button Dust Bin Stick Dust Bin Release Button Vacuum Head Release Button Metal Filter Vacuum Head...
-
Page 6: Control Panel
C O N T R O L PA N E L Auto Mode Button Power Level Indicator • Press to turn on Auto Mode (see • Indicates the level of vacuum Auto Mode, page 9). suction power. • Automatically adjusts power to match Auto Mode Indicator the amount of dust. -
Page 7: Using Your Vacuum
U S I N G YO U R VAC U U M Nozzle Attachments Attach the vacuum head or nozzle attachment to the bottom of the stick and attach the vacuum body to the top of the Your vacuum comes with nozzle attachments stick [Figure 1.1]. - Page 8 USING YOUR VACUUM (CONT.) Nozzle Attachments (cont.) Optionally, leave the stick attached to the vacuum body and press the Vacuum Head Release Button to To use a nozzle attachment: remove the vacuum head. Then, Press and hold the Vacuum Body attach the nozzle or brush to the end Release Button and gently pull of the stick [Figure 1.6].
- Page 9 USING YOUR VACUUM (CONT.) Auto Mode Auto Mode utilizes DPC Technology™ (Dynamic Power Control Technology), which uses infrared sensors to automatically detect the amount of dust and debris that is traveling through the vacuum, and then adjusts the suction power to accommodate the amount of dust.
-
Page 10: Care & Maintenance
C A R E & M A I N T E N A N C E Battery Installation Insert the charger into the charging port on the vacuum body [Figure 2.2]. Turn the vacuum off. Press the Battery Release Button and remove the battery. To reinstall, slide the battery into the slot in the vacuum body [Figure 2.1]. - Page 11 CARE & MAINTENANCE (CONT.) Charging the Vacuum (cont.) Insert the charger into the charging port on the dock. Plug the charger into the outlet [Figure 2.6]. Note: The battery can also be removed and charged separate from the vacuum body Hang the vacuum on the charging [Figure 2.4] dock [Figure 2.7].
- Page 12 CARE & MAINTENANCE (CONT.) Battery Indicator Light Chart Emptying the Dust Bin (While Charging) When dust in the dust bin reaches the MAX line, empty the dust bin. Battery Level Battery Indicator Turn the vacuum off. Remove the 0–30% 3 flashing lights vacuum body by pressing the Vacuum Body Release Button.
- Page 13 C L E A N I N G Cleaning the Vacuum Body Rotate the metal filter clockwise to remove it [Figure 3.2]. Turn the vacuum off. Rinse the dust bin and metal filter with water and allow them to dry. Wipe the vacuum body down with a Make sure the parts are completely damp cloth.
- Page 14 [Figure 3.6]. Replacement Filters: To maintain the performance of your vacuum, only use official Levoit filters. For more information, contact Customer Support (see page 19). HEPA-Type Pre-Filter Pull up on the pre-filter housing to remove it from the top of the vacuum body [Figure 3.4].
-
Page 15: Storage
S TO R AG E CARE & MAINTENANCE (CONT.) Cleaning the Roller Brush When the vacuum is not in use, store it on the charging dock: Clean the roller brush every 4–5 uses to avoid Mount the charging dock by screwing blockage or jamming. -
Page 16: Troubleshooting
T R O U B L E S H O OT I N G Problem Possible Solution Vacuum will not The battery is not installed correctly (see Battery Installation, page 10). turn on Recharge the vacuum (see Charging the Vacuum, page 10). The vacuum motor overheated. - Page 17 F E D E R A L C O M M U N I C AT I O N C O M M I S S I O N I N T E R F E R E N C E S TAT E M E N T – PA R T 1 5 This device complies with Part 15 of the FCC Rules.
-
Page 18: Warranty Information
• If the product has been modified period, please contact Customer Support from its original condition; via support@levoit.com. DO NOT dispose • If the product has not been used of your product before contacting us. Once in accordance with directions and our Customer Support Team has approved instructions in the user manual;... -
Page 19: Customer Support
Customer Support Team. Arovast Corporation 1202 N. Miller St., Suite A Anaheim, CA 92806 Email: support@levoit.com Toll-Free: (888) 726-8520 Support Hours Mon–Fri, 9:00 am–5:00 pm PST/PDT *Please have your order invoice and order ID... - Page 20 /LE VO I T /LE VO I T /LE VO I TLIFESTY LE /LE VO I TLIFESTY LE /LE VO I TLIFESTY LE LEVO I T.C OM DL092121CW-M1_0921LSV-VF401-AUSR...
Need help?
Do you have a question about the VortexIQ 40 and is the answer not in the manual?
Questions and answers