Levoit VortexIQ 40, LSV-VF401-AUS - Cordless Stick Vacuum Manual
- User manual (20 pages)
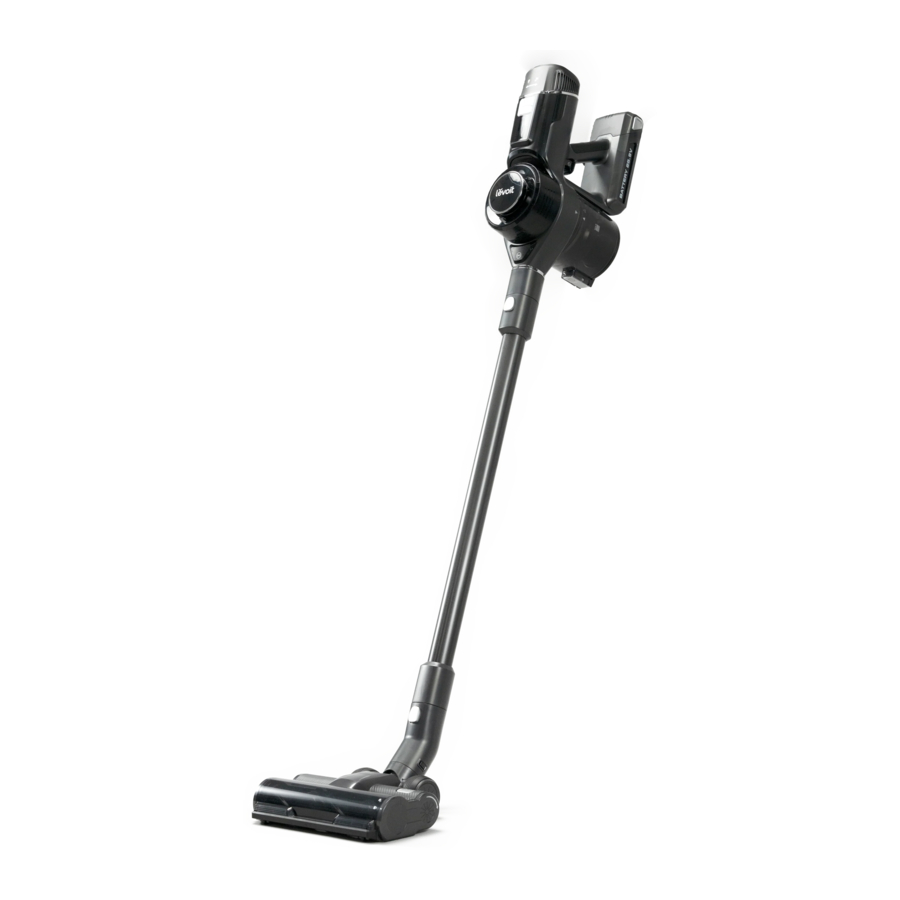
Advertisement
Package Contents
1 × Vacuum Body
1 × Stick
1 × Vacuum Head
1 × Telescoping Crevice Tool
1 × 2-in-1 Dusting Brush
1 × Charging Dock with Accessory Holder
3 × Screws
3 × Wall Anchors
1 × Charger
1 × User Manual
1 × Quick Start Guide
Specifications
| Battery Type | DC 25.9V, 2500mAh Li-ion battery |
| Charging Input | AC 100–240V, 50/60Hz 0.5A |
| Charging Time | 4–5 hours |
| Dimensions | 9.8 × 9.1 × 46.1 in / 25 × 23 × 117 cm |
| Weight | 7.1 lb / 3.2 kg |
| Dust Bin Capacity | 2.5 cups / 0.6 L |
| Runtime | 40 minutes (Low) |
| Rated Power | 400W |
| Suction Power | 130AW |
IMPORTANT SAFETY INSTRUCTIONS
When using this vacuum, basic precautions should always be followed, including the following:
READ ALL INSTRUCTIONS

To reduce the risk of fire, electric shock, or injury:
- Do not leave the vacuum unattended while it is on. Unplug from outlet when not charging and before servicing.
- Do not use outdoors or on wet surfaces.
- The vacuum is not a toy. Do not allow children to play with the vacuum.
- Close supervision is necessary when the vacuum is used by persons (including children) with reduced physical, sensory, or mental capacities, or lack of experience and knowledge, unless they have been given supervision or instruction on how to use the vacuum and understand the hazards involved.
- Only use the vacuum as described in this manual.
- Do not use your vacuum if it is damaged or not working correctly, or if the charger or plug is damaged. Do not try to repair it yourself. Contact Customer Support .
- Do not handle the charger or vacuum with wet hands.
- Do not put any object into any opening. Do not use the vacuum with any opening blocked. Keep free of dust, lint, hair, or anything that may reduce air flow.
- Keep hair, loose clothing, fingers, and all body parts away from openings and moving parts.
- Use extra care when cleaning on stairs.
- Do not vacuum the following or use where they may be present:
- Large or sharp objects such as glass shards
- Flammable or combustible liquids such as solvents or detergents
- Inflammable or explosive substances such as gasoline or alcohol
- Risk of injury. Roller brush may start unexpectedly. Remove the main body before cleaning or servicing.
- Prevent unintentional starting. Ensure the switch is in the "Off" position before picking up or carrying the vacuum. Carrying the vacuum with your finger on the switch may cause accidents.
- Always turn the vacuum off before connecting or disconnecting the stick, nozzles, brushes, or vacuum head.
- Do not vacuum anything that is burning or smoking, such as cigarettes, matches, or hot ashes.
- Do not use without dust bin and filters in place.
- Do not point the vacuum at any person or animal while it is on.
- Store the vacuum on a small stand or flat surface, or hang it from the wall.
- Do not use aftermarket or third-party accessories with the vacuum. Only use the accessories provided.
Battery & Charger

Read all safety warnings and instructions. Failure to follow the warnings and instructions may result in electric shock, fire, and/or serious injury.
- Do not pull or carry the vacuum by the charging cable, use the cable as a handle, close a door on the cable, or pull the cable around sharp edges or corners. Do not run any appliance over the cable.
- Do not pull on the cable to remove it from the outlet. Only use the plug to pull it out from the outlet.
- Never place the charger or its cable near any heat source.
- Keep the charging cable out of areas where people walk often. Place the cable where it will not be tripped over.
- Do not use the charger to charge other appliances besides this vacuum.
- Only recharge the vacuum with the charger specified by Arovast Corporation. A charger that is suitable for one type of appliance may create a risk of fire when used with another battery pack. To request a new charger, contact Customer Support.
- Only use the battery pack specifically designed for this vacuum. Use of any other battery packs may create a risk of injury and fire. To request a new battery, contact Customer Support.
- When the battery pack is not in use, keep it away from other metal objects, like paper clips, coins, keys, nails, screws, or other small metal objects that can make a connection from one terminal to another. Shorting the battery terminals together may cause burns or a fire.
- Under abusive conditions, liquid may be ejected from the battery. Avoid contact. If contact occurs, flush with water. If liquid contacts eyes, immediately flush with water and seek medical help. Liquid ejected from the battery may cause irritation or burns.
- Do not use the battery pack or vacuum if they are damaged or modified. Damaged or modified batteries may exhibit unpredictable behavior resulting in fire, explosions, or risk of injury.
- Have servicing performed only by a qualified repair person using identical replacement parts. This will ensure that the safety of the vacuum is maintained.
- Do not modify or attempt to repair the vacuum or the battery pack except as indicated in the manual.
- Do not expose the battery pack or vacuum to fire or excessive temperatures. The battery used in this device may present a risk of fire or chemical burn if mistreated. Do not disassemble, short contacts, heat above 140°F (60°C), or incinerate.
- Follow all charging instructions and do not charge the battery pack or vacuum outside of the temperature range specified in the instructions. Charging improperly or at temperatures outside of the specified range may damage the battery and increase the risk of fire.
SAVE THESE INSTRUCTIONS
NOT FOR COMMERCIAL USE
HOUSEHOLD USE ONLY
GETTING TO KNOW YOUR VACUUM

- Control Panel
- HEPA-Type Pre-Filter
- Vacuum Body Release Button
- Stick
- Vacuum Head Release Button
- Vacuum Head
- Roller Brush Cushion
- Roller Brush
- LED Lights
- Roller Brush Release Button
- Telescoping Crevice Tool
- 2-in-1 Dusting Brush
- Charger
- Charging Port (Dock)
- Charging Dock with Accessory Holder
- Dust Bin
- Dust Bin Release Button
- Metal Filter
- Vacuum Body
- On/Off Trigger
- Handle
- Battery Release Button
- Charging Port (Body)
- Battery Indicator Lights
- HEPA-Type Main Filter
CONTROL PANEL

- Auto Mode Button
- Press to turn on Auto Mode (see Auto Mode).
- Automatically adjusts power to match the amount of dust.
- Increase or decrease power manually to exit Auto Mode.
- Increase/Decrease Power
- Press
![]() or
or ![]() to manually increase or decrease suction power.
to manually increase or decrease suction power.
- Press
- Dust Level Indicator
- Indicates the level of dust detected by the dust sensor.
- Power Level Indicator
- Indicates the level of vacuum suction power.
- Auto Mode Indicator
- Indicates when Auto Mode is active.
- Airflow Blockage Indicator
- Indicates that the vacuum airflow is blocked.
- Roller Brush Blockage Indicator
- Indicates that the roller brush is blocked (see Cleaning the Roller Brush).
 to manually increase or decrease suction power.
USING YOUR VACUUM
- Attach the vacuum head or nozzle attachment to the bottom of the stick and attach the vacuum body to the top of the stick [Figure 1.1].

Figure 1.1
![warning]() Note: There is a clicking sound when the parts are properly joined together.
Note: There is a clicking sound when the parts are properly joined together. - Charge the vacuum.
![warning]() Note: Fully charge the battery before first use.
Note: Fully charge the battery before first use. - Press the On/Off Trigger to turn the vacuum on.
- Press
![]() to use Auto Mode, or press
to use Auto Mode, or press ![]() or
or ![]() to manually control suction power.
to manually control suction power. - Press the On/Off Trigger to turn the vacuum off.

 to use Auto Mode, or press
 Battery Indicator Light Chart (During Use)
| Battery Level | Battery Indicator |
| 70–100% | 3 lights |
| 50–70% | 2 lights |
| 20–50% | 1 light |
| 0–20% | 1 flashing light |
Nozzle Attachments
Your vacuum comes with nozzle attachments to help you tackle almost any cleanup job.
Telescoping Crevice Tool
- Press button to extend the crevice nozzle [Figure 1.2].

Figure 1.2 - Use to clean hard-to-reach places.
- Good for reaching small cracks and crevices in furniture, the corners of a room, or a car.

2-in-1 Dusting Brush
- Press button to slide bristles up/down and switch between upholstery brush and duster [Figure 1.3].
![]()
Figure 1.3 - Use upholstery brush to clean soft furnishings and upholstery.
- Use bristles to dust and clean hard surfaces.

To use a nozzle attachment:
- Press and hold the Vacuum Body Release Button and gently pull the vacuum body from the stick [Figure 1.4].
![]()
Figure 1.4 - Slide the crevice tool or dusting brush onto the vacuum body [Figure 1.5].
![]()
Figure 1.5 - Optionally, leave the stick attached to the vacuum body and press the Vacuum Head Release Button to remove the vacuum head. Then, attach the nozzle or brush to the end of the stick [Figure 1.6].
![]()
Figure 1.6


 Note: You can also attach the vacuum body directly to the vacuum head [Figure 1.7].

Figure 1.7
Auto Mode
Auto Mode utilizes DPC Technology™ (Dynamic Power Control Technology), which uses infrared sensors to automatically detect the amount of dust and debris that is traveling through the vacuum, and then adjusts the suction power to accommodate the amount of dust. If there is more dust, the suction power will be higher, and if there is less dust, the suction power will be lower.
| Dust Level | Power Level |
 | 1 |
 | 2 |
 | 3 |
 | 4 |
 | 5 |
CARE & MAINTENANCE
Battery Installation
- Turn the vacuum off. Press the Battery Release Button and remove the battery.
- To reinstall, slide the battery into the slot in the vacuum body [Figure 2.1].
![]()
Figure 2.1
There will be a clicking sound when the battery is properly installed.

Note:
- To maintain the life of the battery, store the vacuum in a cool, dry place.
- Store the battery in a semi-charged state (at least half charged).
Charging the Vacuum
Your vacuum uses a 2500mAh Li-ion battery. On a full charge, the battery lasts approximately 40 minutes on power level 1. Use the included charger/charging dock to charge the vacuum.
Note: Make sure the vacuum is turned off before charging.
- Insert the charger into the charging port on the vacuum body [Figure 2.2].
![]()
Figure 2.2 - Plug the charger into an outlet. The battery indicator lights will blink while charging [Figure 2.3].
![]()
Figure 2.3
![warning]() Note: Charging time is about 4–5 hours.
Note: Charging time is about 4–5 hours.
- When the vacuum is fully charged, the 3 battery indicator lights will turn solid and turn off after 1 minute.
![warning]() Note: The battery can also be removed and charged separate from the vacuum body [Figure 2.4].
Note: The battery can also be removed and charged separate from the vacuum body [Figure 2.4].
![]()
Figure 2.4


Alternatively, the vacuum can be charged on the charging dock.
- Mount the charging dock by screwing it into the wall near a power outlet [Figure 2.5].
![]()
Figure 2.5

Note:
- The charging dock must be high enough on the wall to allow the vacuum to stand up.
- Make sure that the wall is free of gas pipes, water pipes, electrical cables, and wires.
- Insert the charger into the charging port on the dock. Plug the charger into the outlet [Figure 2.6 & 2.7].

Figure 2.6 & 2.7
- Hang the vacuum on the charging dock [Figure 2.7]. The battery indicator lights will blink while charging.
![warning]() Note: The nozzle attachments can also be stored on the charging dock.
Note: The nozzle attachments can also be stored on the charging dock.
- When the vacuum is fully charged, the 3 battery indicator lights will turn solid and turn off after 1 minute.

Battery Indicator Light Chart (While Charging)
| Battery Level | Battery Indicator |
| 0–30% | 3 flashing lights |
| 30–60% | 1 solid light & 2 flashing lights |
| 60–85% | 2 solid lights & 1 flashing light |
| 85–100% | 3 solid lights |
- Only charge the battery with the charger specified by Arovast Corporation.
- If you are not using the battery for an extended period, store it in a cool, dry place.
- Store the battery in a semi-charged state (at least half charged) and maintain this by charging the battery every 3 months.
- If you need an additional battery, contact Customer Support.
Emptying the Dust Bin
When dust in the dust bin reaches the MAX line, empty the dust bin.

Figure 2.8
- Turn the vacuum off. Remove the vacuum body by pressing the Vacuum Body Release Button.
- Hold the dust bin over a trash can and press the Dust Bin Release Button [Figure 2.8]. Use caution, as the door will automatically open when the release button is pushed.
- Empty out debris and dirt, then close the door.
CLEANING
Cleaning the Vacuum Body
- Turn the vacuum off.
- Wipe the vacuum body down with a damp cloth.
- Allow the vacuum body to completely dry before using.
Note: Do not allow water to enter the internal parts or motor of the vacuum.
Cleaning the Dust Bin & Metal Filter
- Make sure the vacuum is off and the dust bin is completely empty before cleaning (see Emptying the Dust Bin).
- Rotate the dust bin clockwise to remove it [Figure 3.1]. Empty out any remaining dust and debris.

Figure 3.1
- Rotate the metal filter clockwise to remove it [Figure 3.2].

Figure 3.2 - Rinse the dust bin and metal filter with water and allow them to dry. Make sure the parts are completely dry before using.
- Reattach the metal filter and dust bin to the vacuum body [Figure 3.3].
![]()
Figure 3.3


Note: Do not allow water to enter the internal parts or motor of the vacuum.
Cleaning the HEPA-Type Filters
To maintain the performance of your filters, they should be routinely washed and replaced.
- The pre-filter should be washed once a month and replaced after 6 months.
- The main filter should be washed once every 6 months and replaced after 1 year.
Replacement Filters: To maintain the performance of your vacuum, only use official Levoit filters. For more information, contact Customer Support.
HEPA-Type Pre-Filter
- Pull up on the pre-filter housing to remove it from the top of the vacuum body [Figure 3.4].

Figure 3.4 - Rotate the pre-filter counterclockwise to remove it from the housing [Figure 3.5].

Figure 3.5
- Gently tap the pre-filter over a trash can to remove dust and debris.
- If necessary, run the pre-filter under running water to wash it. Allow it to dry for 24 hours before reinstallation.


HEPA-Type Main Filter
- Rotate the main filter housing counterclockwise to remove it from the back end of the vacuum body [Figure 3.6].
![]()
Figure 3.6 - Rotate the main filter counterclockwise to remove it from the housing [Figure 3.7].

Figure 3.7 - Gently tap the main filter over a trash can to remove dust and debris.
- If necessary, run the main filter under running water to wash it. Allow it to dry for 24 hours before reinstallation.


Cleaning the Roller Brush
Clean the roller brush every 4–5 uses to avoid blockage or jamming.
- Turn the vacuum off. Detach the vacuum head from the stick by pressing the Vacuum Head Release Button.
- Press the Roller Brush Release Button and pull out the roller brush [Figure 3.8].

Figure 3.8
- Carefully use a pair of scissors or a sharp knife to remove any hair or debris tangled around the roller brush.
- Insert the roller brush back into the vacuum head. Slide the side panel up to lock it in place [Figure 3.9].

Figure 3.9


STORAGE
When the vacuum is not in use, store it on the charging dock:
- Mount the charging dock by screwing it into the wall (see Charging the Vacuum).
- Hang the vacuum on the charging dock [Figure 4.1]
![]()
Figure 4.1
- Place the nozzle attachments in the slots on the charging dock.

Note:
- Always store the vacuum on flat ground. If the vacuum is stored on a slanted surface it may fall and be damaged.
- If storing for long periods of time, periodically charge the battery to preserve the life of the battery.
Disposing of the Battery
- The battery contains materials that are harmful to the environment and must be removed from the vacuum before it is discarded.
- When removing the battery, the vacuum must be turned off.
- Discarded batteries should be handled properly. Do not put batteries into fire, water, or soil.
- If battery leakage touches skin or clothing, flush with water immediately to avoid skin injury and seek medical help.
TROUBLESHOOTING
| Problem | Possible Solution |
| Vacuum will not turn on | The battery is not installed correctly (see Battery Installation). |
| Recharge the vacuum (see Charging the Vacuum). | |
| The vacuum motor overheated. Empty the dust container and check for blockage inside the vacuum head and stick. Remove any blockage and clean the filters (see Cleaning). Allow the vacuum to cool for 1 hour before turning it back on. | |
| Vacuum is not charging | The charger is not properly plugged in (see Charging the Vacuum). |
| Roller brush is not turning | Clean the roller brush and remove any debris blocking the brush (see Cleaning the Roller Brush). |
| Vacuum makes an abnormal noise | Clean the roller brush and remove any debris blocking the brush (see Cleaning the Roller Brush). |
| Check for blockage inside the vacuum body, vacuum head, and stick. Remove any blockage (see Cleaning). | |
| Vacuum has low suction power | Battery may be low. Recharge the battery to full charge (see Charging the Vacuum). |
| Clean the roller brush and remove any debris blocking the brush (see Cleaning the Roller Brush). | |
| The dust bin and filters may be full. Empty the dust bin and clean the filters (see Cleaning). | |
| Check for blockage inside the vacuum body, vacuum head, and stick. Remove any blockage (see Cleaning). |
If your problem is not listed, please contact Customer Support.
Questions or Concerns?
Please contact us Mon–Fri, 9:00 am–5:00 pm PST/PDT
at support@levoit.com
or at (888) 726-8520.

Documents / ResourcesDownload manual
Here you can download full pdf version of manual, it may contain additional safety instructions, warranty information, FCC rules, etc.
Download Levoit VortexIQ 40, LSV-VF401-AUS - Cordless Stick Vacuum Manual
Advertisement


Need help?
Do you have a question about the VortexIQ 40 and is the answer not in the manual?
Questions and answers