
Subscribe to Our Youtube Channel
Related Manuals for Nite Devil 24C


Summary of Contents for Nite Devil 24C
- Page 1 Instruction Manual NiteDevil 24C Camera SEE705 5MP Eyeball 2.8mm Built In Mic © 2022 System Q Ltd NiteDevil.com...
-
Page 2: Table Of Contents
xSEE705 Table of Contents Part 1 Introduction 1 SEE705 ..........................1 Part 2 Tools & Handy Extras Part 3 Connections Part 4 4-In-1 Technology Part 5 OSD Menu 1 5MP OSD Menu ....................... 4 2 Key Menu Settings ......................5 Part 6 Audio Over COAX Part 7 Troubleshooting 1 Camera Rebooting / Turning Off .................. -
Page 3: Part 1 Introduction
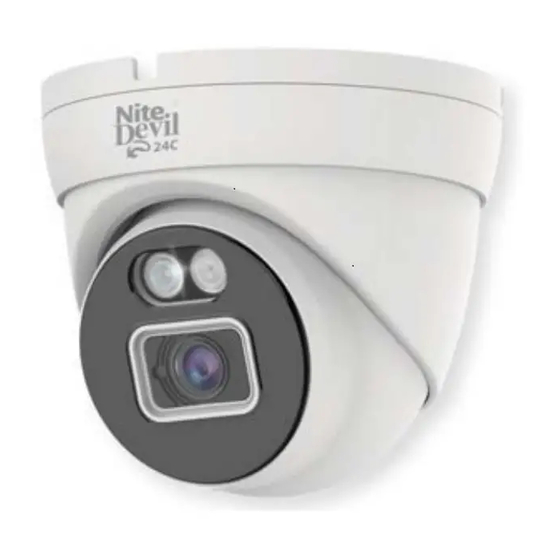
Introduction 1.1 SEE705 The all new NiteDevil® 24C can stay in full colour around the clock using the minimal amount of natural light to produce superb full colour images. It really is a game changer in performance and should be used as a part of any CCTV system requiring full colour images in key areas around entrances etc. -
Page 4: Part 3 Connections
xSEE705 Connections The camera has a 2.1mm socket which requires 12V DC, use a regulated power supply rated above the current draw of the camera. The camera is polarity sensitive so connections must be correctly made. The camera has a standard BNC connector for video output, the output can be changed to AHD, CVI or CVBS if required in the menu 4-In-1 Technology Selectable HD-TVI, HD-CVI, AHD and CVBS (Analogue) Output. -
Page 5: Part 5 Osd Menu
OSD Menu OSD Menu Access to the camera menu is by Coaxitron. For the ZIP DVRs, ZIP Coaxitron is set as default. To access the Cameras Menu via coaxitron:- 1. Click on the image in Live view 2. Click on the PTZ button at the bottom of the screen 3. -
Page 6: 5Mp Osd Menu
xSEE705 5.1 5MP OSD Menu Video Mode TVI / AHD / CVI / CVBS Format 5M20 / 4M25 / 4M30 / 2M25 / 2M30 Language English / Spanish / French / Chinese Exposure Exposure Mode Global High / Middle / Low Back Exit Save –... -
Page 7: Key Menu Settings
OSD Menu 5.2 Key Menu Settings Exposure Mode - AUTO / GLOBE / GLOBAL sets the required shutter speed for the current light level. The shutter speed will automatically detect the required length of time to keep the digital sensor exposed to light. FLK option sets the shutter speed to stop synchronisation with lighting so that pulsing effect is minimised. -
Page 8: Part 6 Audio Over Coax
xSEE705 Audio Over COAX (March 2022) As of writing this , the Audio over COAX (Coaxial Audio) is compatible with the ZIP SUPA-S range of recorders. *Note the standard SUPA recorders are not compatible with Audio over COAX. To enable, in the menu on the SUPA-S go to System > General > Audio Input Type Select Coaxial Audio Select Apply 31/03/2022... -
Page 9: Part 7 Troubleshooting
Troubleshooting Troubleshooting 7.1 Camera Rebooting / Turning Off A. Check the voltage to the camera (under load) using a digital multi-meter, if below 10.8V then move the power supply closer to the camera. B. For 12V DC cameras, only use regulated power supply rated above the current consumption, so that the camera is always receiving the correct supply which is rated above the current consumption. -
Page 10: Part 8 General Maintenance
xSEE705 C. Use thicker gauge copper cabling to reduce the voltage drop to the camera, using thicker cable will reduce the resistance between the camera and the power supply and therefore reduce the voltage dropped along the cable. D. Ensure that the BNC – BNC lead that is connected between the camera and DVR has no shorts between the ground and the centre core (positive) or open circuits along the centre core (positive) or open circuits along the ground. -
Page 11: Part 9 Specification
2.8mm Fixed Lens Image Output 1 Volt Peak-Peak 75 ohm Min.Illumination 0 Lux IR On Day/Night 24C / Mechanical IR (True Day-Night) InfraRed LEDs 2 White LEDs / 2 IR LEDs IR Range Audio Built In Mic (Audio over COAX) -
Page 12: Part 10 Conditions
xSEE705 Conditions 10.1 General Company Disclaimer All specifications are approximate. System Q Ltd reserves the right to change any product specifications or features without notice. Whilst every effort is made to ensure that these instructions are complete and accurate, System Q Ltd cannot be held responsible in any way for any losses, no matter how they arise, from errors or omissions in these instructions, or the performance or non-performance of the equipment that these instructions refer to. -
Page 13: Index
Index Index - V - Video Loss - A - Voltage drop - W - Adjustment - C - WEEE Declaration Cleaning Connections Copyright - D - Declaration Dimensions Disclamer - G - General Disclaimer - H - Handy Extras - M - Maintenance - O -...
Need help?
Do you have a question about the 24C and is the answer not in the manual?
Questions and answers