
Related Manuals for Bante Instruments 9 Series


Summary of Contents for Bante Instruments 9 Series
- Page 1 Bante 9 series Benchtop pH/ORP/Ion/Conductivity/DO Meters USER MANUAL Bante Instruments Inc.
-
Page 2: Table Of Contents
Contents General Guide Introduction ………………………………………………… 03 • Environmental Conditions ……………………………… 03 • Packing List …………………………………………… 03 Meter Overview .….………………………………………… 04 • Connectors …………………………………………… 04 • Display ………………………………………………. 05 • Keypad ………………………………………………. 05 Installing the Electrode Holder ………………………………. 05 Connection …………………………………………………. 06 •... - Page 3 Contents Dissolved Oxygen Prior to Use …………………………………………………. 19 Prior to Use …………………………………………………. 35 • Filling the Electrolyte Solution ……….…………………. 35 Ion Settings …………………………………………………. 19 • Polarizing the Electrode ………………………………… 35 Temperature Compensation …………………………………. 20 • Selecting the Measurement Mode ………………………. 35 •...
-
Page 4: General Guide
General Guide Introduction Thank you for selecting the 9 series water quality meter, this product series includes models below. Single Parameter Meters Model Measurement Parameters pH, mV, ORP pH, mV, ORP, ion Ion, mV Water hardness Conductivity, TDS, salinity, resistivity... -
Page 5: Meter Overview
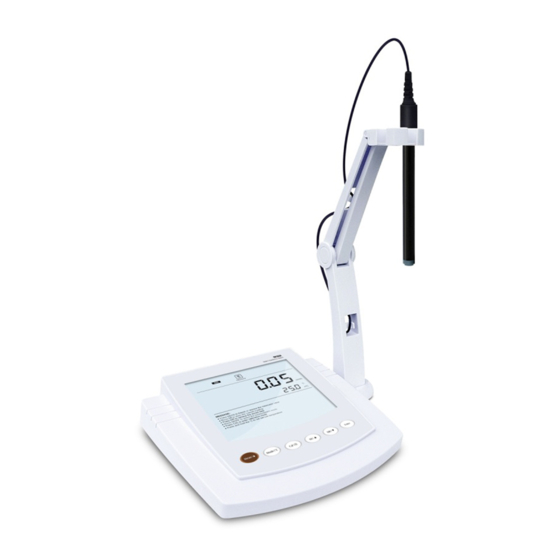
General Guide Meter Overview USB cable, power adapter pH electrode, pH buffer reagents Ion selective electrode, standard solutions, ionic strength adjuster Sensor connections Base plate of electrode arm Display Membrane keypad Conductivity electrode, conductivity standard solutions Connectors Dissolved oxygen electrode, electrolyte solution, membrane cap Temperature probe Socket for pH, ORP or ion selective electrode (BNC) Model / Components... -
Page 6: Display
General Guide Display Keypad Function • Switch the meter on or off • Lock or unlock the measurement • Exit the calibration, settings, data logs and return to the measurement mode • Select the measurement mode • Press and hold the key to enter the temperature setting •... -
Page 7: Connection
General Guide Adjusting the Electrode Arm After installation, if the electrode arm automatically rises or falls, you. • For the Conductivity Electrode: are able to adjust the screw until arm locate at any position. Insert 6-pin connector into the connector socket labeled COND. Remove the plastic cover from the right side of the electrode arm. -
Page 8: General Settings
1.2 Press the key to select a menu item. The 9 series meter contains an integrated setup menu for customizing the function parameters. In the different modes, the display will show the corresponding menu items. For the general settings, the option will be applied to all modes once setting is changed. -
Page 9: Setting The Date And Time
2.2 Press the key until the meter shows (date). The 9 series meter is supplied with a TP-10K temperature probe for measurement and temperature compensation. If the measured temperature reading differs from that of an accurate thermometer, the probe needs to be calibrated. -
Page 10: Prior To Use
3M KCl solution Preparation of pH Buffer Solutions pH Calibration and Measurement The 9 series meter is packaged with the pH 4.01, 7.00, 10.01 buffer sachets required for calibration. This section is applicable to models 2.1 Half fill a 250 ml volumetric flask with distilled water and add the pH 7.00 buffer reagent. -
Page 11: Selecting The Measurement Mode
Selecting the Measurement Mode Press the Mode key until the If you want to change the current settings, press and hold the icon appears on the display, the meter enters the pH measurement mode. to enter the setup menu. Press the / key to select an option and press the Enter key to confirm. -
Page 12: Ph Calibration
1.4 Press the Enter key, the Calibration icon begins flashing. pH Calibration The 9 series meter allows 1 to 5 points calibration in the pH mode. We recommend that you perform at least 2 points calibration for high accuracy measurement. The meter will automatically recognize and calibrate to following standard buffer values. -
Page 13: Ph Calibration With Custom Buffers
3.4 If necessary, press the / key to set the calibration value, 2.4 When the reading has stabilized, the display will show ---/CAL3. press the Enter key to begin the calibration. The meter prompts you to continue with third point calibration. 2.5 Repeat the step 2.3 above until the meter shows Calibration is completed. -
Page 14: Viewing The Calibration Log
Viewing the Calibration Log 4.1 Press the MR key in the pH measurement mode and press the pH Measurement key until the meter shows (Electrode / Page 2). 4.2 Press the Enter key, the meter shows the last calibration date. Rinse the pH electrode with distilled water. -
Page 15: Electrode Maintenance
Electrode Maintenance Appendix Cleaning the pH Electrode Preparation of Electrode Storage Solution Since pH electrode is susceptible to contamination, thoroughly clean • Dissolve 24.6 grams of analytical grade potassium chloride (KCl) as necessary after each use. reagent in 100 ml distilled water. •... -
Page 16: Orp
Prior to Use The 9 series meter is capable of measuring the oxidation reduction potential of aqueous solutions through connecting an ORP electrode, selectable sensor includes following options. Order Code Description For measuring the sample with strong redox potential For measuring the sample with weak redox potential Connect the ORP electrode to the meter (refer to the Connection section on page 6). -
Page 17: Orp Settings
7. Month - ORP Calibration The 9 series meter allows 1 point calibration in the ORP mode, but calibration is not necessary unless exact readout agreement with a work standard and at a specific ORP value is needed. -
Page 18: Mv Measurement
mV Measurement Electrode Maintenance Rinse the ORP electrode with distilled water. Place the electrode • Rinse the ORP electrode thoroughly with distilled water after use. into the sample solution and stir gently. Note, the sensing • In the corrosive chemicals, viscous solutions and solutions with element and liquid junction must be completely immersed into heavy metals or proteins, take readings quickly and rinse the solution. -
Page 19: Appendix
Appendix Preparation of ORP Standard Solutions Quinhydrone solution A: Dissolve 3 grams of quinhydrone reagent in 500 ml of the pH 4.01 buffer solution, stir the solution for 10 minutes. Undissolved quinhydrone reagent must be present. If necessary, add the reagent. Temperature Potential (±... -
Page 20: Prior To Use
Prior to Use Connect the ion selective electrode to the meter (refer to the Connection section on page 6). Remove the protective cap and soak the electrode in a 100 ppm standard solution for about 10 minutes. 10 min. Selecting the Measurement Mode Press the Mode key until the icon appears on the display, the meter enters the ion concentration measurement mode. -
Page 21: Temperature Compensation
Calibration Points Set the number of calibration points. 2 to 5 points (default 2 points) Ionic Valency Set the ion valence of electrode. Monovalent (default) Divalent If you want to change the current settings, press and hold the to enter the setup menu. Press the / key to select an option and press the Enter key to confirm. -
Page 22: Ion Calibration
Ion Calibration The 9 series meter allows 2 to 5 points calibration in the ion mode, acceptable calibration points include the following options. Measurement Unit Calibration Points 1.4 Press the Enter key, the Calibration icon begins flashing. 0.001, 0.01, 0.1, 1, 10, 100, 1000, 10000 mg/L 0.001, 0.01, 0.1, 1, 10, 100, 1000, 10000... -
Page 23: Viewing The Calibration Log
2.4 Press the key to view the next data set. 1.8 When the reading has stabilized, the display will show CAL3. 2.5 To exit the calibration log, press the Meas key. The meter prompts you to continue with third point calibration. 1.9 Repeat the steps 1.6 and 1.7 above until the meter shows Calibration is completed. -
Page 24: Ion Measurement
Ion Measurement Electrode Maintenance Rinse the ion selective electrode with distilled water. Place the • Rinse the ion selective electrode thoroughly with distilled water electrode (and temperature probe) into the sample solution and after use, wipe clean with a lint-free tissue, then replace stir gently. -
Page 25: Optional Accessories
Ionic Strength Adjusters Swirl the volumetric flask gently to dissolve the reagent and fill to the mark with distilled water. Order Code Description Volume Cap and upend the volumetric flask several times to mix the ISA-NH4 Ammonium (NH 480 ml solution. -
Page 26: Water Hardness
Water Hardness Prior to Use Connect the water hardness electrode to the meter (refer to the Connection section on page 6). Remove the protective cap and soak the electrode in a 10 mmol/L standard solution for about 10 minutes. 10 min. Selecting the Measurement Mode The meter contains 8 water hardness measurement modes. -
Page 27: Temperature Compensation
Water Hardness Refer to the Setting a Default Option section for detailed Water Hardness Calibration instructions on page 7. The 932 meter allows 2 to 5 points calibration with standard solutions, acceptable calibration points include the following options. Temperature Compensation Measurement Unit Calibration Points In order to get accurate measurement results, we recommend that all... -
Page 28: Viewing The Calibration Log
Water Hardness 1.4 Rinse the water hardness electrode with distilled water, then rinse with a small amount of standard solution. Place the electrode (and temperature probe) into the standard solution (e.g., 10 mmol/L), stir gently to create a homogeneous solution. 1.9 When the reading has stabilized, the display will show CAL3. -
Page 29: Water Hardness Measurement
Water Hardness Water Hardness Measurement Electrode Maintenance Rinse the water hardness electrode with distilled water. Place • Rinse the water hardness electrode thoroughly with distilled the electrode (and temperature probe) into the sample solution water after use, wipe clean with a lint-free tissue, then replace and stir gently. -
Page 30: Conductivity/Tds/Salinity/Resistivity
Conductivity Prior to Use Connect the conductivity electrode to the meter (refer to the Connection section on page 6). Soak the electrode for about 10 minutes in tap water to remove dirt and oil stains on the sensor surface. 10 min. Selecting the Measurement Mode Press the Mode key, the meter will show the conductivity (COND), TDS, salinity (SAL) and resistivity (RES) icons. -
Page 31: Temperature Compensation
Refer to the Setting a Default Option section for detailed instructions on page 7. The 9 series meter is capable of using three types of the conductivity electrodes. Before the calibration and measurement, ensure that you have selected a suitable electrode according to the anticipated sample conductivity. -
Page 32: Conductivity Calibration
Conductivity Calibration the sensor. Automatic Calibration The 9 series meter allows 1 to 5 points calibration in the conductivity mode. Before calibration, ensure that selected cell constant (K = 0.1, 1, 10) matches connected electrode. If you have selected the manual calibration ( ), the meter will wait to enter a cell constant. -
Page 33: Multipoint Calibration
(Electrode / Page 2). The 9 series meter provides an easy manual calibration mode. If the 4.2 Press the Enter key, the meter shows the last calibration date. conductivity standard solution is not ready, you are able to use this method to calibrate the meter. -
Page 34: Measurements
Conductivity Measurements Electrode Maintenance • Rinse the conductivity electrode thoroughly with distilled water Press the Mode key to select the measurement mode. • In the total dissolved solids (TDS) mode, ensure that you have set after use. a correct conductivity-to-TDS conversion factor in the setup menu •... -
Page 35: Calculating The Temperature Coefficient
Conductivity Where: Optional Accessories = Cell constant Conductivity Electrodes = Value of conductivity standard solution = Measured value meas Order Code Description = Raw cell constant (0.1, 1 or 10) CON-0.1 For measuring the pure water Calculating the Temperature Coefficient CON-1 For general purpose applications Do not connect the temperature probe to the meter. -
Page 36: Dissolved Oxygen
Dissolved Oxygen Prior to Use Filling the Electrolyte Solution 1.1 Take out the dissolved oxygen electrode and electrolyte solution from the packaging. Unscrew the membrane cap from the bottom of the electrode, rinse the inside and outside with distilled water and blot dry. -
Page 37: Dissolved Oxygen Settings
Milligrams per liter (default) Dissolved Oxygen Calibration Parts per million The 9 series meter allows 1 or 2 points calibration in the dissolved mmHg Millimeter of mercury (default) oxygen mode. If you have selected the 1 point calibration in the setup... -
Page 38: Do Calibration In Mg/L Or Ppm Mode
Dissolved Oxygen DO Calibration in mg/L or ppm Mode 1.1 Press the Mode key to enter the dissolved oxygen concentration mode and select the 1 point calibration in the setup menu. 1.2 Press the Cal key, the display shows 8.25 mg/L / CAL1 (@25° C). 2.4 When the reading has stabilized, the display will show 8.25 mg/L / CAL 2 (@25°... -
Page 39: Dissolved Oxygen Measurement
Electrode Maintenance • Rinse the dissolved oxygen electrode thoroughly with distilled The 9 series meter can be used to measure the water, wastewater, water after use. brine and other liquids. If your sample is seawater or water containing large amounts of salt, make sure to set the salinity coefficient before •... -
Page 40: Data Management
Data Management Data Management The 9 series meter is capable of storing and recalling up to 500 data sets. Storing a Measurement Result During the measurement, press the MI key to store the reading into the memory, the Memory icon appears on the display. -
Page 41: Clearing The Data Logs
1.4 Press the key to view the stored data. Communication The 9 series meter is capable of transferring the data to a computer or importing the data to Excel by a free DAS software. You are able to download this software from our official website. Before installation, make sure that the Windows 10 operating system has been installed on your computer. -
Page 42: Specifications And Troubleshooting
Specifications Meter Specifications Range -2.000 to 20.000 pH Resolution 0.001, 0.01, 0.1 pH Accuracy ± 0.002 pH Calibration Points 1 to 5 points USA (pH 1.68, 4.01, 7.00, 10.01, 12.45) pH Buffer Options NIST (pH 1.68, 4.01, 6.86, 9.18, 12.45) DIN (pH 1.09, 4.65, 6.79, 9.23, 12.75) Temperature Compensation 0 to 100°... - Page 43 Troubleshooting Other Specifications Accuracy ± 0.5% F.S. Memory 500 data sets Calibration Points 1 to 5 points Communication Interface USB-B 10 µ S/cm, 84 µ S/cm, 1413 µ S/cm, Calibration Solutions Operating Temperature 0 to 50° C (32 to 122° F) 12.88 mS/cm, 111.8 mS/cm Storage Temperature 0 to 60°...
- Page 44 Tel: (+1) 346-762-7358 E-mail: banteinstruments@yahoo.com Factory: F3, Building 2, No.2185, Laifang Rd., Shanghai 201615, China Tel: (+86) 21-6404-1598 E-mail: banteinstrument@hotmail.com The information in this document is subject to change without notice. www.bante-china.com Copyright © Bante Instruments Inc, 2022. All rights reserved.
Need help?
Do you have a question about the 9 Series and is the answer not in the manual?
Questions and answers