Table of Contents
Advertisement
Available languages
Available languages
Quick Links
Advertisement
Chapters
Table of Contents

Subscribe to Our Youtube Channel
Related Manuals for Electrolux KEGB9410W


Summary of Contents for Electrolux KEGB9410W
- Page 1 KEGB9410W Dishwasher User Manual Lavavajillas Manual de instrucciones...
-
Page 2: Table Of Contents
6. BASIC SETTINGS ................... 11 7. WIRELESS CONNECTION................15 8. BEFORE FIRST USE..................16 9. DAILY USE....................... 17 10. HINTS AND TIPS................... 20 11. CARE AND CLEANING..................22 12. TROUBLESHOOTING..................26 13. TECHNICAL INFORMATION................. 31 14. ENVIRONMENTAL CONCERNS..............32 My Electrolux Kitchen app... -
Page 3: Safety Information
ENGLISH WE’RE THINKING OF YOU Thank you for purchasing an Electrolux appliance. You’ve chosen a product that brings with it decades of professional experience and innovation. Ingenious and stylish, it has been designed with you in mind. So whenever you use it, you can be safe in the knowledge that you’ll get great results every time. - Page 4 Children between 3 and 8 years of age and persons • with very extensive and complex disabilities shall be kept away from the appliance unless continuously supervised. Children of less than 3 years of age should be kept •...
-
Page 5: Safety Instructions
13 A ASTA (BS 1362) fuse (UK and suitable place that meets installation Ireland only). requirements. 2.3 Water connection www.youtube.com/electrolux www.youtube.com/aeg • Do not cause damage to the water hoses. How to install your 60 cm • Before connection to new pipes, pipes... - Page 6 2.6 Service • To repair the appliance contact the Authorised Service Centre. Use original spare parts only. • Please note that self-repair or non- professional repair can have safety consequences and might void the guarantee. • The following spare parts will be...
-
Page 7: Product Description
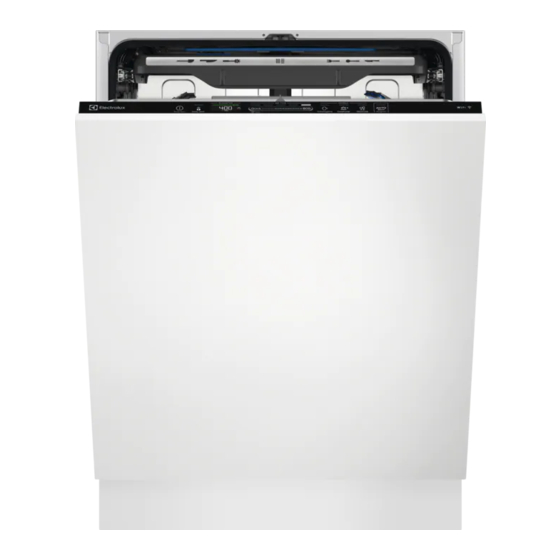
ENGLISH • Remove the door catch to prevent children and pets to get closed in the appliance. 3. PRODUCT DESCRIPTION Ceiling spray arm Rinse aid dispenser Upper spray arm Detergent dispenser Lower spray arm Lower basket Filters Upper basket Rating plate Cutlery drawer Salt container Air vent... -
Page 8: Control Panel
4. CONTROL PANEL On/Off button / Reset button MY TIME selection bar Delay Start button / Remote start EXTRAS buttons button AUTO Sense program button Display 4.1 Display 4.2 ECOMETER The ECOMETER indicates how the programme selection impacts energy and water consumption. -
Page 9: Programme Selection
ENGLISH 5. PROGRAMME SELECTION 5.1 MY TIME 5.2 AUTO Sense MY TIME selection bar allows to select a The AUTO Sense programme suitable dishwashing cycle based on automatically adjusts the dishwashing programme duration. cycle to the type of load. The appliance senses the degree of soil and the amount of dishes in the baskets. - Page 10 Programme Dishwasher Degree of Programme phases EXTRAS load soil • Prewash Not applicable Pre-rinse Crockery, Fresh, lightly • Dishwashing 60 °C • ExtraPower cutlery dried-on • Intermediate rinse • GlassCare • Final rinse 50 °C • ExtraHy‐ • AirDry...
-
Page 11: Basic Settings
ENGLISH Water (l) Energy (kWh) Duration (min) 1)2) Programme 2h 40min 11 - 13.5 1.12 - 1.26 0.757 AUTO Sense 10.4 - 13.3 0.76 - 1.22 120 - 170 Machine Care 9.7 - 11.8 0.60 - 0.73 1) The pressure and the temperature of the water, the variations of the mains supply, the options, the quantity of dishes and the degree of soil can change the values. - Page 12 For each setting, a The lights related to the Previous, OK dedicated bar of the ECOMETER and Next are on. flashes. How to change a setting The order of the basic settings presented in the table is also the order of the...
- Page 13 ENGLISH Water hardness German de‐ French de‐ mmol/l Clarke de‐ Water softener grees (°dH) grees (°fH) grees level 47 - 50 84 - 90 8.4 - 9.0 58 - 63 43 - 46 76 - 83 7.6 - 8.3 53 - 57 37 - 42 65 - 75 6.5 - 7.5...
- Page 14 This activity Acoustic signals sound also increases the total water consumption of when a malfunction of the a programme by additional 4 litres and appliance occurs. It is not the total energy consumption of a possible to deactivate these programme by additional 2 Wh.
-
Page 15: Wireless Connection
• Mobile device connected to the Kitchen app. This functionality allows you wireless network. to remotely control and monitor your 1. Launch My Electrolux Kitchen app on dishwasher. your mobile device and follow the My Electrolux Kitchen app can be instructions in the app. -
Page 16: Before First Use
7.2 How to deactivate the Refer to "Daily use" to activate the remote start. wireless connection 7.4 How to reset the network Press and hold simultaneously credentials for 2 seconds. If you want to connect to a different • The indicator is off. -
Page 17: Daily Use
ENGLISH CAUTION! The compartment (B) is for rinse aid only. Do not fill it with detergent. CAUTION! Only use rinse aid designed specifically for dishwashers. 6. Turn the cap of the salt container 1. Open the lid (C). clockwise to close the salt container. 2. - Page 18 9.1 Using the detergent How to activate the remote start Make sure that the indicator on and your dishwasher is added in My Electrolux Kitchen app. If not, refer to "Wireless connection". 1. Press • The light related to the button is •...
- Page 19 ENGLISH 9.4 How to select and start the • The display shows the longest possible program duration. programme Pre-rinse 2. Close the appliance door to start the program. 1. To select Pre-rinse, press and The appliance senses the type of load hold for 3 seconds.
-
Page 20: Hints And Tips
9.10 Opening the door while 9.11 The Auto Off function the appliance operates This function saves energy by switching the appliance off when it is not operating. Opening the door while a programme is running pauses the wash cycle. The... - Page 21 ENGLISH • You can use dishwasher detergent, • Make sure that the water softener rinse aid and salt separately or you level is correct. If the level is too high, can use the multi-tablets (e.g. ''All in the increased quantity of salt in the 1'').
-
Page 22: Care And Cleaning
10.6 Unloading the baskets • Put hollow items (cups, glasses and pans) with the opening facing 1. Let the tableware cool down before downwards. you remove it from the appliance. Hot • Make sure that glass items do not items can be easily damaged. - Page 23 ENGLISH toothpicks, etc) decrease the cleaning performance and can cause damage to the drain pump. CAUTION! If unable to remove the foreign objects, contact an Authorised Service Centre. 1. Disassemble the filters system as 2. Remove the filter (C) out of filter (B). instructed in this chapter.
- Page 24 8. Put back the filter (B) in the flat filter (A). Turn it clockwise until it locks. 3. To install the spray arm back, press it downwards. CAUTION! An incorrect position of the filters can cause bad washing results and damage to the appliance.
- Page 25 ENGLISH toothpick, to remove particles of soil from the holes. 1. Release the stoppers on the sides of the sliding rails of the cutlery drawer and pull the drawer out. 4. To install the spray arm back, press the spray arm upwards and simultaneously turn it counterclockwise until it locks into place.
-
Page 26: Troubleshooting
5. To install the spray arm (C) back, insert the mounting element (B) in the spray arm and fix it in the delivery tube (A) by turning it clockwise. Make sure that the mounting element locks into place. 6. Install the cutlery drawer on the sliding rails and block the stoppers. - Page 27 ENGLISH Problem and alarm code Possible cause and solution The appliance does not • Make sure that the sink spigot is not clogged. drain the water. • Make sure that the interior filter system is not clog‐ The display shows i20. ged.
- Page 28 Problem and alarm code Possible cause and solution The displayed programme • Refer to the consumption values table in the chapter duration is different than "Programme selection". the duration in the con‐ sumption values table. The remaining time in the •...
- Page 29 ENGLISH The PNC can be found on the rating WARNING! plate on the appliance door. You can We do not recommend using also check the PNC on the control panel. the appliance until the Before checking the PNC, make sure the problem has been appliance is in the programme selection.
- Page 30 Problem Possible cause and solution Unusual foam during wash‐ • Use the detergent designed specifically for dish‐ ing. washers. • Use a detergent from a different manufacturer. • Do not pre-rinse dishes under running water. Traces of rust on cutlery.
-
Page 31: Technical Information
ENGLISH 12.3 Problems with wireless connection Problem Possible cause and solution Activating wireless connec‐ • Wrong wireless network ID or password. Cancel tion is not successful. the setup and start it again to enter the correct cre‐ dentials. Refer to "Wireless connection". •... -
Page 32: Environmental Concerns
Capacity Place settings 1) Refer to the rating plate for other values. 2) If the hot water comes from alternative source of energy (e.g. solar panels), use the hot water supply to decrease energy consumption. 13.1 Link to the EU EPREL EPREL database using the link https:// eprel.ec.europa.eu and the model name... - Page 33 6. AJUSTES BÁSICOS ..................43 7. CONEXIÓN INALÁMBRICA................47 8. ANTES DEL PRIMER USO................48 9. USO DIARIO.....................50 10. CONSEJOS....................53 11. MANTENIMIENTO Y LIMPIEZA..............54 12. SOLUCIÓN DE PROBLEMAS................58 13. INFORMACIÓN TÉCNICA................64 14. ASPECTOS MEDIOAMBIENTALES.............. 65 My Electrolux Kitchen app...
-
Page 34: Información Sobre Seguridad
PENSAMOS EN USTED Gracias por adquirir un electrodoméstico Electrolux. Ha elegido un producto que lleva décadas de experiencia e innovación profesionales. Ingenioso y elegante, ha sido diseñado pensando en usted. Así pues, cada vez que lo utilice, puede tener la seguridad de que obtendrá siempre excelentes resultados. - Page 35 ESPAÑOL las instrucciones o la supervisión sobre el uso del electrodoméstico de forma segura y comprendan los riesgos. Es necesario mantener alejados del aparato a los • niños de entre 3 y 8 años, así como a las personas con minusvalías importantes y complejas, salvo que estén bajo supervisión continua.
-
Page 36: Instrucciones De Seguridad
Antes de realizar tareas de mantenimiento, apague el • aparato y desenchúfelo de la toma de corriente. No utilice agua pulverizada a alta presión ni vapor • para limpiar el aparato. Si el aparato tiene orificios de ventilación en la base, •... - Page 37 ESPAÑOL 2.5 Iluminación interna (contadores de agua, por ejemplo), deje correr el agua hasta que esté limpia. ADVERTENCIA! • Asegúrese de que no haya fugas de Existe riesgo de lesiones. agua visibles durante y después del • Este aparato cuenta con una luz primer uso del aparato.
-
Page 38: Descripción Del Producto
2.7 Desecho destinadas a soportar condiciones físicas extremas en los aparatos domésticos, como la temperatura, la ADVERTENCIA! vibración, la humedad, o están Existe riesgo de lesiones o destinadas a señalar información asfixia. sobre el estado de funcionamiento del • Desconecte el aparato de la red. -
Page 39: Panel De Control
ESPAÑOL 3.2 Luz interna La bombilla se apaga cuando se cierra la puerta o se apaga el aparato. De lo El aparato tiene una lámpara interna. Se contrario, se apaga automáticamente enciende cuando se abre la puerta o se después de un tiempo para ahorrar enciende el aparato mientras la puerta energía. -
Page 40: Selección De Programas
4.3 Indicadores Indicador Descripción Indicador de abrillantador. Se enciende cuando hay que rellenar el dosificador de abrillantador. Consulte “Antes del primer uso”. Indicador de sal. Se enciende cuando hay que rellenar el depósito de sal. Consulte “Antes del primer uso”. - Page 41 ESPAÑOL temperatura entre 65 °C 70 °C y durante GlassCare al menos 10 minutos en la última fase de aclarado. GlassCare evita cualquier daño en cargas delicadas, en particular las piezas ExtraPower de cristal. La opción evita cambios rápidos en la temperatura del programa ExtraPower mejora los resultados seleccionado y la reduce a 45 °C.
- Page 42 Programa Carga del Grado de su‐ Fases del programa EXTRAS lavavajillas ciedad Vajilla, cu‐ Normal, lige‐ • Prelavado • ExtraPower biertos, ollas ramente seco • Lavavajillas a 50 °C • GlassCare y sartenes • Aclarado interme‐ • ExtraHygie‐ • Aclarado final a 55 °C...
-
Page 43: Ajustes Básicos
ESPAÑOL En su solicitud, incluya el código de Información para institutos de número de producto (PNC) de la placa pruebas de características. Para cualquier otra pregunta relacionada Para recibir toda la información con su lavavajillas, consulte el manual necesaria para efectuar pruebas de de servicio suministrado con el aparato. - Page 44 6.1 Modalidad de ajuste 1. Utilice Anterior o Siguiente para seleccionar la barra del ECOMETER dedicada al ajuste deseado. Cómo navegar en el modo de • La barra del ECOMETER ajuste dedicada al ajuste elegido parpadea. Puede navegar en el modo de •...
- Page 45 ESPAÑOL Grados alema‐ Grados fran‐ mmol/l Grados Nivel del descal‐ nes (°dH) ceses (°fH) Clarke cificador de agua 43 - 46 76 - 83 7.6 - 8.3 53 - 57 37 - 42 65 - 75 6.5 - 7.5 46 - 52 29 - 36 51 - 64 5.1 - 6.4...
- Page 46 6.4 Sonido de fin programa. Esta actividad aumenta el consumo total de agua de un programa Puede activar una señal acústica que en 4 litros adicionales y el consumo total suena al finalizar el programa. de energía de un programa en 2 Wh adicionales.
-
Page 47: Conexión Inalámbrica
Wi-Fi 5 Ghz: <23 dBm La app My Electrolux Kitchen se puede Bluetooth de baja descargar desde la App Store en su energía 5.0: <20 dBm dispositivo móvil. La aplicación es... -
Page 48: Antes Del Primer Uso
2 segundos. 3. Cuando se le indique, introduzca las credenciales de la red doméstica en • El indicador está la aplicación My Electrolux Kitchen. encendido. • La pantalla muestra On durante Si no se introducen las unos segundos. credenciales, el lavavajillas •... - Page 49 ESPAÑOL 8.1 El depósito de sal PRECAUCIÓN! El agua y la sal pueden PRECAUCIÓN! salirse del depósito de sal Utilice solo sal gruesa cuando lo llena. Después de diseñada para lavavajillas. llenar el depósito de sal, La sal fina aumenta el riesgo inicie inmediatamente el de corrosión.
-
Page 50: Uso Diario
3. Si el programa tiene una fase de 2. Cierre la puerta del aparato. prelavado, ponga una pequeña 3. Use la aplicación My Electrolux cantidad de detergente en la parte Kitchen para manejar remotamente interior de la puerta del aparato. - Page 51 ESPAÑOL • El ECOMETER indica el nivel de Cómo desactivar el inicio consumo de agua y energía diferido actualizado. De forma predeterminada, Pulse hasta que la pantalla muestre cada vez que inicie un programa debe activar las • La luz correspondiente al botón opciones.
- Page 52 Cuando se ajusta el inicio retardado, el desactiva. Active el inicio diferido antes inicio diferido se activa automáticamente. de cerrar la puerta; de lo contrario, el ciclo de lavado empieza inmediatamente Durante la cuenta atrás, no se puede después de cerrar la puerta. Al abrir la cambiar la selección de programa.
-
Page 53: Consejos
ESPAÑOL 10. CONSEJOS 10.1 General – Asegúrese de que el nivel actual del descalcificador coincide con la Siga estos consejos para obtener un dureza de su suministro de agua. resultado de limpieza de secado óptimo – Siga las instrucciones del capítulo en el uso diario y proteger el medio "Mantenimiento y limpieza". -
Page 54: Mantenimiento Y Limpieza
10.3 Qué hacer si desea dejar • Utilice el aparato, exclusivamente, para el lavado de utensilios del hogar de usar pastillas de detergente aptos para lavavajillas. • No lave en el aparato utensilios de Antes de volver a utilizar por separado madera, marfil, aluminio, estaño ni... - Page 55 ESPAÑOL 11.1 Machine Care • Para obtener unos resultados de limpieza óptimos, inicie el programa Machine Care es un programa diseñado Machine Care. para limpiar el interior del aparato con resultados óptimos. Elimina la 11.3 Eliminación de cuerpos acumulación de cal y grasa. extraños Cuando el aparato detecta que es Revise los filtros y el sumidero después...
- Page 56 1. Gire el filtro (B) hacia la izquierda y extráigalo. 7. Vuelva a montar los filtros (B) y (C). 8. Vuelva a colocar el filtro (B) en el filtro plano (A). Gírelo hacia la derecha hasta que encaje. 2. Extraiga el filtro (C) del filtro (B).
- Page 57 ESPAÑOL 2. Para desmontar el brazo aspersor del cesto, presiónelo hacia arriba a la vez que lo gira hacia la derecha. 2. Lave el brazo aspersor bajo el agua corriente. Retire las partículas de suciedad de los orificios mediante un 3.
-
Page 58: Solución De Problemas
Unos 3. Para separar el brazo aspersor (C) orificios obstruidos pueden provocar del tubo de descarga (A), gire el resultados de lavado insatisfactorios. elemento de montaje (B) hacia la izquierda y tire del brazo aspersor El brazo aspersor de techo está... - Page 59 ESPAÑOL Problema y código de Posible causa y solución alarma No se puede encender el • Asegúrese de que el enchufe está conectado a la to‐ aparato. ma de corriente. • Asegúrese de que no haya fusibles dañados en la caja de fusibles.
- Page 60 Problema y código de Posible causa y solución alarma La temperatura del agua • Asegúrese de que la temperatura del agua de entra‐ dentro del aparato es de‐ da no exceda los 60 °C. masiado alta o se ha pro‐...
- Page 61 ESPAÑOL Problema y código de Posible causa y solución alarma La puerta del aparato se • La AirDry función está activada. Puede desactivar la abre durante el ciclo de la‐ función. Consulte "Ajustes básicos". vado. Sonidos de traqueteo o • La vajilla no está colocada correctamente en los ces‐ golpeteo dentro del apara‐...
- Page 62 2. Para salir de la presentación del El aparato vuelve a la selección de PNC, mantenga pulsados programa. simultáneamente unos 3 segundos. 12.2 Los resultados del lavado y el secado no son satisfactorios Problema Posible causa y solución Mal resultado de lavado.
- Page 63 ESPAÑOL Problema Posible causa y solución Quedan restos de detergen‐ • La pastilla de detergente se ha quedado pegada te en el dosificador al final en el dosificador y no se ha disuelto en el agua. del programa. • El agua no puede lavar el detergente del dosifica‐ dor.
-
Page 64: Información Técnica
12.3 Problemas con la conexión inalámbrica Problema Posible causa y solución La activación de la conexión • ID de red inalámbrica o contraseña incorrecta. inalámbrica no se ha realiza‐ Cancele la configuración y vuelva a iniciarla para do correctamente. -
Page 65: Aspectos Medioambientales
ESPAÑOL Tensión (V) 200 - 240 Conexión eléctrica Frecuencia (Hz] 50 - 60 Presión del suministro de barra (mínima y máxima) 0.5 - 10 agua Mpa (mínimo y máximo) 0.05 - 1.0 Suministro de agua máx. 60°C Agua fría o caliente Capacidad Coloque los cubiertos 1) Consulte la placa de datos técnicos para otros valores. - Page 68 My Electrolux Kitchen app The software in this product contains components that are based on free and open source software. Electrolux gratefully acknowledges the contributions of the open software and robotics communities to the development project. To access the source code of these free and open source software components whose license conditions require publishing, and to see their full copyright information and applicable license terms, please visit: http://electrolux.opensoftwarerepository.com (folder NIU5)
Need help?
Do you have a question about the KEGB9410W and is the answer not in the manual?
Questions and answers