DSC PowerSeries neo HS2TCHP Installation Instructions Manual
Hide thumbs
Also See for PowerSeries neo HS2TCHP:
- User manual (149 pages) ,
- Installation instructions manual (33 pages) ,
- Installation manual (29 pages)
Table of Contents
Advertisement
Available languages
Available languages
Quick Links
HS2TCHP
Installation Instructions/Instructies voor installatie/Istruzioni di installazione/Instrukcja instalacji
WARNING: Please refer to the System Installation Manual for information on limitations regarding product use and function and information on the limitations as to liability of the manufacturer.
NOTE: These instructions shall be used in conjunction with the system Installation Manual of the Control Panel with which this equipment is intended to be used..
WARSCHUWING Raadpleeg de installatiehandleiding voor informatie over beperkingen wat betreft productgebruik en -functie, en informatie over de beperkingen van aansprakelijkheid van de fabrikant.
OPMERKING: Deze instructies moeten worden gebruikt in combinatie met de systeeminstallatiehandleiding van het centrale waarmee deze apparatuur is bestemd om te worden gebruikt.
AVVERTENZA: Fare riferimento al Manuale di installazione del sistema per informazioni sui limiti relativi all'utilizzo e alle funzioni del prodotto, e informazioni sui limiti di responsabilità del costrut-
tore.
NOTA: Le presenti istruzioni devono essere impiegate in combinazione con il manuale d'installazione del sistema della Pannello di controllo con il quale si intende utilizzare l'apparecchiatura.
OSTRZEZENIE: Informacje dotyczące ograniczeń użytkowania i funkcji produktu oraz informacje dotyczące ograniczeń odpowiedzialności producenta podano w podręczniku instalacji systemu.
UWAGA: Instrukcje zawarte w tej publikacji należy stosować łącznie z instrukcjami zawartymi w podręczniku instalacji panelu sterowania, z którym ten produkt ma być używany.
Advertisement
Table of Contents

Related Manuals for DSC PowerSeries neo HS2TCHP


Summary of Contents for DSC PowerSeries neo HS2TCHP
- Page 1 HS2TCHP Installation Instructions/Instructies voor installatie/Istruzioni di installazione/Instrukcja instalacji WARNING: Please refer to the System Installation Manual for information on limitations regarding product use and function and information on the limitations as to liability of the manufacturer. NOTE: These instructions shall be used in conjunction with the system Installation Manual of the Control Panel with which this equipment is intended to be used.. WARSCHUWING Raadpleeg de installatiehandleiding voor informatie over beperkingen wat betreft productgebruik en -functie, en informatie over de beperkingen van aansprakelijkheid van de fabrikant.
-
Page 2: Specifications
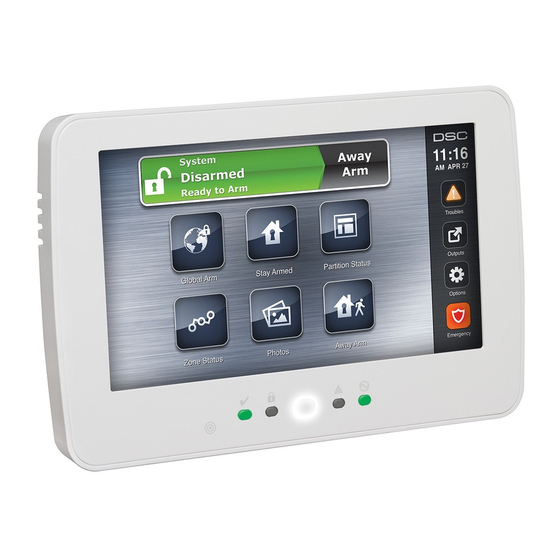
English Unpacking The keypad package includes the following parts: Installation Instructions One keypad The HS2TCHP keypad can be used on security systems with up to 128 zones. These Five mounting screws and five anchors for wall-mounting keypads are compatible with the Neo PowerSeries HS2016/32/64 and HS2128 panels One tamper switch (required for UL commercial burglary listed installations) V1.0 and higher. -
Page 3: Applying Power
Figure 2 - Mounting the Backplate If the ‘P/Z’ terminal is programmed as an output, a small relay (such as DSC model RM-1 or RM-2) or buzzer or other DC operated device may be connected between the positive supply voltage and the ‘P/Z’ terminal (max.load is 50mA). -
Page 4: Keypad Display Symbols
Toggle Options Enter [902][001] or use the [<][>] keys and press [*]. When prompted, enter the serial number of the keypad found on the back of the device. An error tone is sounded if an invalid serial number is received. Once enrolled, the device model, serial number and slot assignment are displayed. -
Page 5: Optional Settings
Select Options, Access Codes [enter Master code]. From the Label screen, press the item that you want to label (e.g., zones, partitions, Select a user to delete. etc.). Select Prox Tag Prog then delete. Enter the label name for the selected item. Function Key Assignment Press Save when complete. -
Page 6: Perform A Firmware Upgrade
Note:For UL/ULC installations, bit 5 (Power LED) and bit 6 (Power LED IndicatesAC Present) This feature affects only the text on the Classic (square) button home page. Note: shallbe ON. Perform a Firmware Upgrade [023] Third Keypad Options Default Value Option Insert an SD card in the HS2TCHP with the new firmware. -
Page 7: Limited Warranty
Any software provided along with the Software Product that is associated with a separate end-user You no rights to use such content. All rights not expressly granted under this EULA are reserved by DSC license agreement is licensed to You under the terms of that license agreement. - Page 8 INCLUDING CUSTOMERS, AND INJURY TO PROPERTY. the keypad emergency buttons) have to be disabled: WARNING: DSC recommends that the entire system be completely tested on a regular basis. However, - Fire Alarm function despite frequent testing, and due to, but not limited to, criminal tampering or electrical disruption, it is possible for this SOFTWARE PRODUCT to fail to perform as expected.
-
Page 9: Montage
Installatie instructies Uitpakken De HS2TCHP toetsenbord kan worden gebruikt beveiligingssystemen met maximaal 128 Het bedienpaneel pakket omvat het volgende: zones. Deze toetsenborden zijn compatibel met de Neo machtreeksen HS2016 / 32/ 64 en Een bedienpaneel HS2128 panelen V1.0 en hoger. Vijf pluggen en vijf bevestigingsschroeven voor montage op een wand Een sabotageschakelaar (vereist voor commerciële, UL-geregistreerde inbraak- Specificaties... -
Page 10: Stroom Inschakelen
B (negatieve) aansluitklem. Wanneer de P/Z-aansluitklem als een uitgang is geprogrammeerd, een klein relais (bijvoorbeeld DSC model RM-1 of RM-2) of zoemer of ander DC-apparaat inrich- ting kan worden aangesloten tussen de positieve voedingsspanning en de P/Z-ter- minal (maximale belasting is 50 mA). -
Page 11: Het Programmeren Van Het Toetsenpaneel
Andere bedienpanelen kunnen vervolgens worden geregistreerd vanaf het eerste bedienpaneel. Het programmeren van het toetsenpaneel Gebruik een van de volgende opties om te registreren: Programmering bestaat uit het aan en uit zetten van opties in elke sectie of door het bevol- [902][000] Automatisch aanmelden ken van gegevensvelden. -
Page 12: Ondersteuning Proximity (Prox) Tag
Herhaal deze procedure op elk bedieningspaneel totdat deze allemaal zijn toe- Functieknoptoewijzing gewezen aan de juiste blok. De HS2TCHP heeft 7 knoppen op het scherm Start, waarvan er 4 kunnen worden gepro- [902][101] Afmelden bedienpaneel grammeerd door de installateur. Functietoets 2 moet altijd zijn ingesteld op Afwezig inge- Voer [902][101] of gebruik de [<][>]-toetsen en druk op [*]. -
Page 13: Optionele Instellingen
Het uitvoeren van een firmware-upgrade [39] Probleemweergave [40] Alarmen in geheugen [61] - [68] Blokselectie 1 - 8 Steek een SD-kaart met de nieuwe firmware in de HS2TCHP. Druk Opties, Installateurmenu [Installateurcode], Programmeren bedienpaneel en Programmeren van labels dan Firmware. Druk op het HS2TCHP bedienpaneel Opties, Installateurmenu [Installateurcode], en Selecteer OK om de firmware-upgrade uit te voeren (als er een nieuwe firm- dan Label programmeren. -
Page 14: Beperkte Garantie
I___I___I___I___I___I___I___I___I___I___I___I___I___I ___I ter voldoening van een schending van zulke garantie, DSC, naar eigen keuze, bij teruggave van de appa- ratuur bij het reparatiepunt, de defecte apparatuur zal repareren of vervangen. Deze garantie geldt [031] Duur gedownload LCD-bericht alleen voor materiële defecten en fabricagefouten en niet voor beschadigingen opgelopen tijdens ver-... - Page 15 DSC op te treden om deze garantie te wijzigen of te veranderen, en aanvaardt geen andere SOFTWAREPRODUCT niet onderwerpen aan reverse-engineering, decompileren en disassembleren, ten- garantie of aansprakelijkheid betreffende dit product. In geen geval zal Digital Security Controls aan-...
- Page 16 UITVALTIJD, AANKOOPTIJD, CLAIMS VAN DERDEN, INCLUSIEF KLANTEN, EN EIGENDOMSSCHADE. WAARSCHUWING: DSC raadt aan om het gehele systeem regelmatig volledig te testen. Het is echter mogelijk dat dit SOFTWAREPRODUCT ondanks regelmatige tests en ten gevolge van, maar niet beperkt tot, criminele sabotage of elektriciteitsuitval niet functioneert zoals verwacht.
- Page 17 Italiano Dotazione Guida all’installazione La tastiera viene fornita con i seguenti elementi in dotazione: La tastiera HS2TCHP può essere utilizzata in sistemi di sicurezza con fino a 128 zone. Le Una tastiera tastiere sono compatibili con i pannelli Neo PowerSeries HS2016/32/64 e HS2128 V1.0 Cinque viti di montaggio e cinque ancoraggi per montaggio a parete Un interruttore anti manomissione (richiesto per impianti antifurto commerciali con e più...
-
Page 18: Applicazione Di Corrente Elettrica
(negativo). Se il morsetto “P/Z” è programmato come uscita, un piccolo relè (come il modello DSC RM-1 o RM-2), un cicalino o un altro dispositivo a corrente continua possono essere collegati tra la tensione di alimentazione positiva e il terminale “P/Z”... -
Page 19: Configurazione Di Base
Attenzione: Eseguire la posa dei cavi rispettando le norme e le codifiche locali Registrazione della tastiera Configurazione di base Le tastiere possono essere registrate automaticamente o manualmente. In entrambi i casi, il numero seriale del dispositivo è usato come un identificatore. Questa sezione descrive come configurare la tastiera, incluso registrazione, configurazione etichetta di prossimità, assegnazione tasti funzione e programmazione etichetta. - Page 20 Immettere da 01 a 08 pe assegnazione partizione o usare i tasti [<][>] per scorrere Funzione assegnazione tasti alla partizione specifica. Se non è usata partizione, immettere [01]. Per le tastiere HS2TCHP ha 7 pulsanti sullo schermo Home, quattro di essi programmabili dal globali immettere [00].
-
Page 21: Programmazione Della Tastiera
Aggiornamento del firmware [34] Programmazione Utente [35] Funzioni utente [37] Programma Data e Ora [39] Visualizzazione Inserire una scheda SD con il nuovo firmware nel HS2TCHP. [40] Memoria allarme [61] - [68] Selezione Partizione 1 – 8 problema Premere Opzioni, Menu Installatore [Codice Installatore], Programmazione tastiera, Programmazione Etichetta Aggiornamento firmware. - Page 22 [041] Assegnazione zona temperatura interna Impostazione Valore Opzione Abilitato Disabilitato predefinita Predefinito: 000 I___I___I___I (I valori validi sono 000-128) locale abilitata disabilitata Orologio locale visualizza [042] Assegnazione zona temperatura esterna Disabilitato I__I Orologio visualizza AM/PM orario in 24 ore Predefinito: 000 I___I___I___I (I valori validi sono 000-128) Scorrimento memoria Scorrimento memoria allarme...
-
Page 23: Limiti Di Garanzia
SOFTWARE viene utilizzato. Digital Security Controls (DSC) garantiche che per un periodo di 12 anni dalla data di acquisto, il (c) Copia di backup - L'Utente può creare copie di backup del PRODOTTO SOFTWARE, ma può... - Page 24 DSC. (c) LIMITAZIONE DI RESPONSABILITÀ; LA GARANZIA RIMANDA ALL’ALLOCAZIONE DEI ©2017 Tyco Security Products. Tutti i diritti riservati • www.dsc.com • Assistenza tecnica: 1- RISCHI - IN QUALSIASI CIRCOSTANZA, SE QUALSIASI STATUTO COMPORTA GARANZIE O CONDIZIONI NON 800-387-3630 (Canada, US), 905-760-3000 ESPRESSE NEL PRESENTE CONTRATTO DI LICENZA, LA RESPONSABILITÀ...
-
Page 25: Zawartość Opakowania
Polski Zawartość opakowania Instrukcja instalacji klawiatura serii HS2TCHP 1 styk sabotażowy WPROWADZENIE 5 śrub montażowych i kołki Klawiatura HS2TCHP może być zastosowana do systemów alarmowych obsługujących Instrukcja użytkownika i instalacji do 128 linii dozorowych. Klawiatury mogą pracować z centralami serii Neo MONTAŻ... -
Page 26: Podłączenie Zasilania
Rysunek 2 - Montaż urządzenia. Linie podłącza się do zacisków P/Z i B (Black). W przypadku urządzeń wymagających zasiania, przewody zasilające urządzenie należy podłączyć do zacisków R (12V) i B (Black). Jeżeli zacisk P/Z zaprogramowano jako wyjście, niewielki przekaźnik, buzzer lub inne urządzenia pracujące na napięcie stałe 12V mogą być podłączone do zacisków R(12V) i P/Z (obciążalność... - Page 27 Rysunek 4 - Opcje przełączane, sposób wyświetlania. urządzenia, numer seryjny oraz przydzielony adres. Klawiatury zostaną przypisane do kolejnych wolnych adresów. [902][001] Ręczne przypisywanie Wprowadzić numer sekcji [902][001] lub użyć przycisków kursorów <> by wybrać funkcję po czym wcisnąć [*]. Wprowadzić numer seryjny urządzenia znajdujący się na tylnej części obudowy Wcisnąć...
- Page 28 Wcisnąć [*] by wybrać urządzenie a następnie wcisnąć ponownie [*] by je Wybrać sekcje [001]-[005] dla przycisków funkcyjnych 1-5 po czym usunąć. nacisnąć [*]. Wprowadzić dwucyfrowy numer odpowiadający wybranej funkcji przycisku SYMBOLE NA KLAWIATURZE [00]-[68]. Funkcje zostały opisane na kolejnej stronie. Gotowość–...
- Page 29 instalatora], „Programowanie klawiatury” a następnie wybrać „Aktualizacja PROGRAMOWANIE NAZW LINII I PODSYSTEMÓW oprogramowania”. Z poziomu menu klawiatury wybrać „Opcje”, „Menu Instalatora” [Kod Nacisnąć „OK.” aby rozpocząć procedurę aktualizacji oprogramowania instalatora], a następnie „Programowanie nazw”. klawiatury. Wybrać żądaną nazwę do programowania. Używając wirtualnej klawiatury na wyświetlaczu, wprowadzić...
- Page 30 Fabrycznie Opcje Wartość programowana w sekcji określa ile razy komunikat wyświetlany na klawiaturze Włączone wyświetlanie musi zostać anulowany, aby został całkowicie usunięty. Naciśnięcie dowolnego I__I wyłączone lokalnego zegara przycisku anuluje komunikat. Zegar wyświetla czas w trybie Zegar wyświetla czas w I__I 24 godzinnym trybie 12 godzinnym...
-
Page 31: Ograniczona Gwarancja
Umowy Licencyjnej, nawet jeśli ta Umowa Licencyjna stanowi modyfikację wcześniejszej umowy lub postanowień. W takim przypadku użytkownik ma obowiązek zniszczyć wszystkie kopie tego kontraktu. Jeśli Użytkownik nie wyraża zgody na warunki tej Umowy Licencyjnej, firma DSC nie OPROGRAMOWANIA udziela Użytkownikowi licencji na OPROGRAMOWANIE, a Użytkownik nie ma prawa z niego korzys- tać. - Page 32 7. OGRANICZONA GWARANCJA ©2017 Tyco Security Products. All Rights Reserved • www.dsc.com • (a) BRAK GWARANCJI — FIRMA DSC UDOSTĘPNIA OPROGRAMOWANIE „TAK JAK JEST” („AS IS”), BEZ GWARANCJI. FIRMA DSC NIE GWARANTUJE, ŻE OPROGRAMOWANIE SPEŁNIA WYMAGANIA NABYWCY ANI ŻE OPROGRAMOWANIE BĘDZIE DZIAŁAĆ W SPOSÓB NIEPRZERWANY I WOLNY OD BŁĘDÓW.
Need help?
Do you have a question about the PowerSeries neo HS2TCHP and is the answer not in the manual?
Questions and answers