Sign In
Upload
Download
Table of Contents
Contents
Add to my manuals
Delete from my manuals
Share
URL of this page:
HTML Link:
Bookmark this page
Add
Manual will be automatically added to "My Manuals"
Print this page
×
Bookmark added
×
Added to my manuals
Manuals
Brands
KUHN Manuals
Farm Equipment
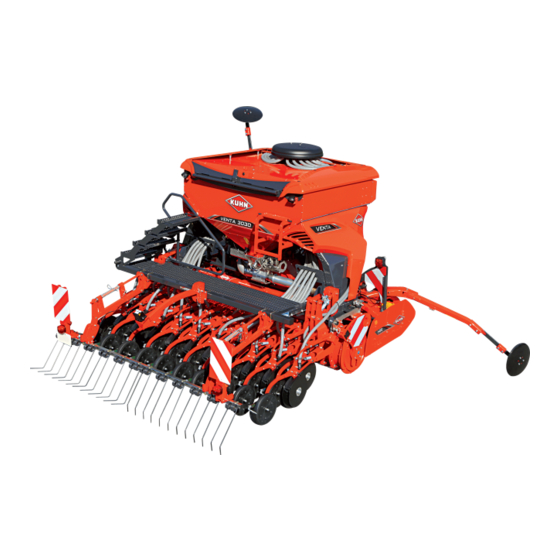
Venta 3030
Operator's manual
KUHN Venta 3030 Operator's Manual
Seed drill
Hide thumbs
1
2
3
Table Of Contents
4
5
6
7
8
9
10
11
12
13
14
15
16
17
18
19
20
21
22
23
24
25
26
27
28
29
30
31
32
33
34
35
36
37
38
39
40
41
42
43
44
45
46
47
48
49
50
51
52
53
54
55
56
57
58
59
60
61
62
63
64
65
66
67
68
69
70
71
72
73
74
75
76
77
78
79
80
81
82
83
84
85
86
87
88
89
90
91
92
93
94
95
96
97
98
99
100
101
102
103
104
105
106
107
108
109
110
111
112
113
114
115
116
117
118
119
120
121
122
123
124
125
126
127
128
129
130
131
132
133
134
135
136
page
of
136
Go
/
136
Contents
Table of Contents
Troubleshooting
Bookmarks
Table of Contents
Dear Owner
Table of Contents
Contents
Identification of the Machine
Rear View
Model Identification Plate
Optional Equipment
Safety
Description of Symbols Used in this Document
Safety Instructions
Introduction
Read and Follow the Safety Instructions
Precautions to be Taken before Carrying out any Operations on the Machine
Precautions to Take before Using the Machine
Precautions When Driving
Precautions When Driving on Public Roads
Maximum Speed
Precautions When Coupling
Hydraulic Circuit
Precautions During Manoeuvres
Remote Controlled Components
Safety Decals
Waste Disposal
Precautions for Maintenance and Repair Work
Projection of Stones and Foreign Objects
Precautions for Machine Use
Precautions to Take before Using the Parking Stands
Location and Description of Safety Decals on the Machine
Location of Safety Decals
Description of Safety Decals
Road Safety Equipment and Recommendations
Likely Critical Failures
Incorrect Use of the Machine by the User
Limit State Criteria
Machine Specifications
Description and Glossary
Technical Specifications
Required Equipment
Seedflex Seeding Units
Control Terminal
Top Link
Hydraulic Blower Drive
Sound Levels
Machine Delivery
Machine Parking
Unloading with an Overhead Crane
Unloading with a Forklift
Putting into Service
Description of Control Elements
Control Box Description
Preparing the Tractor
Coupling the Machine
Lift Sensor Adjusment
Description of Coupling Elements
Blower Unit Drive
Adjusting the Machine
Covering Harrow Adjustment
Adjusting the Tramlining Rhythm
Adjustment of the Fill Level Sensor
Instructions for Transport
Putting the Machine into Transport Position
Steps
Pre-Emergence Markers (Optional Equipment)
Radar Arm (Optional Equipment)
Metering Unit
Parallelogram Linkage
Covering Harrow
Conformity with the Road Regulations
Machine Transport Using Transport Means
Instructions for Work
Items to Check before Starting Work
The Application Rate
The Tramlining
Putting the Machine into Work Position
Lower the Harrow
Lower the Radar Arm (Optional Equipment)
Lower the Pre-Emergence Marker (Optional Equipment)
Adjustments in Working Position
Coulter Bar Adjustment
Ground Pressure Adjustment
Covering Harrow Adjustment
Filling the Hopper
Adjusting the Metering Unit
Blower
Agitator
Adjusting the Metering Unit Opening for Large Seeds (Large Grooves)
Adjusting the Metering Unit Opening for Small Seeds (Small Grooves)
Stationary Calibration Test
Machine Use
Emptying the Hopper
Partial Emptying (A)
Cleaning the Metering Unit (B)
Uncoupling the Machine
Parking Without Soil Preparation Tool
Parking the Combination
Optional Equipment
Tramline Shut-Off Valves
Removal of the Mechanical Valve
Fitting of the Tramlining Valve
Half-Width Shut-Off
Lighting
Lighting/Signalling for Seed Drill Without Covering Harrow
Side Reflective Panels
Pre-Emergence Markers
Adjusting the Position of the Disk
Angle Adjustment
Length Adjustment
Transport Position
Wheel Scraper
Seeding Disk Cleaners
Radar
Working Light
Sealing Lip for Fava Beans
Fertilizer Dispenser
Volume Reducer
Free Return
Balance KERN
Distribution Head with VISTAFLOW Valves
Maintenance and Storage
Frequency Chart
Cleaning the Machine
Lubrication
Maintenance
Checking that the Cover Is Locked
Check Metering Unit Seal Lips
Checking the Blower Hydraulic Drive
Checking the Covering Harrow Tines
Control of the Seedflex Seeding Units
Checking the Seed Transfer Tubes
Checking the Lighting Equipment
Oil Change
Check the Functioning of the Tramlining Valves
Storage and Pre/Post Season Checks
At the End of each Season
At the Start of each Season
Storage
Dismantling and Scrapping of the Machine
Troubleshooting Guide
Calculating the Load on an Axle
Limited Warranty
Advertisement
Quick Links
1
Stationary Calibration Test
Download this manual
Operator's manual
RN034AGB D
Read carefully before starting the machine
Seed Drill
Original instructions
RN034AGB D
- English - 09-2019
Table of
Contents
Previous
Page
Next
Page
1
2
3
4
5
Advertisement
Table of Contents
Need help?
Do you have a question about the Venta 3030 and is the answer not in the manual?
Ask a question
Questions and answers
Subscribe to Our Youtube Channel
Related Manuals for KUHN Venta 3030
Farm Equipment KUHN Venta 3530 Operator's Manual
Seed drill (136 pages)
Farm Equipment KUHN Venta 4030 Operator's Manual
Seed drill (136 pages)
Farm Equipment KUHN VBP 2160 Operator's Manual
Baler/wrapper combination (408 pages)
Farm Equipment KUHN VBP 2190 Operator's Manual
Baler/wrapper combination (408 pages)
Farm Equipment KUHN GMD240 Operator's Manual
Disc mower (116 pages)
Farm Equipment KUHN GMD 700 G II Assembly & Operators Manual
Multidisc mower (48 pages)
Farm Equipment KUHN GMD 44 Assembly & Operators Manual
Select multidisc mower (45 pages)
Farm Equipment KUHN GMD 3150 TL CE Operator's Manual
Disc mower (68 pages)
Farm Equipment KUHN FC 240 P Assembly & Operation Manual
Mower conditioner (56 pages)
Farm Equipment KUHN GF222T Operator's Manual
(44 pages)
Farm Equipment KUHN FC303YGC Operator's Manual
Mower conditioner (80 pages)
Farm Equipment KUHN GF 5001 TH Assembly & Operators Manual
(37 pages)
Farm Equipment KUHN GF 5001 MH Assembly And Operators Manual
Gyrotedder (36 pages)
Farm Equipment KUHN SW1604 Operation Manual
(123 pages)
Farm Equipment KUHN GA 6000 Assembly & Operators Manual
Gyrorake (41 pages)
Farm Equipment KUHN SpeedRake SR108 Operator's Manual
(44 pages)
This manual is also suitable for:
Venta 3530
Venta 4030
Table of Contents
Save PDF
Print
Rename the bookmark
Delete bookmark?
Delete from my manuals?
Login
Sign In
OR
Sign in with Facebook
Sign in with Google
Upload manual
Upload from disk
Upload from URL


Need help?
Do you have a question about the Venta 3030 and is the answer not in the manual?
Questions and answers