Table of Contents
Advertisement
Quick Links
Advertisement
Table of Contents

Related Manuals for Texecom Premier Elite ComlP CEJ0000


Summary of Contents for Texecom Premier Elite ComlP CEJ0000
- Page 1 Installation Manual Premier Elite ComlP INS273-7...
-
Page 2: Table Of Contents
3.1 Premier Elite ......................... 3.2 Premier 412/816/816Plus & 832 ..................4.0 Port Forwarding ........................5.0 Wintex setup ......................... 6.0 Texecom mobile app's ......................6.1 Local Connection ........................6.2 Remote connection & Push Notifications ................. 6.3 Premier Elite ......................... 6.4 Premier Elite App Encryption ..................... -
Page 3: Overview
WAN. Once the control panel is connected to a network the following functions can be achieved: Upload/Download via Wintex UDL Receive Push Notifications, Arm, Disarm, Part Arm & Reset via Texecom mobile app's Signal alarms to an Alarm Receiving Centre High security polling by Alarm Receiving Centre Typical LAN configuration... - Page 4 INS273-7 4/28...
-
Page 5: Supported Control Panels
1.2 Supported Control Panels The ComIP module is supported on the following Premier & Elite Series control panels, this manual assumes use with Premier Elite panels: Premier 412/816 816 Plus & 832 V16 or later Premier Elite 12/24/48/88/168 & 640 Premier 48/88/168 &... -
Page 6: General
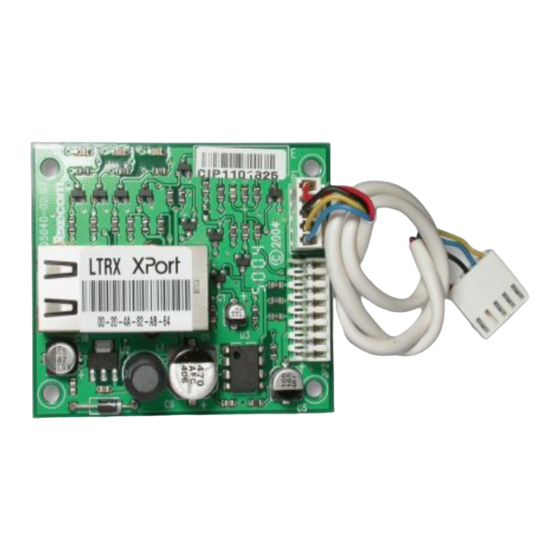
1.3 General The installation of the ComIP module requires a basic understanding of networking and TCP/IP protocol. If you are not familiar with these concepts, you may require assistance from an IT professional before attempting to install the module. The ComIP module is designed to be fitted inside the control panel and is powered via the harness connection supplied. -
Page 7: Installation
1.5 Installation Introduction This step by step guide will allow you to achieve the following and should be carried out in the order detailed in the manual. Installation Assign an IP address manually O Reserve the IP address O Set the DHCP Pool Setup port forwarding on the router Setup push notifications Programme the control panel... -
Page 8: Ip Address Information
You will need to know the following; the default information should be available from the router documentation: The IP address of the router The router name The router password Before assigning an IP address it is important to understand how IP addresses work and the impact this can have on the performance of the system and the ComIP. -
Page 9: Automatically Assigned Ip Address (Dhcp)
The gateway address, or router, allows communication to other LAN/WAN segments. The gateway address should be the IP address of the router connected to the same LAN segment as the ComIP. The gateway address must be within the local network. Netmask (Subnet Mask) A netmask defines the number of bits taken from the IP address that are assigned for the host section. - Page 10 not the same as the router. When prompted enter the router user name & password and press Enter. Once you have access to the router you are looking for DHCP Settings, the example shown may or may not be the same as the router. You will see a Start & End IP address, this is the DHCP pool or the range of addresses used by the router when assigning an address automatically.
-
Page 11: Dhcp Reservation
2.4 DHCP Reservation On the PC check for DHCP or Address reservation. You should have something like this. Click Add New or whatever the router displays and enter the required details. The MAC address is printed on the ComIP and will be required, as will the IP address you will be assigning to the ComIP. -
Page 12: Premier 412/816/816Plus & 832
Enter Engineer mode on the keypad. Press then (UDL/Digi Options). Press then for (Setup Modules). Press then for (Setup IP data). V3 or later only then select which Com Port the IP details apply too. Press and enter the IP address of the ComIP you noted in the previous steps. -
Page 13: Port Forwarding
The control panel can now be accessed on the LAN. However, to access the panel from the Texecom mobile apps or Wintex remotely, additional steps are required within the various programmes and the control panel. 4.0 Port Forwarding WARNING: Care should be taken when opening ports as this can leave the router vulnerable to malicious attacks. -
Page 14: Wintex Setup
Once you have found the option you will have something like this. Add a new rule using the ComIP IP address and Port Number you used earlier. Some routers may require use of the MAC address to allow port forwarding. Please check with the manufacturer’s documentation or website for details. - Page 15 Click ADD You have now configured Wintex for a local connection to the control panel. To access the panel do the following: In Wintex click on Connect Scroll down and choose Click via Network (192.168.0.100 on port 10001) Once connected the status (bottom left of the Wintex screen) will change to Online Ready.
-
Page 16: Texecom Mobile App's
6.0 Texecom mobile app's Texecom mobile apps can be used to access the system either remotely or locally. The apps are supported on iOS & Android devices and can be downloaded from the respective app stores. All three apps are configured identically for access. -
Page 17: Remote Connection & Push Notifications
For remote connections it is highly recommended that you enable Push Notifications. This will mean that Texecom will track the IP address and update it as required. If the service provider does not provide you with a fixed IP address (most don't) you will require a third party DDNS provider to allow the app to operate remotely if you do not "Enable"... - Page 18 and press Register. Once you have completed this step the Account Number will be automatically populated with an Account Number Premier Elite ComIP Installation Manual 12 INS273-7 allocated by the Server. Record all of the details here for future use, and if you choose to add an additional device to receive notifications from the same site.
-
Page 19: Premier Elite
6.3 Premier Elite ARC Settings & Reporting Options Enter the Engineers Code Press UDL/Digi Options)then (Program Digi) Using the Scroll key select Which ARC you wish to use Press and scroll to change the ARC protocol to either SIAII or Contact ID, both are supported. - Page 20 button to toggle each option on or off. Press then and scroll across the screen and use the button to toggle option 7 Connect Via IP ON (an I will be shown on the screen) If you chose SIAII as the Protocol in previous steps scroll once more to Option 8 and toggle Send SIA Text to ON (a T will be shown).
- Page 21 Press then (Digi Options) Press then scroll through the options and ensure Digi is Enabled (E shown on Screen) and Dial All Numbers (A shown on screen)are on, Use the button to toggle each option on or off. Press Initialise a Test Call Press then (Start Test Call)
- Page 22 an ATS failure will be displayed immediately on the keypad at the time the fault occurs. Again no action is actually required by the user as the panel will recover of its own accord. However if the Users WiFi connection has a tendency to drop devices, this could be a source of frustration.
-
Page 23: Premier Elite App Encryption
communication that signals to an ARC or other response authority. 6.4 Premier Elite App Encryption 128 bit AES Encryption has been added for communications with our mobile app’s. The encryption key is generated by the app and MUST be entered into a physical keypad on the system. - Page 24 Enter the server address and port number 05202801223010001 Press (ARC No.X Menu) Press (Acc No1) Enter the account number from the App XXXXXX (this MUST be entered as a 6 digit code) Press (Protocol Disabled) Press (Protocol will be set to SIA Level II) Press (Protocol Options) Press...
-
Page 25: Disclaimer
Provider (ISP), and as such make no claims for reliability of connections or system performance. 7.2 Push Notifications Push notifications are used entirely at the users own risk and Texecom will accept no liability for system failure, missed communications, failure of polling, failure of message delivery or any other failing which may occur. -
Page 26: Troubleshooting
to enable the device, and to make configuration changes to routers and switches where required. 8.0 Troubleshooting Q: I am not receiving notifications and my IP address has not updated A: Go to Global Options/ System Timers/Poll IP Every, and change to 1 minute. Pr N N... -
Page 27: Specifications
Packed Weight 60g (Approximately) Operating Temperature -10 - +55 degrees C Humidity 0-95% non-condensing 8.2 Standards Texecom declares that this product complies with the requirements of the following directives: 2004/108/EC EMC Directive • 2006/95/EC LVD Directive • 2011/65/EU RoHS Directive •... -
Page 28: Warranty
8.3 Warranty All Texecom products are designed for reliable, trouble-free operation. Quality is carefully monitored by extensive computerised testing. As a result the ComIP is covered by a two-year warranty against defects in material or workmanship INS273-7 28/28...
Need help?
Do you have a question about the Premier Elite ComlP CEJ0000 and is the answer not in the manual?
Questions and answers