Table of Contents
Advertisement
Quick Links
Advertisement
Chapters
Table of Contents

Related Manuals for Philips 5000 Series


Summary of Contents for Philips 5000 Series
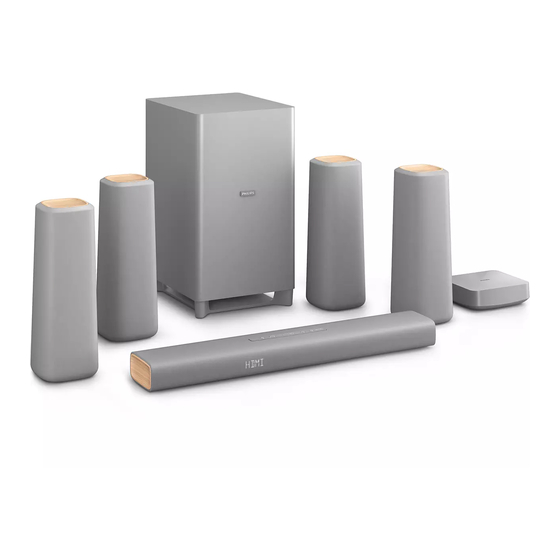
- Page 1 用户手册 User manual CSS5530G 在以下网站上注册产品并获得支持 www.philips.com/support...
-
Page 2: Table Of Contents
目录 重要信息 故障种类和处理方法 帮助和支持 安全 爱护产品 爱护环境 您的产品 主装置 遥控器 接口 无线低音扬声器 无线盒(接收器) 连接和设置 摆放扬声器 与后置扬声器进行配对 对低音扬声器进行配对 连接至电视 连接电视或其他设备的音频 HDMI 通过 连接数字设备 设置扬声器 使用您的产品 调节音量 选择声音 播放器 通过蓝牙播放音乐 通过 连接蓝牙 存储设备 自动待机 应用出厂设置 更新软件 检查软件版本 通过 设备更新软件 壁挂安装 产品规格 ZH-CN... - Page 3 • 在雷电天气之前,应断开本产品的 电源。 • 断开电源线时,应始终握住插头,而不 能拉电缆。 请在使用本产品之前阅读并理解所有说 小心短路或起火! 明。因未遵守说明而造成的损坏不在保修 • 有关标识和电源功率,请参阅产品背面 范围内。 或底部的型号铭牌。 • 在将本产品连接到电源插座上之前,请 帮助和支持 确保电源电压与产品背面或底部印刷的 电压值相匹配。如果电压不同,切勿将 产品连接到电源插座上。 有关广泛的在线支持,请访问 www.philips.com/support 以: 小心受伤或损坏本产品! • 下载用户手册和快速入门指南 • 若要进行壁挂安装,则必须按照安装说 • 观看视频教程(仅限于选定的型号) 明将本产品稳固地安装在墙上。只能使 (FAQ) • 查找常见问题 的答案 用随附的挂架(如果可用)。若壁挂安 • 通过电子邮件向我们发送问题 装不当,则可能造成事故、人身伤害或 • 与支持代表聊天。...
-
Page 4: 您的产品
您的产品 池可能导致严重受伤或死亡。摄入后 小时内可能发生严重的内部烧伤。 • 如果您怀疑电池不慎被吞咽或位于体内 的任何部位,请立即就医。 感谢您的惠顾,欢迎光临飞利浦! 为了 • 更换电池时,请务必将所有新旧电池放 您能充分享受飞利浦提供的支持,请在 在儿童接触不到的地方。更换电池后, www.philips.com/welcome 上注册 确保电池仓完全紧闭。 您的产品。 • 如果电池仓无法完全紧闭,请不要继续 使用产品。放在儿童接触不到的地方并 联系制造商。 主装置 本节包括主装置的概述。 此款 类设备具有双重绝缘,不提供保护 接地。 爱护产品 只能用微细纤维清洁布清洁本产品。 启动本产品或切换到待机模式。 爱护环境 b 显示面板 c 待机指示灯 弃置旧产品 当本产品处于待机状态时,待机指示灯 变成红色。 SOURCE 选择本产品的输入源。 本产品采用可回收利用的高性能材料和组 e 音量... - Page 5 :切换至蓝牙模式;按住 秒钟可 遥控器 断开当前蓝牙连接。 HDMI ARC HDMI :将来源切换至 本部分包括遥控器的概述。 连接。 在 和蓝牙模式下,跳至上一首或 AVRCP 下一首曲目(仅适用于支持 的蓝牙设备)。 在 和蓝牙模式下,播放、暂停或 AVRCP 继续播放(仅适用于支持 的 蓝牙设备)。 BASS +/- 增大或减小低音。 f 音量控制 • :增大或减小音量。 • :静音或恢复音量。 SOUND 选择声音模式。 AUDIO SYNC +/- 增大或减小音频延迟。 i 扬声器设置按钮 :进入扬声器的音量设置模式。 DELAY :进入扬声器的距离设置...
- Page 6 接口 无线低音扬声器 本节概述了本产品上的可用接口。 本产品附有无线低音扬声器。 HDMI IN HDMI 连接至数字设备上的 输出。 TO TV - HDMI OUT (ARC) HDMI (ARC) 连接至电视的 输入。 FRONT SPEAKER L/R 连接至前置扬声器。 PAIRING (配对) 按下可进入低音扬声器配对模式。 • 连接 存储设备播放音乐。 b 低音扬声器指示灯 • 升级本产品的软件。 • 低音扬声器和主装置之间进行无 DC IN 线配对时,指示器会呈白色快速 连接至电源。 闪烁。 •...
-
Page 7: 无线盒(接收器
连接和设置 无线盒(接收器) 本产品随附一个无线盒(接收器),使后 本节将帮助您将本产品连接至电视和其他 置扬声器以无线方式与主装置配合使用。 设备,然后进行设置。 有关本产品及附件的基本连接详细信息, 请参阅快速入门指南。 注 • 有关标识和电源功率,请参阅产品背面或底部的 型号铭牌。 • 在建立或更改任何连接之前,请确保所有设备均 已与电源插座断开连接。 AC MAINS 连接至电源。 PAIRING (配对) 摆放扬声器 按下以进入后置扬声器和主装置的配 对模式。 扬声器的定位在营造环绕音效中起着关键 c 无线指示器 的作用。为了获得最佳效果,请将所有扬 • 当后置扬声器和主装置之间进行无 声器朝向座位并将其置于接近耳朵高度的 线配对时,指示灯会快速闪烁。 位置(坐着时)。 • 配对成功时,指示灯会亮起。 • 配对失败时,指示灯会缓慢闪烁。 d 后置扬声器接口 连接至后置扬声器。 WOOFER FRONT SPEAKER FRONT SPEAKER FRONT CENTER... - Page 8 如未听到后置扬声器的音频,请执行以下 注 操作进行配对。 • PAIRING 环绕音效取决于房间形状和大小、墙壁和天花板 按无线盒上的 (配对)按 类型、窗户和反射面以及扬声器声学特性等诸多 钮进入配对模式。 因素。试验不同的扬声器定位以找出适合您的最 » 无线盒上的白色 指示灯会迅 佳摆放。 速闪烁。 按照以下一般原则摆放扬声器。 OPTICAL OPTICAL 在 模式(按 ) 下, 秒钟内按 次遥控器上的 座位: ,再按 次 音量 ,然后按住 这是您聆听区域的中心。 BASS + 。 主装置 (充当中置扬声器): » 如果配对成功,则无线盒上的白色 将主装置直接摆放在座位前面,可以在 指示灯会亮起。 电视的上面,也可以在下面。...
- Page 9 连接至电视 连接电视或其他设备的音频 将本产品连接至电视。您可以通过本产品 通过本产品的扬声器播放电视或其他设备 的扬声器收听电视节目的音频。 的音频。 使用本产品、电视和其他设备提供的最佳 品质连接。 HDMI (ARC) 通过 连接电视 最佳质量音频 注 (ARC) 本产品支持带音频回传通道 功能 HDMI HDMI ARC • 的 。如果电视兼容 , HDMI ARC 通过 连接本产品和电视时,无需使 HDMI 用音频连接。 则可使用一根 线缆通过扬声器收听 电视音频。 方案 :通过数字光纤线缆连接 音频 最佳质量视频 HDMI 使用高速 线缆,将本产品上的 HDMI OUT (ARC) 接口连接至电视...
-
Page 10: Hdmi 连接数字设备
使用模拟线缆,将本产品上的 设置扬声器距离 AUDIO IN ( 毫米插孔)连接至 AUDIO OUT 后置扬声器的无线连接会导致音频延迟。设 电视或其他设备上的 置扬声器距离能在前置扬声器、后置扬声器 接口(红色和白色)。 和低音扬声器之间实现同步音频的输出。 按遥控器上的 切换至 DELAY 按 进入设置模式。 模式。 DELAY ADJ » 显示面板将滚动显示 (延迟调节)。 HDMI 通过 连接数字设备 • 要退出设置模式,请按 EXIT SETTINGS ,或 秒钟不按按钮。 HDMI DVD/ 通过单一 接口将机顶盒、 蓝 DELAY 光光盘播放机或游戏控制台等数字设备连 再按... -
Page 11: 使用您的产品
使用您的产品 均衡器 更改本产品的高频(高音)和低频(低音) 设置。 本节旨在帮助您使用本产品播放连接设备 TREBLE +/- BASS +/- 按 或 更 中的音频。 改频率。 开始之前 • 根据快速入门指南和本用户手册中所 同步视频和音频 述,建立必要连接。 • 选择正确的与连接设备对应的声音输 如果音频和视频不同步,请延迟音频以匹 入源。 配视频。 AUDIO SYNC +/- 按 同步音频与 视频。 调节音量 夜间模式 按 音量 增大或减小音量。 在播放音频时,夜间模式可降低响亮声音 • 要静音,按 。 的音量,达到安静聆听的效果。夜间模式 •... -
Page 12: Usb
米( 英尺)。 设备之间进行短距离无线通信的技术。 按遥控器上的 可将本产品切换至蓝 所需组件 牙模式。 • 具有 功能的蓝牙设备。 » 显示面板上显示闪烁的 。 • 要进行配对,请用 设备轻击本产 品的 标签。 在蓝牙设备上,开启蓝牙,搜索并选择 Philips CSS5530 以开始连接(有 在蓝牙设备上启用 (有关详细信 关如何启用蓝牙功能,请参阅蓝牙设备 息,请参阅设备用户手册)。 用户手册)。 请用 设备轻击本产品的 标 • 首次连接时,某些移动设备会出现 签,直到本产品发出蜂鸣音。 配对提示,选择“是”进行连接。 • 首次连接时,某些移动设备会出现 » 设备连接时,显示面板上的 会 配对提示,选择“是”进行连接。... -
Page 13: 更新软件
集线器或 多功能阅读器,则可能无法识别 存储设备。 • 在软件更新过程中,请勿关闭电源或移除 闪 • 不支持数码相机 和 协议。 存盘,因为这样做可能会损坏本产品。 • 不要在读取文件时移除 存储设备。 • 支持 端口: 伏 毫安。 www.philips.com/support 在 上 检查最新的软件版本。 • 搜索您的型号,然后单击“软件和 自动待机 驱动程序”。 将软件下载到 闪存盘中。 播放所连接设备中的媒体时,如果按钮处 a 将下载的文件解压缩(如果已压 于不活动状态 分钟,并且未播放所连接 缩),并确保解压缩的文件包含以 设备中的音频 视频,则本产品会自动切换 CSS5530.bin 下两个文件:“ ”... -
Page 14: 壁挂安装
壁挂安装 在遥控器上,在 秒钟内按 次 ,再按 次 音量 ,然后按下 SOUND 。 » 然后,显示面板上会闪烁“ ” 在将本产品安装到墙壁之前,请阅读所有 (升级)。 安全防范措施。 » 如果未连接 闪存盘或发现无 效的升级文件,则显示面板上会显 注 ERROR 示“ ”(错误)。 • 若壁挂安装不当,则可能造成事故、人身伤害或 按遥控器上的 开始升级。 损坏。如果您有任何疑问,请联系您所在国家 地 等待更新完成。 区的客户服务。 • » 更新完成后,本产品将自动关闭并 将挂架固定到可承受本产品和挂架总重量的墙 壁上。 重新打开。 螺钉长度 直径 注... -
Page 15: 产品规格
产品规格 主装置 • 电源: • 型号(飞利浦品牌的交流电源适 注 DYS602-210309W 配器): ; AS650-210-AA309 • 规格和设计如有更改,恕不另行通知。 100-240 • 输入: 约 伏, 50/60 赫兹, 安 3.09 • 输出: 伏 , 安 • 功放器 待机功耗:≤ 瓦 • 尺寸(宽 高 厚): 420W RMS • 总输出功率: 580 x 51.5 x 98 毫米... - Page 16 厚): 警告 150 x 44.5 x 126 毫米; • • 重量: 千克 存在触电危险。切勿拆下本产品的外壳。 遥控器电池 为保证保修的有效性,切勿尝试自行维修 本产品。 AAA-R03 • 节 伏 如果在使用本产品时遇到问题,请在申请 服务之前检查以下事项。如果仍遇到问 www.philips.com/support 待机电源管理 题,请在 页面上获得支持。 • 本产品保持不活动状态 分钟后, 将自动切换至待机或联网待机模式。 主装置 • 待机或联网待机模式下的功耗低于 瓦。 本产品上的按钮不起作用。 • 要禁用蓝牙连接,请按住遥控器上的蓝 • 将本产品的电源断开几分钟,然后重 牙按钮。...
- Page 17 音频和视频不同步。 AUDIO SYNC +/- • 按 将音频与视 频同步。 蓝牙 设备无法与本产品连接。 • 设备不支持本产品所需的兼容规格。 • 您尚未启用设备的蓝牙功能。有关如何 启用该功能,请参阅设备的用户手册。 • 设备未正确连接。正确连接设备。 • 本产品已连接其他蓝牙设备。断开连接 的设备,然后重试。 播放所连接蓝牙设备中的音频时音质 较差。 • 蓝牙接收质量较差。将设备移近本产 品,或移除设备与本产品之间的任何 障碍物。 所连接的蓝牙设备时断时续。 • 蓝牙接收质量较差。将设备移近本产 品,或移除设备与本产品之间的任何 障碍物。 Wi-Fi • 关闭蓝牙设备的 功能以避免 干扰。 • 对于某些蓝牙设备,为节省电量可能会 自动禁用蓝牙连接。这并不表示本产品 存在故障。 设备无法通过...
- Page 18 Contents 1 Important 7 Product specifications Help and support Safety 8 Troubleshooting Care for your product Care of the environment 2 Your product Main unit Remote control Connectors Wireless subwoofer Wireless box (receiver) 3 Connect and set up Place speakers Pair up with the rear speakers Pair up with the subwoofer Connect to TV...
-
Page 19: Important
• Where the mains plug or an appliance coupler is used as the For extensive online support, visit disconnect device, the disconnect www.philips.com/support to: device shall remain readily operable. • download the user manual and the • Batteries (battery pack or batteries... -
Page 20: Care For Your Product
• • Never place the product or any When you change the batteries, objects on power cords or on other always keep all new and electrical equipment. used batteries out of reach of • If the product is transported in children. -
Page 21: Your Product
2 Your product Remote control This section includes an overview of the Congratulations on your purchase, remote control. and welcome to Philips! To fully benefit from the support that Philips offers, register your product at www.philips.com/welcome. Main unit This section includes an overview of the main unit. -
Page 22: Connectors
USB: Switch your audio source to Connectors the USB connection. HDMI IN: Switch your source to the This section includes an overview of the HDMI IN connection. connectors available on this product. : Switch to Bluetooth mode; Press and hold three seconds to break the current Bluetooth connection. -
Page 23: Wireless Subwoofer
Wireless subwoofer Wireless box (receiver) This product comes with a wireless This product comes with a wireless box subwoofer. (receiver) to make the rear speakers work with the main unit wirelessly. a AC MAINS Connect to the power supply. b PAIRING (pairing) Press to enter the pairing mode for the rear speakers and the main unit. -
Page 24: Connect And Set Up
3 Connect and set This section helps you connect this WOOFER product to a TV and other devices, and FRONT SPEAKER FRONT SPEAKER then set it up. FRONT CENTER For information about the basic connections of this product and accessories, see the quick start guide. Note •... -
Page 25: Pair Up With The Rear Speakers
» The white LED on the wireless from the main unit. Make sure that the left, right, and the main unit are box blinks quickly. at equal distance from your seating In OPTICAL mode (press OPTICAL) position. , within six seconds, on the remote REAR SPEAKER L (rear left) and control, press twice then... -
Page 26: Connect To Tv
» If the pairing fails, the white LED setup is correct, or contact the on the subwoofer blinks slowly. TV manufacturer if needed. Press HDMI ARC on the remote If the pairing fails, repeat the steps control of this product to enable the above. -
Page 27: Connect Digital Devices Through Hdmi
• Using an optical cable, connect audio is automatically played on the OPTICAL IN connector on this product. this product to the OPTICAL OUT Using a High Speed HDMI cable, connector on the TV or other device. connect the HDMI OUT connector •... -
Page 28: Use Your Product
4 Use your Press DELAY again to select a speaker for distance adjustment. product Press Volume +/- to adjust distance for the selected speaker. • To exit setup mode without save, press EXIT SETTINGS, or This section helps you use this product 3 seconds of button inactivity to play audio from connected devices. -
Page 29: Mp3 Player
On the Bluetooth device, switch on Bluetooth, search for and select MP3 player Philips CSS5530 to start connection (see the user manual of the Connect your MP3 player to play your Bluetooth device on how to enable audio files or music. -
Page 30: Connect Bluetooth Via Nfc
What you need Wait until this product beeps. » When the Bluetooth connection • A Bluetooth device with NFC succeeds, BT is displayed on the function. • display panel. For pairing, tap the NFC device on the NFC tag of this product. »... -
Page 31: Auto Standby
Use the remote control to control Apply factory settings play. • Press to start, pause or You can reset this product to the default resume play. settings programmed at the factory. • Press to skip to the previous or next track. In AUX mode, on the remote control •... -
Page 32: Update Software
USB flash drive when the software update is in progress because you might damage this product. Check the latest software version on www.philips.com/support. • Search for your model and click on "Software and drivers". Download the software into a USB flash drive. -
Page 33: 7 Product Specifications
6 Wall mount 7 Product specifications Before you mount this product on the wall, read all safety precautions. Note Note • Specifications and design are subject to change without notice. • Improper wall mounting may result in accident, injury or damage. If you have any query, contact Consumer Care in your country. - Page 34 Main unit Wireless box/receiver • • Power supply: Power supply: 110-240 V~, • Model (Philips branded AC 50-60 Hz • power adapter): DYS602- Power consumption: 20 W • 210309W; AS650-210-AA309 Standby power consumption: ≤ 0.5 W • Input: 100-240 V~, 50/60 Hz •...
-
Page 35: Troubleshooting
If you still have a problem, get support at www.philips.com/support. Bluetooth A device cannot connect with this Main unit product. The buttons on this product do not •... - Page 36 • Turn off Wi-Fi function on the Bluetooth device to avoid interference. • For some Bluetooth, the Bluetooth connection can be deactivated automatically to save power. This does not indicate any malfunction of this product. A device cannot connect with this product via NFC.
- Page 37 Manufactured under license from Dolby Laboratories. Dolby, Pro Logic, and the double-D symbol are trademarks of Dolby Laboratories. The terms HDMI and HDMI High- Definition Multimedia Interface, and the HDMI Logo are trademarks or registered trademarks of HDMI Licensing LLC in the United States and other countries.
- Page 38 产品中有害物质的名称及含量 Names and Contents of Hazardous Substances 有害物质 Hazardous Substance 部件名称 铅 汞 镉 六价铬 多溴联苯 多溴二苯醚 Name of the parts (Pb) (Hg) (Cd) (Cr (VI)) (PBB) (PBDE) Housing 外壳 Subwoofer 超重低音箱 Loudspeakers 喇叭单元 PWBs 电路板组件 Accessories (Remote control & cables) 附件(遥控器,...
- Page 39 Innovations (Shanghai) Commercial Company Ltd., and WOOX Innovations (Shanghai) Commercial Company Ltd., is the warrantor in relation to this product. Philips and the Philips Shield Emblem are registered trademarks of Koninklijke Philips N.V. and are used under license from Koninklijke Philips N.V.
Need help?
Do you have a question about the 5000 Series and is the answer not in the manual?
Questions and answers