
Related Manuals for XDrum DD-460P Mesh E-Drum Kit


Summary of Contents for XDrum DD-460P Mesh E-Drum Kit
- Page 1 00073463 - XDrum DD-460P Mesh E-Drum Kit 00073464 - XDrum DD-460C Mesh E-Drum Kit Operating instructions Revision: 07-2021...
-
Page 2: Table Of Contents
© 2020 These operating instructions are protected by copyright. Reproduction of these operating instructions, even in part, is only permitted with the permission of Musikhaus Kirstein GmbH. The same applies to the reproduction or copying of images, even in modified form. Content Safety precautions and precautionary measures .......... - Page 3 XDrum DD-460 Thank you for choosing this product. To ensure that you are completely satisfied with this product, please read these operating instructions carefully before using our product. Keep these operating instructions in a safe place. The operating instructions must be passed on to all subsequent users.
-
Page 4: Safety Precautions And Precautionary Measures
XDrum DD-460 Safety precautions and precautionary measures Always place the appliance securely on a level surface to avoid injury from the appliance falling over. Do not place any devices that can heat up (e.g. lighting equipment or fog machines) on the unit. -
Page 5: Important Information
XDrum DD-460 Important information Power supply Do not plug the appliance into the same sockets as other electrical appliances controlled by an inverter (e.g. freezer, washing machine, microwave or air conditioner) or containing a motor. Depending on how the electrical appliance is used, disturbances in the power supply may cause malfunctions and/or produce audible noises. -
Page 6: Structure And Functions
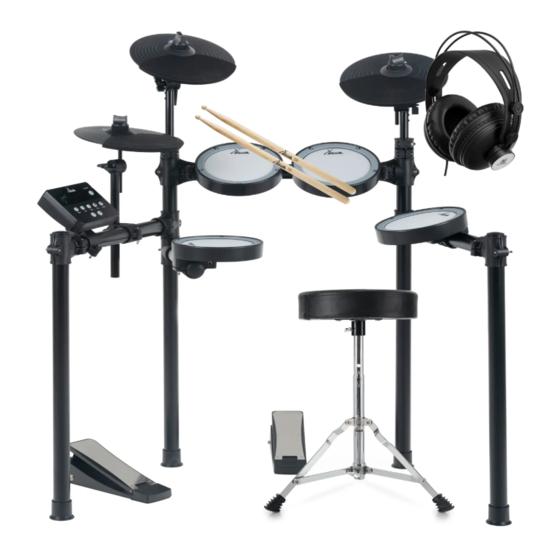
XDrum DD-460 Structure and functions 1. Drum module 2. Hi-Hat Cymbal 3. Crash Cymbal 4. Tom 1 Pad 5. Tom 2 Pad 6. Ride Cymbal 7. Tom 3 Pad 8. Snare Pad 9. Foot machine 10. Hi-Hat Controller... -
Page 7: Installation Instructions
XDrum DD-460 Installation instructions Workflow: • Open the packaging with a knife and remove all components. Compare the components with the parts list above. • Assemble the components as described in the pictures below and then screw them tight. - Page 8 XDrum DD-460 • Mounting the cymbal pads on the cymbal arms...
- Page 9 XDrum DD-460 • Attach the tom to the frame g. • You can now place the pedals on the floor and connect the cymbal pads and toms to the module via cable.
-
Page 10: Module
XDrum DD-460 Module Top and bottom 1) Volume control: For adjusting the volume 2) On/Off button: Switch the unit on or off 3) DRUM button: Press this button and then use the [+] / [-] buttons to select the different drum kits. -
Page 11: Basic Settings And Operation
XDrum DD-460 Back cover 1) DC IN socket: Connect the supplied power supply unit here to supply the e- drum with power. 2) USB socket: Use this socket to connect your e-drum to a PC/laptop/etc. via USB cable, so that you can use midi functions. - Page 12 XDrum DD-460 4.2) CLICK mode Press the CLICK button to switch to CLICK mode The light of the CLICK button lights up Use the [+] / [-] keys to select the tempo The possible tempo range is between 20 - 300...
- Page 13 XDrum DD-460 4.4) Recording mode (REC button) Press the REC button to switch to recording mode. The REC button light comes on, the metronome starts automatically and you are ready to record. Hit a pad to start recording Press the REC button to stop recording...
-
Page 14: Advanced Settings
XDrum DD-460 Advanced settings 5.1 Setting the volume and trigger parameters Press the DRUM button to enter drum kit mode Press the MULTI button for more than 2 seconds to enter the PAD volume adjustment setup. Now the light of the DRUM button flashes Hit the pad that you want to adjust the volume of. - Page 15 XDrum DD-460 5.2 Setting the metronome The tempo as well as the beat and note values can be changed. Press the CLICK button to access the metronome settings Press and hold the MULTI button for more than 2 seconds for the...
- Page 16 XDrum DD-460 MIDI code default values Pads Key value Bass Drum Snare head Snare Rim Shot Tom1 Fur Tom2 Fur Tom3 Fur Crash surface Crash edge Ride surface Ride edge Pads Key value Hi-Hat surface (open) Hi-Hat rim (open) Hi-Hat surface (closed)
-
Page 17: Weee Declaration
XDrum DD-460 WEEE Declaration (Waste of Electrical and Electronic Equipment) Your product has been designed and manufactured using high quality materials and components that are recyclable and reusable. The symbol means that your product must be disposed of separately from household waste at the end of its life. Dispose of this appliance at your local collection point or recycling centre.
Need help?
Do you have a question about the DD-460P Mesh E-Drum Kit and is the answer not in the manual?
Questions and answers