Table of Contents
Advertisement
Quick Links
Advertisement
Table of Contents

Related Manuals for XDrum DD-508L


Summary of Contents for XDrum DD-508L
- Page 1 DD-508L E-Drum Set Users manual 00022174 Version 01/2010...
- Page 2 Congratulations! Thank you for purchasing this digital drum module. The drum module has been developed to act and play like a drum set but with greater ease. Before you use the instrument, we recommend you to read through this manual. Taking Care of Your Digital Drum Set Location Handling and Transport...
-
Page 3: Table Of Contents
Contents Features PANEL Controls -Front PANEL -Rear Panel Setup Connect the Pads and the Pedal - Connect a MIDI and USB device - Connect a audio equipment - Connect a CD player, etc.(Aux in jack) - Connect Headphones - Connect the Power supply jack Quick Start -POWER ON -Demo... - Page 4 Contents UTILITY -Trigger 40-41 -Effect -MIDI Settings -Reset SD Card -Explore the files in a SD card -Playback MIDI files in a SD card -Mute a channel of the MIDI file Load 45-46 Delete Format -The error information during a card operation APPENDIX VOICE LIST 48-55...
-
Page 5: Features
The digital drum is a top grade drum product for all professional drum players. It is easy for performing, tuition, recording or etc. It can be performed freely with almost 700 drum voices and 220 songs of High quality! Also, you can use SD card to store your own songs or USB MIDI function to connect the computer. -
Page 6: Panel Controls
Panel Controls Front Panel QUICK [MIXER ] but ton [M AST ER] / [AUX] / [P HON ES] butto ns En ter M IXER men u, ad just m aste r volu me Ma ter Volum e, Au x In volum e, inc ludin g Kit volum e, A ccom paniment volum e, ph one volum e Kn obs Ca rd midi vol ume or Click vo lume . -
Page 7: Rear Panel
Panel Controls Rear Panel DC input AUX IN Connection for the DC 9V power adapter. This stereo input jack is for an external sound source such as an MP3 or CD player. Power switch This switch turns power on and off. Line output jacks Stereo output connection to an audio system or drum amplifier. -
Page 8: Setup
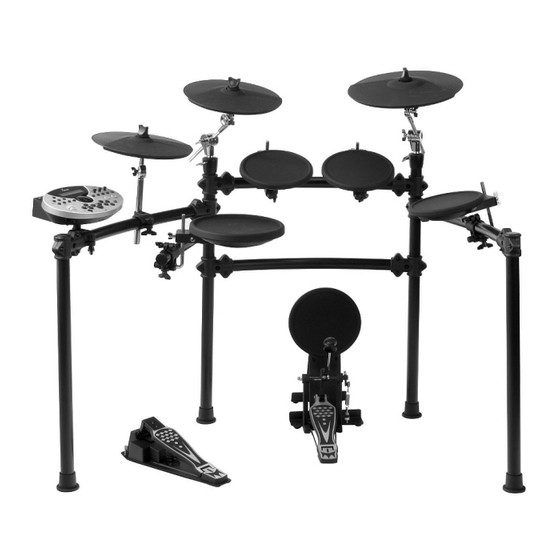
Setup Caution! To prevent electric shock and damage to the device, make sure the power is switched OFF on the drum and all related device before making any connection. Connect the Pads and the Pedals Using the provided cables, connect each Trigger input jack on the rear panel of the module, and make sure each pad is connected to its corresponding Trigger input jack. -
Page 9: Connect A Midi And Usb Device
Setup Connect a MIDI and USB device MIDI device This is for you want to use an external sound module or MIDI sequencer. The drum will output all the MIDI codes generated by hitting pads or stepping pedal via the MIDI output or USB port. But clicking and the MIDI codes in songs are excluded. -
Page 10: Lcd
+100 INST SONG DEMO CLICK N UM T EMP O D ATA Current Kit index : A dot matrix that allows displaying variable size fonts and icons. Main Display The main part of this dot matrix is used to display the current kit or song name, and all the various menus. -
Page 11: Quick Start
Quick Start POWER ON Connect the DC 9V power adapter to the Drum Module, and then set the power switch to the "ON" position. DEMO Press button and button simultaneously [KIT] [UTILITY] to enter Demo Mode: Press buttons to select a Demo to play; [+]/[-] button control the play. -
Page 12: Adjust Value
Quick Start Adjust Value 1. Select the parameter to be adjusted referring to the LCD icon" " ([Page -] / [SAVE/ENTER] / [PAGE +] is valid) 2. Adjust the value using [+]/[-] buttons or DIAL ; Rename Operating guide LCD display [PAGE+] Move the c urso r right [PAGE-]... -
Page 13: Kit
The digital drum has 99 including 40 Preset Kits + 59 User Kits Kits for you to select. ( ) Selecting KIT 1.Enter KIT Mode Press the button to enter KIT mode. The Kit [KIT] indicator " KIT " is lightened and the LCD displays the current Kit number and Kit name like below: Press the button or use the DIAL to select a Kit... - Page 14 >> Table 1.2 PAD NUM TRIG NUM NAME MIDI Note KICK SNARE SNARE R TOM1 TOM1 R TOM2 TOM2 R TOM3 TOM3 R TOM4 TOM4 R RIDE RIDE R RIDE Bell CRASH1 CRASH1 R CRASH2 CRASH2 R O HIHAT O HIHAT R Half Open HIHAT Half Open HIHAT R C HIHAT...
-
Page 15: Editing Kit
Editin g KIT 1.Editing Pad voices In Kit menu, Press [MENU] button to edit Pad Voices of the current kit. All parameters of the Pad, as VO I C E voices, volume, pan, decay, pitch .etc can be adjusted. TEMPO >>Table 1.3 Operating guide LCD display... - Page 16 >>Table 1.4 ([+]/[-]) PARAMET EREXPLAIN PARA RANGE DEFAULT Grp* Pad voice group (See detail below) Voc* Voice index/ HH combi group index 1~674 See detail below ( ) Volume Volume 0~127 (according L8~R8/Center to different Pitch Pitch -8~+8 Pad triggers) Decay Decay 0~-5...
- Page 17 Voc: The digital drum has up to 674 Drum voices. Press the button or use the DIAL to select a drum voice; when another voice group is selected, [+]/[-] the menu "Grp: " Will refresh simultaneously. NOTE: In the menu as below, the "DATA: 290 " icon indicate current Voice index: MIDI note: Define: Adjust the midi note of each pad triggers sending out through MIDI OUT Port.
- Page 18 Explain Details: Pattern: At most 7 pads can use Pad pattern (Hit or Tap types) simultaneously. 、 Grp Sng: All the Songs (including Preset Songs, User Songs) can be selected for pad pattern; Use the DIAL or press the [+]/ [-] button to select a song you like; when another song group is selected, the menu"Grp:"will refresh simultaneously.
- Page 19 DrumVoc: Define: Choose that whether sound drum voice when pad pattern is ON. ON: Default setting. When triggering the pad, sound the pad pattern also with drum voice; OFF: When triggering the pad, just sound the pad pattern. 3. Exchange Kit Order 1)Select a Kit: 2)Press the button, and the...
-
Page 20: Saving Kit
Saving KIT The d igit al drum allows modify ing and saving user Kits in local or SD Card, i t is convenient fo r you to transit and use. NOTE: In the inner o f the menu, press the but ton, you can also ent er saving page to save cu rren t kit . - Page 21 §Saving User Kit Select a user Kit , for example "MyKit001": Press the button to enter the saving page, with th e operation as below (Table 1.10): [SAVE/E NTER] >>Table 1.10 Operating guide LCD display [SAVE/ENTER] save to local (see Table 1.9) [+]/[-] to select a Kit [PAGE+] Save cur rent Kit to SD card...
-
Page 22: Mixer
MIXER Master Kit volume, Accompaniment Volume (=Master Song play volume), Click Volume and Card MIDI Volume can be balanced together in the drum module mixer menu. §Master Volume Press the button to enter mixer menu: [MIXER] P ress th e b utton consta ntly to selec t [PAGE+] "S ongpVol", "C lickVol"... - Page 23 MIXER >>Table 2.2 Operating guide LCD di splay [MIXER] Master Kit Vo lume [ SAVE/ENTER] Adju st trigger's volum e [ +] [PAGE +] Master Accompaniment Volume [ SAVE/ENTER] Adjust Song part s' volum e [PAGE+] [PAGE +] Click vol ume [PAGE +] C ard Midi volume >>Table 2.3...
-
Page 24: Song
SONG The digital drum comes with 220 songs. Preset (Internal) Songs (Songs 1-120) User Songs (Songs 、 121-220). The digital drum is sequencer organizes music into seven parts. The Drum Kit part is used to record/play back what is played on the pads. Additionally, Percussion part, Part 1, Part 2, Part 3, Part 4 and Part 5 are the 6 backing instrument parts (backing parts). -
Page 25: Song Editing
SONG Adjusting Song Acmp Volume Adjust background volume of the song to balance the Kit volume. refer to MIXER ) ( Adjusting Temporarily Tempo You can temporarily change the tempo of a song while playback is in progress. The song returns to its preset tempo when a different song is selected. - Page 26 SONG Whole Settings(SET UP) 1.On" SET UP" screen, Press [SAVE/ENTER] to enter the screen of whole settings: 2.Press , switch setting menus. [PAGE+]/[PAGE-] >>Table 3.3 Operating Guide Lcd Display [SAVE/ENTER] SONG playback rate SONG Beat [PAGE+] SONG playback mode [PAGE+] measures before playback of a song begins [PAGE+] Kit Synchronizing...
- Page 27 SONG Parameters Explanations: If during playback of a song, the parameters edited become effective at once. TEMPO You can temporarily change the tempo of a song while playback is in progress. The song returns to its preset tempo when a different song is selected. T-Sig For the preset songs, this parameter shows the current song's default value;...
- Page 28 SONG Part Settings(Drum/Perc/PART1~Part5) ==Drum/Perc Part== 1.On song menu screen, select corresponding part, then press to enter the screen of [SAVE/ENTER] part settings: 2,Press ,switch setting menu: [PAGE+]/[PAGE-] >>Table 3.5 Operat ing g uide L CD display [PA GE+] Part Setting [SAVE/ENT ER] Kit Num ber applied f or drum /perc part [PA GE+]...
- Page 29 SONG >>Table 3.7 Operating guide LCD display [SAVE/ENTER] Voice applied for part1~part5 Part volume [PA GE +] Part reverb [PA GE +] Part pan [PA GE +] >>Table 3.8 Pa rameter Bri ef E xplain Range D efau lt Voc* Voi ce applie d for part1~part5 detai led i nstructions below Volume...
-
Page 30: Saving Song
SONG Saving Song The digital drum allow you to edit preset song and save to user song for using; conveniently. Also allow to save current user song and all user songs to SD card. NOTE: Not only on SONG screen, but also in the deeper menu of song editing, press [SAVE/ENTER] will enter Song Save screen. - Page 31 SONG == EACH SONG SAVING == If user song edited, press [SAVE/ENTER] If no identified SD card, you can save song to local, reference operation as follows: >>Table 3.10 Operating guide LCD display [ SAVE/ENTER] Select save position [ +] Select user song [ -] [ SAVE/ENTER]...
-
Page 32: Mute
MUTE M UTE ON : Press and hold the button, then [MENU] press button, enter the [PART MUTE]] Mute When mut e on, the led is lighten. [PART MUTE] In SONG mode, press the [PART MUTE] button, you can m ute Song parts (drum, percussion, part1~part5);... - Page 33 MUTE M ute a chann el of th e MI DI fi le 1.When brow sing the SD c ard, press and hold [MENU] button, t hen pres s [PART MUTE] to sel ect t he settings of the mute option. You can select any of th e 16 channe ls to be m uted when the part mu te functi on is enabled .
-
Page 34: Record
RECORD 100 user songs can be recorded, each song has 7 record tracks (Drum + Percussion + Part1~Part5), in which Part1~Part 5 can only be recorded by MIDI IN. Record a New Song 1. Select a new song (ahead of the song's name, there is a “*”... -
Page 35: Record
RECO RD RECORD 1.Start Recording ==Recording Drum/Percussion parts== In record waiting statement, press button or trigger the pads (when SYNC Start is ON) to [PLAY/STOP] start recording. LCD displays” Recording…”, the measure and beat icons would refresh . At this time, [REC] button and [PLAY/STOP] button both would be lightened. -
Page 36: Recording Based On Preset Song
RECO RD Recording Based on preset song 1.Select a preset song (for example 021), press button, t he digital drum i ndicates [REC] saving it to a user song, it would select the first new user song to be t he destination (if there is no new user song, select the very first user song): LCD ico n "N UM: 021 "... - Page 37 RECO RD >>Table 5.2 PARA RANGE([+]/[ - ]) PARAMETER EXPLAIN DEFAULT Select record part Drum/Perc Drum Part * record time signature 1-9/2,1-9/4,1-9/8, 1 -9/16 TimeSig tempo 30~280 Tempo record mode New/Overdub Overdub Mode * loop length OFF/ALL/1~99 Loop* Quantize resolution OFF/8/8T/16/16T/32/32T/64 Qntize* synchronous start...
-
Page 38: Click
CLICK Click ON/OFF You can swit ch th e cl ick sound on and off by pressing [ CLIC K]. [CLICK] ligh ts while the click sou nd is set to b e played. N OTE: In DEMO,[CLI CK] is in valid. Click Settings Holding down and pressing... -
Page 39: Save
SAVE ALL User Kits, user Songs and Global Setup (including click, pad, and mixer setting .etc) can be saved in SD Card. see the default saving path: >>Table 7.1 File Type Format Saving Path user Kit *.KIT ..Root\ M Y_EDRUM \ All user Kits *.KIT ..Root\ MY_EDRUM \... - Page 40 UTILITY The t rigger de tection parameters, reverb effect, EQ, M IDI set up, reset to factory default can be set in UTILITY menu. Press butto n to enter the utility menu: [UTILITY] >>Table 8.1 Operatin g Guide LC D display [UTILITY ] Trigg er detec tion para meters [SAVE/E NTER]...
-
Page 41: Trigger
UTILIT Y Trigger You can set the parameters of each drum pad and cymbals in the Trigger menu. During the setting, you can select each trigger by hitting the corresponding trigger or use the drum buttons on the panel. Here are the parameters for triggers: >>Table 8.2 Parameter([+]/[ - ]) Item... - Page 42 UTILIT Y Scan-T (Scan time) Since the rise time of the trigger signal waveform may differ slightly depending on the characteristics of each pad or acoustic drum trigger (drum pickup), you may notice that identical hits (velocity) may produce sound at different volumes. If this occurs, you can adjust the SCAN TIME so that your “...
-
Page 43: Effect
UTILIT Y Effect You can set the Reverb effect and the 4 band EQ parameters in the “Effect” menu. >>Table 8.3 Item Explain Parameters Default Master reverb switch OFF/ON Reverb SRoom/MRoom/LRoom/Hall1/ Reverb type RvbTyp Hall2/Plate/Delay/P .Dely 4 band EQ master According to OFF/ON EQSwitch... -
Page 44: Sd Card
SD Card Explore the files in a SD card 1. Press the button, the button [CARD] would be lightened, and the root folder of the card would be opened. You'll see the folders and the supported files in the folder. *the digital drum can support *.MID, *.KIT, *.SNG, *.SET files. -
Page 45: Mute A Channel Of The Midi File
SD Card M ute a ch ann el of the MIDI file W hen browsing the S D card, press and hold button, th en press to select [MENU] [PART MUTE] th e settin gs of the m ute optio n. You can se lect an y of the 16 ch annels to be muted when the part m ute function is enabled. - Page 46 SD Card Load You can load a MIDI file to be a user song, or load back the setting of the KITs (*.KIT), all user songs (*.SNG), or your global setting (*.SET). E.g. if you want to load a MIDI file to be a user song, after you've selected the “Load” in the card menu: 1.
- Page 47 SD Card 4.If you confirm the selection, the MIDI file would be loaded to the selected user song memory slot, and you will see “Song Loaded!” Note: Only MIDI files smaller than 32 Kbytes can be loaded. The load user song function support SMF 1 only, and up to 7 channels of the MIDI file can be used in the 1 shot or loop type user song.
-
Page 48: Format
SD Card Format 1.Select “Format” in card menu, press , we will ask you to confirm the [SAVE/ENTER] operation. 2.Press to confirm or press to abort. [SAVE/ENTER] [EXIT] Note: After format, all previous data in the card will be erased. Please make sure that you have back up all the important information in the card. -
Page 49: Voice List
VOICE LIST 94l name Full Name AcBd17 Acoust Kick 17 StdBd1 Standard Kick 1 AcBd18 Acoust Kick 18 StdBd2 Standard Kick 2 AcBd19 Acoust Kick 19 ClascBd1 Classic Kick 1 AcBd20 Acoust Kick 20 ClascBd2 Classic Kick 2 AcBd22 Acoust Kick 22 RockBd1 Rock Kick 1 AcBd23... - Page 50 VOICE LIST 506Sn1 506 Snare 1 12 9 ElBd18 Electron Kick 18 506SnR1 506 Snare Rim 1 13 0 ClasSn1 Classic Snare 1 13 1 506Sn2 506 Snare 2 ClasSnR1 Classic Snare Rim 1 506SnR3 506 Snare Rim 3 13 2 ClasSn2 Classic Snare 2 1969Sn...
- Page 51 VOICE LIST ElSn4 Electronic Snare 4 ClsTmR1b Classic Tom Rim 1 b ElSn5 Electronic Snare 5 ClsTm2b Classic Tom 2 b ElSn6 Electronic Snare 6 ClsTmR2b Classic Tom Rim 2 b ElSn7 Electronic Snare 7 ClsTm3b Classic Tom 3 b ElSn9 Electronic Snare 9 ClsTmR3b...
- Page 52 VOICE LIST RoomTm3 Room Tom 3 BshTm2b Brush Tom 2 b RoomTm4 Room Tom 4 BshTmR2b Brush Tom Rim 2 b RoomTm5 Room Tom 5 BshTm3b Brush Tom 3 b RoomTm6 Room Tom 6 BshTmR3b Brush Tom Rim 3 b Timpani Timpani BshTm4b...
- Page 53 VOICE LIST 34 4 VoiceTm3 Voices Tom 3 3 87 ClsCr2 Classic Crash 2 ClsCr3 Classic Crash 3 34 5 IndTm1 Industry Tom 1 3 88 ClsCr4 Classic Crash 4 34 6 IndTm2 Industry Tom 2 3 89 34 7 IndTm3 Industry Tom 3 3 90...
- Page 54 VOICE LIST 43 0 MiniHOp Mini HH Open JyHCs Junkyard HH Close 43 1 MiniHOpR Mini HH Open Rim NoiceHCs Noices HH Close 43 2 ClsHOpA Classic HH Open A BrshHCs Bass HH Close 43 3 ClsHOpB Classic HH Open B StdHPdA Standard HH Pad A 43 4...
- Page 55 VOICE LIST CgslpLo Conga SlapLow 56 0 Tabla3 Tabla003 CgslpHi Conga Slap High 56 1 Tabla4 Tabla004 ElectCgL Elect Conga Low 56 2 Tabla5 Tabla005 OpCga Open Conga 56 3 Tabla6 Tabla006 Cgaslp Conga Slap 56 4 FX 1 CowBl Cow bell 56 5 FX 2...
- Page 56 VOICE LIST FX41 FX 41 Fx006 FX42 FX 42 Fx007 FX43 FX 43 Fx008 FX44 FX 44 Fx009 FX45 FX 45 Fx10 Fx010 FX46 FX 46 Fx11 Fx011 FX47 FX 47 Fx12 Fx012 FX48 FX 48 Fx13 Fx013 FX49 FX 49 Fx14 Fx014 FX50...
-
Page 57: Kit List
KIT LIST NAME NAME Acoust-1 DrumBass FunkBand Funk Pwrbd HipHop-1 Std-2 HipHop-2 Acoust-2 House-1 Fusion House-2 Camco Vintage JzBrush Junkyard Room M-box Rock Step PopRock Industry Lowfi Jazz Brush Metal Songo Electron 1971's JzLatin Timbals Noise O school Std-1 Tr606 R&B Disco Magic... -
Page 58: Song List
SONG LIST Number Group LCD Name Name Pattern Loop Fusion 1 Fusion1 Hiphop Hiphop 16 Beat Pop 16Bt Pop Dance 1 Dance1 Latin Dance 1 LtinDan1 Rock 1 Rock1 Latin Jazz 1 Ltin Jz1 Funk 1 Funk1 Latin Pop 1 LtinPop1 60's Rock 60'sRock... - Page 59 SONG LIST Funk4 Funk 4 Mambo Mambo LtinDan2 Latin Dance 2 D N'B2 Drum N'Bass 2 Pop Rk Pop Rock Punk Punk Fusion4 Fusion 4 Break Beat 2 BreakBt2 Dance Rk Dance Rock Funk5 Funk 5 Fusion5 Fusion 5 Reggae2 Reggae 2 Couty Bl Country Blues...
- Page 60 SONG LIST Disco2 Disco 2 Boogie 2 Boogie2 Metal 2 Metal2 HardRock Hard Rock Latin1 Latin 1 Percussion World2 World 2 Loop Latin2 Latin 2 Bossa Bossa Samba2 Samba 2 3/4 Pop 3/4Pop Pop 3 Pop3 Jazz 2 Jazz2 Reggae4 Reggae 4 Reggae5 Reggae 5...
-
Page 61: Demo List
Voice List DEMO LIST Demo No. NAME FUSION WORLD ASCII CHARACTER LIST &...
Need help?
Do you have a question about the DD-508L and is the answer not in the manual?
Questions and answers