
Related Manuals for APG B Series


Summary of Contents for APG B Series
- Page 1 LOE Ultrasonic Level Sensors User Manual Web Enabled Controller, Series B Doc #9004258 Rev C, 04/16 1.800.544.2843 www.calcert.com sales@calcert.com...
-
Page 2: Table Of Contents
Table of Contents Introduction ........................ iii Warranty and Warranty Restrictions ..............iv Chapter 1: Specifications and Options..............1 Dimensions ............................1 Specifications ..........................2-3 Model Number Configurator ......................3 System Wiring Diagrams ......................4-6 Chapter 2: Installation and Removal Procedures and Notes ......7 Tools Needed ............................. -
Page 3: Introduction
The LOE Ultrasonic Level Sensor and Web Enabled Controller offers a wide degree of integrated, flexible, remote and local control and monitoring for your system. The LOE can control up to 10 APG Modbus sensors--any combination of level, pressure, magnetostrictive and ultrasonic--and two input or output relay terminals. -
Page 4: Chapter 1: Specifications And Options
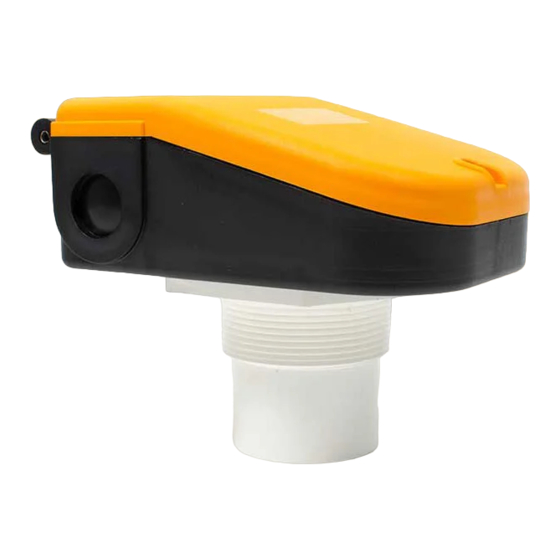
Chapter 1: Specifications and Options • Dimensions LOE-2126, LOE-6126 4.00” 6.05” 101.6mm 153.7mm 2.40” 61.0mm 2” NPT 2.30” 58.4mm 5.50” 139.7mm 2.00” 50.8mm LOE-3136 4.00” 6.05” 101.6mm 153.7mm 2.40” 61.0mm 3” NPT 3.86” 98.0mm 5.50” 3.00” 139.7mm 76.2mm 1.800.544.2843 www.calcert.com sales@calcert.com... -
Page 5: Specifications
Programmable, 5 Hz maximum (200 ms) Communications Digital Output Ethernet TCP/IP Modbus Ethernet TCP/IP via embedded webserver (LAN only) Ethernet TCP/IP to APG-provided website 0-2 Isolated Solid State Relays Inputs RS-485 Modbus (up to 10 slave sensors) 0-2 Discrete Switches... -
Page 6: Model Number Configurator
Mounting LOE-2126 2” Ø NPT LOE-3136 3” Ø NPT LOE-6126 2” Ø NPT Compatible APG Modbus Senors Ultrasonic Magnetostrictive MPX-E1, MPX-R1 Pressure PT-400-L5, PT-400-L31, PT-500-L5, PT-500-L31 Controllers DCR-1006A, MND • Model Number Configurator Model Number: LOE - _____ - _____ A. -
Page 7: System Wiring Diagrams
• System Wiring Diagrams External 12-28 VDC Source Wiring To 12-28 VDC Power Supply SEND/ RESET RS-485 ETHERNET PORT NOTE: Power terminals for 24V and GND can only be used to power Modbus sensors if LOE is powered via POE. If LOE is powered via 12-28 VDC supply, Modbus sensors must be powered independently. - Page 8 Modbus Sensor Daisy-chain Wiring 270 Ω terminating resistor NOT internal to LOE RS-485 NOTE: Power terminals for 24V and GND can only be used to power Modbus sensors if LOE is powered via POE. If LOE is powered via 12-28 VDC supply, Modbus sensors must be powered independently.
- Page 9 System Overview - LOE with Modbus network, SSR’s and Internet Connection Computer Server Hosting Website and Internet Logged Data Computer Local Network / Internet Connection Network Connection to Internet Solid State Relays Modbus Input MNU Ultrasonic Sensors MP Magnetostrictive Float Level Sensors 1.800.544.2843 www.calcert.com sales@calcert.com...
-
Page 10: Chapter 2: Installation And Removal Procedures And Notes
Chapter 2: Installation and Removal Procedures and Notes • Tools Needed • Flat head screwdriver to remove knockouts for cables. • If you are using a stand pipe to mount your LOE, you will probably need tools to install the stand pipe. •... -
Page 11: Installation Notes
• Installation Notes • Mount your LOE sensor so that it has a clear, perpendicular sound path to the surface being moni- tored. Your sensor should be mounted away from tank or vessel walls and inlets. (See Figure 2.1) • The sound path should be free from obstructions and as open as possible for the 9° off axis beam Figure 2.1 •... -
Page 12: Software Setup
• Software Setup Initial setup of the LOE and individual Modbus sensors is done via an embedded web server. The embedded server can be accessed by using either the serial number or local IP address of the LOE and a web browser (Internet Explorer, Chrome, Firefox, etc). - Page 13 On the Sensor Information screen you will see the IP Address of the newly installed LOE. (See Figure 2.6.) Type the LOE’s IP address into your browser’s address bar (See Figure 2.7). Figure 2.6 Figure 2.7 Logging on to the LOE Embedded Web Server The LOE’s embedded webpage should now be open, showing the Main Display page (See Figure 2.8).
- Page 14 Click on Home to bring up the Menu page (See Figure 2.9). The first menu link clicked during each session will prompt a User Name and Password login for the LOE (See Figure 2.10). The default User Name is admin, and the default Password is password.
-
Page 15: Removal Instructions
Change Numb of Sensors On Line to reflect the total number of Modbus sensors you will be connecting to your LOE. Click Change (or press Enter) to send the new value to the LOE. With Sensor Number to View set to 1 (for the latest sensor added to the Modbus network), set New Sensor Number to the highest available number. -
Page 16: Chapter 3: Programming With Modbus Tcp/Ip
Chapter 3: Programming with Modbus TCP/IP • Modbus Polling via Ethernet with Modbus TCP/IP Using the LOE’s IP address, and port number 502, readings can be polled from the LOE for any attached sensors via RS-485 Modbus commands. Up to 14 16-bit Input Registers, beginning with register 299, can be polled with a single command. -
Page 17: Loe Generic Modbus Register List
• Total number of registers requested, up to 14, given in hex: # of Registers Hex equivalent # of Registers Hex equivalent • LOE Generic Modbus Register List Input Registers (0x04) Register Returned Data 30299 Sensor Type 30300 Distance/Level 1, Top (in mm, unsigned) 30301 Distance/Level 2, Bottom (in mm, unsigned) 30302... -
Page 18: Chapter 4: Loe Embedded Web Server
Chapter 4: LOE Embedded Web Server • Accessing the LOE Embedded Web Server See the Software Setup section of chapter 2 (pages 9 - 11) for instructions for accessing and signing into the LOE embedded web server. • Navigating the LOE Embedded Web Server The LOE embedded web server has two primary screens--the Main Display Page (Figure 4.1) and Menu Page (Figure 4.2)--and a screen for each of 9 submenus. - Page 19 Figure 4.1 Figure 4.2 1.800.544.2843 www.calcert.com sales@calcert.com...
-
Page 20: Loe Sensor Input Configuration Submenus
• LOE Sensor Configuration Submenus LOE Application Parameters Figure 4.3 The Application Parameters menu configures the application-specific parameters applied to the calculated reading from the LOE sensor. PARAMETER RANGE Units 1 - feet 2 - inches 3 - meters Units is used to select the units of measurement for distance or level applications. The units will also determine the resolution of Basic and Application Parameters. - Page 21 PARAMETER RANGE Full Distance 0 - Sensor Maximum Full Distance sets the distance from the LOE sensor Zero Point (See Figures 4.5 - 4.7) to the full level of the vessel being monitored. Not used when Application Type is set to 0 (Value). PARAMETER RANGE Empty Distance...
- Page 22 Tank Parameters Application Type Tank Parameter Function 0 - Distance Parameter 1 Not Used Parameter 2 Not Used Parameter 3 Not Used Parameter 4 Not Used Parameter 5 Not Used Distance (factory default) measures the distance from the Zero Point of the Distance LOE sensor to the target surface.
- Page 23 Application Type Tank Parameter Function Diameter 3 - Standing Cylindrical Parameter 1 Tank Diameter Tank with Parameter 2 Bottom Radius Conical Parameter 3 Cone Length (Height) Full Bottom Parameter 4 Not Used Distance Parameter 5 Not Used Empty Distance Cone Length Cone Diameter...
- Page 24 Application Type Tank Parameter Function 6 - Spherical Tank Parameter 1 Tank Diameter Full Parameter 2 Not Used Distance Empty Parameter 3 Not Used Diameter Distance Parameter 4 Not Used Parameter 5 Not Used Application Type Tank Parameter Function 7 - Pounds Parameter 1 Multiplier (Linear Scaling)
- Page 25 Application Type Tank Parameter Function Full Distance 10 - Horizontal Oval Parameter 1 Tank Length Tank Parameter 2 Tank Depth Length Depth Empty Parameter 3 Tank Width Distance Parameter 4 Not Used Width Parameter 5 Not Used Application Type Tank Parameter Function 11 - Polynomial Parameter 1...
- Page 26 PARAMETER RANGE Sensitivity 0 - 100% Sensitivity sets the level of gain that is applied to the echo. When operating in AutoSense, Hard-Target, or Soft-Target (see Gain Control), Sensitivity sets an upper limit for the amplification that can be applied to the echo.
- Page 27 Effective Effective Effective Measurement Zone Measurement Zone Measurement Zone Offset Offset Zero Blanking Sensor Zero Blanking Sensor Zero Blanking Sensor Sensor Point Max. Point Max. Point Max. minus Max. Distance Distance Offset Distance Offset = 0 Offset > 0 Offset < 0 Figure 4.5 Figure 4.6 Figure 4.7...
- Page 28 PARAMETER RANGE Window 0 - Sensor Maximum Window determines the corresponding physical range for qualified samples, based on the current Distance. Samples beyond the +/- Window range of the current Distance will not qualify unless the average moves. Samples outside the extents of the Window are written to the Out of Range Samples buffer. (See Figure 4.8.) Example: Window = 6 Inches Out of Range Samples = 10...
- Page 29 PARAMETER RANGE Offset -10 ft - + 10ft Offset is used to change the Zero Point of the LOE sensor. The Zero Point of the sensor is the point from which the calculated distance is measured. When the Offset is set to 0, the Zero Point of the sensor is at the face of the transducer (See Figure 4.5).
- Page 30 Reading Type Range Signal Strength 0 - 100 Signal Strength displays the strength of the signal being received by the sensor. 0 represents the lowest quality signal, and 100 represents the highest quality. Reading Type Range Temperature Temperature displays the current temperature of the thermal device in the LOE sensor body. LOE Trip Outputs and Settings Figure 4.11 Figure 4.10...
- Page 31 Alarm Type TRIP TRIP DISTANCE WINDOW 1_ - Active Alarm Designates the active trip point as a web alarm condition. To initiate web alarm whenever the Trip Condition 3 is ON, Trip Type would be set to 13. TRIP TYPE 0 NEAR Alarm Type 2_ - Inactive Alarm...
- Page 32 Trip Condition TRIP TRIP DISTANCE WINDOW 5 - Hysteresis Far Hysteresis Far activates the Trip whenever the Calc. Dist,Level,Volume becomes greater than the Trip Distance + Trip Window settings. The Trip remains activated until the TRIP TYPE 0 NEAR Calc. Dist,Level,Volume becomes less than the Trip Value setting.
- Page 33 Figure 4.14 The LOE can have up to 2 input relays that can be tied to alarms on the remote APG-provided website. There are three alarm configurations for Trip Inputs: Alarm On on Input, Alarm Off on Input, and Relay On Time Check Limit.
- Page 34 External Website Communication Status Figure 4.15 The LOE embedded web server includes one parameter, a button, and two status reports for communication with the remote APG-provided website (i.e., www.levelandflow.com). PARAMETER RANGE Retry Time 30 - 180 Seconds Retry Time sets the time delay (in seconds) between attempts by the LOE to contact the external website.
-
Page 35: Modbus Sensor Configuration Registers
LOE-6126 PT-400/PT-500-L5 (Pressure) LOE-3136 DCR-1006A LOE-7126 RST-5001 MPX-E1/R1 (2 floats) RST-5003/4 MPX-E1/R1 (1 float) AUS-7123 PG-7 MTM-1000 PG-10 Note: This list represents sensors that interface with various APG Modbus software packages. Not all interface with the LOE. 1.800.544.2843 www.calcert.com sales@calcert.com... - Page 36 RS-485 Modbus Holding 1 Figure 4.17 This menu shows the contents of the first set of Holding Registers for the selected Modbus sensor (See Figure 2.8). The register names and value restrictions are automatically configured for the type of sensor detected (See Figure 4.16).
- Page 37 RS-485 Modbus Holding 2 Figure 4.18 This menu shows the contents of the second set of Holding Registers for the selected Modbus sensor (See Figure 2.8). The register names and value restrictions are automatically configured for the type of sensor detected (See Figure 4.16).
-
Page 38: Loe Utility Menus
• LOE Utilty Menus Network Settings Figure 4.19 1.800.544.2843 www.calcert.com sales@calcert.com... - Page 39 Security Settings Figure 4.20 The Security Settings allow users to set their own user name and password for logging into the embedded webpage. Labels Figure 4.21 The Labels menu allow users to create custom labels for the Main Menu, the LOE, and the sensors attached to the LOE.
- Page 40 Figure 4.22 When labels are created in the Labels menu, they will be reflected on the Main Menu page (See Figure 4.22). RS-485 Network Settings Figure 4.23 1.800.544.2843 www.calcert.com sales@calcert.com...
- Page 41 PARAMETER RANGE Baud Rate Checkbox 9600 Baud Baud Rate Checkbox is used to select the baud rate of the of the sensors connected to the LOE. All APG Modbus sensors communicate at 9600 Baud. PARAMETER RANGE Numb of Sensors On Line 0 - 10 Numb of Sensors On Line sets the number Modbus sensors connected to the LOE.
-
Page 42: Chapter 5: Maintenance
Chapter 5: Maintenance • General Care Your LOE series controller is very low maintenance and will need little care as long as it is installed correctly. However, in general, you should: • Avoid applications for which the sensor was not designed, such as extreme temperatures, contact with incompatible corrosive chemicals and fumes, or other damaging environments. -
Page 43: Calibration
• Calibration This procedure uses targets at known distances to calibrate the LOE sensor’s accuracy. A wall or other large, flat object is recommended for the long range target. • Point the sensor at a target at a known distance near the maximum range of the sensor (See Figure 5.1).
Need help?
Do you have a question about the B Series and is the answer not in the manual?
Questions and answers