Table of Contents
Advertisement
Available languages
Available languages
Advertisement
Chapters
Table of Contents

Related Manuals for Homewerks 7136-02HW


Summary of Contents for Homewerks 7136-02HW
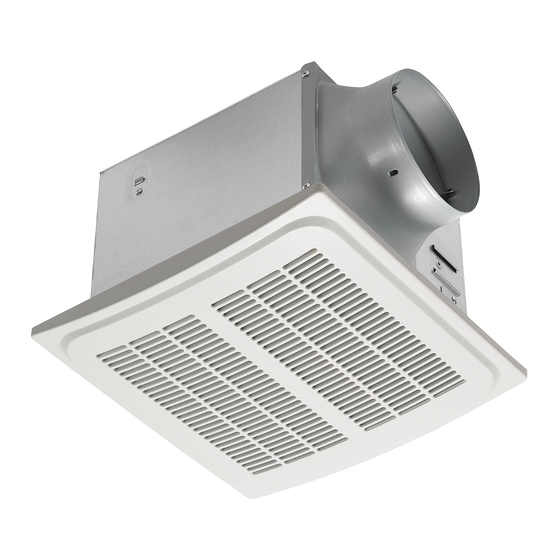
- Page 1 Model 7136-02HW USE AND CARE GUIDE BATHROOM VENTILATION FAN WITH HUMIDITY SENSOR Need Help? Please call our toll-free line at (877) 319-3757 (7:30 am to 4:30 pm CST) for additional assistance or service. HOMEWERKS.COM 06-25-2021...
-
Page 2: Table Of Contents
3 ft. 3-1/4 in. (1 m) distance can be met. CAUTION: To reduce risk of fire and to properly exhaust air, be sure to vent air to the outdoors. Do not vent exhaust air into spaces within walls or ceilings, or into attics, crawl spaces, or garages. Homewerks.com... -
Page 3: Warranty
Insulation around the ducts can reduce energy loss and inhibit mold growth. Fans Seal any gap Wall cap installed with existing ducts may not achieve around fan (with 2-3 foot their rated air flow. housing built-in straight run damper) before elbow Homewerks.com... -
Page 4: Wiring Diagram
□ You may need the help of a second person to install this fan; one person on the attic side and one on the room side. NOTE: Installation may vary depending on how the previous bath fan was installed. Supplies necessary for the installation of your bath fan are not all included. However, most are available at your local home improvement or hardware store. Homewerks.com... -
Page 5: Tools Required
Fan Housing Grille HARDWARE INCLUDED NOTE: Hardware not shown at actual size. Part Description Quantity Wood Screw M4 x 30 mm Machine Screw M4 x 12 mm Machine Screw M4 x 10 mm Suspension Bracket Suspension Bracket Suspension Bracket Homewerks.com... -
Page 6: Installation
(EE) and suspension bracket (FF) to the back of the fan housing (A). Securing the fan housing to the ceiling joists □ Secure the fan housing (A) to the joists with suspension brackets (EE, FF) using wood screws (AA). EE, FF Homewerks.com... - Page 7 □ Turn on the power source. Check the fan for any abnormal sounds or vibrations. Installing the grille □ Attach the grille (B) by pinching the mounting springs and inserting into the narrow rectangular slots in the fan housing (A). Mounting springs Homewerks.com...
-
Page 8: Existing Construction
□ If this fan is not replacing an old fan, be sure to cut a 10-13/16 in. x 10-1/2 in. opening for the fan housing (A). NOTE: Make sure one edge of the opening is flush with the joist for installation from below. Homewerks.com... - Page 9 (A). Then, attach suspension bracket (EE) and suspension bracket (FF) to the back of the fan housing (A). □ Secure fan housing (A) to the joists with the suspension brackets (EE, FF) using wood screws (AA). EE, FF Homewerks.com...
- Page 10 You may need to consult an electrician contractor to determine safety. Reconnecting the duct connector □ Attach the duct connector to the fan housing (A) with the screws that were set aside when the duct connector was removed earlier. Duct connector Homewerks.com...
-
Page 11: Humidity Sensor Operation
The LED indicator light in back to the “ON” position. The LED Indicator light switch to the “OFF” the fan is RED. in the fan is GREEN. The fan will automatically turn position. on when the humidity level in the room reaches 60%. Homewerks.com... -
Page 12: Care & Cleaning
If the light on the grille is red, the fan is in full Turn the fan off when not in use. NOTE: The humidity speed mode and not humidity sensing mode. sensor tolerance is +/- When in full speed mode, the fan will not shut off 10% RH. automatically. Homewerks.com... - Page 13 Modelo 7136-02HW GUÍA DE USO Y CUIDADO VENTILADOR DE BAÑO CON DETECTOR DE HUMEDAD ¿Necesita ayuda? Llame a nuestra línea gratuita al (877) 319-3757 (7:30 a.m. a 4:30 p.m. CST) para obtener asistencia adicional o servicio. HOMEWERKS.COM...
-
Page 14: Información Sobre Seguridad
1 m. el aire de manera adecuada, asegúrese de ventilar el aire hacia el exterior. No extraiga el aire en espacios dentro de paredes o techos, o en áticos, entrepisos o garajes. Homewerks.com... -
Page 15: Garantía
2 a 3 pies del ventilador Es posible que los ventiladores instalados incorporado) antes del codo con conductos existentes no alcancen su flujo de aire nominal. Homewerks.com... -
Page 16: Diagrama De Cableado
NOTA: La instalación puede variar dependiendo de cómo se instaló el ventilador de baño anterior. No todos los suministros necesarios para la instalación de su ventilador de baño están incluidos. Sin embargo, la mayoría están disponibles en su tienda de artículos del hogar o ferretería local. Homewerks.com... -
Page 17: Herramientas Requeridas
NOTA: Los materiales no se ilustran en tamaño real. Pieza Descripción Cantidad Tornillo para madera M4 x 30 mm Tornillo mecánico M4 x 12 mm Tornillo mecánico M4 x 10 mm Soporte de suspensión Soporte de suspensión Soporte de suspensión Homewerks.com... -
Page 18: Instalación
(A). Asegurar la carcasa del ventilador en la viga del techo □ Asegura la carcasa del ventilador (A) en la viga con los soportes de suspensión (EE, FF) usando tornillos para madera (AA). EE, FF Homewerks.com... - Page 19 □ Apague la fuente de alimentación. Probe el ventilador en busca de sonido o vibración anormales. Instalar la rejilla □ Instale la rejilla (B) presionando los resortes de montaje e insértelos en las ranuras rectangulares estrechas en la carcasa del ventilador (A). Resortes de montaje Homewerks.com...
-
Page 20: Construcción Existente
□ Si este ventilador no está reemplazando un ventilador viejo, asegúrese de cortar una abertura de 10-13/16 pulg. x 10-1/2 pulg. para la carcasa del ventilador (A). NOTA: Asegúrese de que un borde de la abertura esté a ras con la viga para la instalación desde abajo. Homewerks.com... - Page 21 (EE) y el soporte de suspensión (FF) en la parte trasera de la carcasa del ventilador (A). □ Asegura la carcasa del ventilador (A) en la viga con los soportes de suspensión (EE, FF) usando tornillos para madera largos (AA). EE, FF Homewerks.com...
- Page 22 Reinstalar el conector de conducto □ Fije el conector de conducto a la carcasa del ventilador (A) con los tornillos que se dejaron de lado cuando el conector de conducto se retiró antes. Conector de conducto Homewerks.com...
-
Page 23: Operación Del Detector De Humedad
“ON”. La luz LED en el interruptor de ventilador será ROJA. ventilador será VERDE. El ventilador se encenderá pared en la automáticamente cuando el nivel de humedad en posición “OFF”. la habitación sea superior al 60%. Homewerks.com... -
Page 24: Cuidado Y Mantenimiento
Si la luz de la rejilla es roja, el ventilador está Apague el ventilador cuando no esté en uso. en modo de velocidad completa y no en modo NOTA: La tolerancia de de detección de humedad y no se apagará nuestro detector es de automáticamente. +/-10% RH. Homewerks.com...
Need help?
Do you have a question about the 7136-02HW and is the answer not in the manual?
Questions and answers