Table of Contents
Advertisement
Advertisement
Table of Contents

Related Manuals for Homewerks SmartVent 7145-80V-HS


Summary of Contents for Homewerks SmartVent 7145-80V-HS
- Page 1 SmartVent BATHROOM ™ VENTILATION FAN MODEL 7145-80V-HS Español p. 13 Questions, problems, missing parts? Before returning to the store, call our customer service department at 1-877-319-3757, 7:30 a.m. - 4:30 p.m., CST, Monday - Friday. READ AND SAVE THESE INSTRUCTIONS 11-13-2019 HomewerksWW.com...
-
Page 2: Table Of Contents
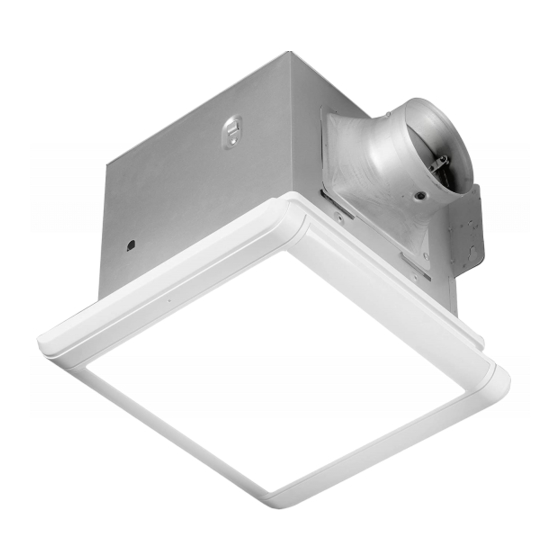
TABLE OF CONTENTS Product Specifications ........................2 Package Contents ..........................3 Hardware Included ..........................3 Safety Information ..........................4 Preparation ............................4 New Construction Installation Instructions..................6 Existing Construction Installation Instructions ..................8 Care and Cleaning..........................11 Troubleshooting ..........................12 Warranty ............................12 PRODUCT SPECIFICATIONS Airflow: 80 - 100 CFM LED light power consumption: 15W 120V, 60Hz LED light brightness: 800 lumens... -
Page 3: Package Contents
PACKAGE CONTENTS PART DESCRIPTION PART DESCRIPTION Fan Housing Suspension Bracket Grille with LED lights LED Wall Switch Suspension Bracket HARDWARE INCLUDED (not actual size) Wood Screw Machine Screw M4 x 30 M4 x 12 Qty. 8 Qty. 4 HomewerksWW.com... -
Page 4: Safety Information
SAFETY INFORMATION Please read and understand this entire manual before attempting to assemble, operate or install the product. • Always disconnect the power supply prior to servicing WARNING: To reduce the risk of fire, electric the fan, motor or junction box. shock, or injury to persons, observe the following: •... - Page 5 PREPARATION Before removing your current ventilation unit, verify your switch box on the wall has the required supply wires necessary for this installation. These supply wires are power/black and neutral/white (refer to right side of wiring diagram below) at the switch. If you do not see both of these wires, consult a licensed electrician. Check area above installation location to be sure that wiring can run to the planned location and that duct work can be run and the area is sufficient for proper ventilation.
-
Page 6: New Construction Installation Instructions
NEW CONSTRUCTION INSTALLATION INSTRUCTIONS BEFORE INSTALLATION WARNING: RISK OF ELECTRIC SHOCK! Ensure the electricity to the wires you are working on is shut off. Either remove the fuse or turn off the circuit breaker before removing the existing bath fan or installing the new one. - Page 7 NEW CONSTRUCTION INSTALLATION INSTRUCTIONS (continued) 5. Secure the suspension brackets (C and D) to the fan housing (A) using machine screws (BB) (included). Hardware Used Machine screws 6. Remove the wiring cover. Pull the house wires through the Product wiring cover hole. Using the attached quick connectors, connect Quick wire 120v house wiring to the fan as shown in the wiring diagram...
-
Page 8: Existing Construction Installation Instructions
NEW CONSTRUCTION INSTALLATION INSTRUCTIONS (continued) 9. Attach the grille (B) by pinching the mounting springs and inserting into the narrow rectangular slots in the fan housing (A). Mounting spring Turn on the power source. If you hear any abnormal sound or vibration, please refer to the Troubleshooting Guide on page 12. - Page 9 EXISTING CONSTRUCTION INSTALLATION INSTRUCTIONS (continued) 4. Installation Without Suspension Brackets Place the fan housing (A) next to a ceiling joist or wall stud. The fan housing (A) should be level and perpendicular to the joist or wall stud. Allow for thickness of ceiling board or drywall used in your application.
- Page 10 EXISTING CONSTRUCTION INSTALLATION INSTRUCTIONS (continued) 9. Remove the wiring cover. Pull the house wires through the Product wiring cover hole. Using the attached quick connectors, connect Quick wire 120v house wiring to the fan as shown in the wiring diagram connect Wire on page 5.
-
Page 11: Care And Cleaning
CARE AND CLEANING CAUTION: Before attempting to clean the fixture, disconnect the power to the fixture by turning the breaker off or removing the fuse from the fuse box. • See safety information before proceeding. Routine maintenance should be done at least once a year. •... -
Page 12: Troubleshooting
TROUBLESHOOTING PROBLEM POSSIBLE CAUSE SOLUTION The fan seems louder than it The CFM is too great. Be sure the CFM rating on the fan matches the should. square footage of your room. The damper is damaged or not working properly. Check the damper to ensure it is opening and closing properly.
Need help?
Do you have a question about the SmartVent 7145-80V-HS and is the answer not in the manual?
Questions and answers