Table of Contents
Advertisement
Available languages
Available languages
Questions, problems, missing parts? Before returning to the store, call our customer
service department at 1-877-319-3757, 7:30 a.m. - 4:30 p.m., CST, Monday - Friday.
U.S. Pat. No. 9,398,357
®
The BLUETOOTH
word mark and logos are registered trademarks owned by BLUETOOTH SIG, Inc. and any use of the said
mark by Homewerks Worldwide is under license. Other trademark and trade names are those of their respective owners.
Homewerks.com
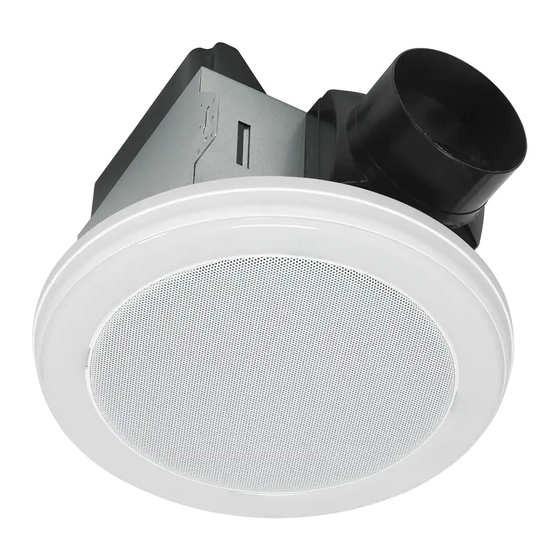
BATH FAN WITH BLUETOOTH
READ AND SAVE THESE INSTRUCTIONS
SPEAKER AND LED LIGHT
1
®
MODEL 7130-18-BT
Español p. 14
4-28-2021
Advertisement
Chapters
Table of Contents

Related Manuals for Homewerks 7130-18-BT


Summary of Contents for Homewerks 7130-18-BT
- Page 1 The BLUETOOTH word mark and logos are registered trademarks owned by BLUETOOTH SIG, Inc. and any use of the said mark by Homewerks Worldwide is under license. Other trademark and trade names are those of their respective owners. 4-28-2021 Homewerks.com...
-
Page 2: Table Of Contents
Homewerks.com... -
Page 3: Package Contents
PACKAGE CONTENTS PART DESCRIPTION QUANTITY Fan housing Grille with BLUETOOTH ® speaker and LED light HARDWARE INCLUDED (not shown actual size) Wood Screw Qty. 4 Homewerks.com... -
Page 4: Safety Information
1-877-319-3757, 7:30 a.m. - 4:30 p.m., CST, Monday - Friday. Tools Required for Assembly (not included): Hammer, Flathead Screwdriver, Wire Connectors, Nails, Duct Tape, Phillips Screwdriver, and Utility Knife or Drywall Saw. Helpful Tools (not included): Electric Drill, Drill Bits Homewerks.com... - Page 5 Fan Neutral (White) Fan connection for long Neutral Motor Capacitor Fan Neutral (White) life of Grounding connection for long Motor Neutral motor Green Wires Grounding connection life of Ground Green Wires motor Ground Fan Housing Junction Box Fan Housing Junction Box Homewerks.com...
-
Page 6: New Construction Installation Instructions
(A) and then pressing on the other side to snap the duct connector into place. Ensure that all four metal flanges on the fan housing (A) are inside the plastic duct connector when it is replaced. Duct connector Homewerks.com... - Page 7 8. Attach grille (B) by pinching the mounting springs and inserting them into the narrow rectangular slots in the fan housing (A). Housing slots Turn on power source. Test the unit. Mounting springs Homewerks.com...
-
Page 8: Existing Construction Installation Instructions
7-3/4 in. x 7-1/2 in. opening for the fan housing. 4. Detach the two grille mounting brackets by removing the two screws on each bracket. Mounting Mounting NOTE: Save the screws for reinstallation of the mounting bracket bracket brackets. Homewerks.com... - Page 9 (A). The fan housing (A) must be installed flush with the ceiling board or the grille mounting springs will not be long enough to insert into the slots inside the fan housing (A). Homewerks.com...
- Page 10 11. Attach grille (B) by pinching the mounting springs and inserting them into the narrow rectangular slots in the fan housing (A). Housing Turn on power source. Test the unit. slots Mounting springs Homewerks.com...
-
Page 11: Pairing Bluetooth ® Device To Speaker
2. From the home screen, choose settings > BLUETOOTH ® ® search for the speaker. search for the speaker. 3. Choose the Homewerks speaker. Enter the passkey or PIN 3. Choose the Homewerks speaker. Enter the passkey or PIN ™... - Page 12 5. Attach the grille (B) by pinching the mounting springs and inserting them into the narrow rectangular slots in the fan Housing housing (A). slots Turn on power source. Mounting springs Homewerks.com...
-
Page 13: Troubleshooting
SHALL VOID THIS WARRANTY. Shipping costs for return product as part of a claim on the warranty must be paid for by the customer. Inquiries regarding warranty claims can be directed to 1-877-319-3757, 7:30 a.m. - 4:30 p.m., CST, Monday - Friday. Homewerks.com... - Page 14 La palabra y logotipos de BLUETOOTH son propiedad de BLUETOOTH SIG, Inc., y cualquier uso de estas marcas por parte ® de Homewerks Worldwide se efectúa bajo licencia. Otras marcas y nombres comerciales son los de sus respectivos dueños. Homewerks.com...
-
Page 15: Especificaciones Del Producto
Si este equipo produce interferencia dañina a la recepción de radio o televisión, lo que puede determinarse encendiendo y apagando el equipo, se insta al usuario a intentar corregir la interferencia mediante uno de los siguientes métodos: Homewerks.com... -
Page 16: Contenido Del Paquete
CONTENIDO DEL PAQUETE PIEZA DESCRIPCIÓN CANTIDAD Carcasa del ventilador Rejilla con altavoz BLUETOOTH y luz LED ® MATERIALES INCLUIDOS (no se ilustran en tamaño real) Tornillo para madera Cantidad 4 Homewerks.com... -
Page 17: Información Sobre Seguridad
Si hace falta alguna pieza o se encuentra danada, no intente ensamblar el producto. Pongase en contacto con el Servicio al Cliente para piezas de repuesto 1-877-319-3757, de 7:30 a. m. a 4:30 p. m., hora central estándar, de lunes a viernes. Homewerks.com... - Page 18 Neutral de ventilador (blanco) Neutral Neutral Motor Motor larga vida larga vida Conexión a tierra Conexión a tierra del motor del motor Cables verdes Cables verdes Tierra Tierra Caja del ventilador Caja de conexiones Caja del ventilador Caja de conexiones Homewerks.com...
-
Page 19: Instrucciones De Installación - Nueva Construcción
(A) y luego presionando en el otro lado para encajar el conector del conducto en su lugar. Asegúrese de que las cuatro bridas metálicas en la carcasa del ventilador (A) estén dentro del conector del conducto de plástico cuando se vuelva a colocar. Conector del conducto Homewerks.com... - Page 20 8. Fije la rejilla (B) apretando los resortes de montaje e insertándolos en las ranuras rectangulares estrechas en la carcasa del ventilador (A). Ranuras Encienda la fuente de alimentación. Pruebe el ventilador. en la caja Resortes de montaje Homewerks.com...
-
Page 21: Instrucciones De Installación - Construcción Existente
19,7 cm x 19 cm. para la carcasa del ventilador 4. Separe los dos soportes de montaje de la rejilla quitando los dos tornillos de cada soporte. Soporte Soporte NOTA: Guarde los tornillos para reinstalar los soportes de montaje de montaje de montaje. Homewerks.com... - Page 22 La carcasa del ventilador (A) debe instalarse al ras de la placa del techo o los resortes de montaje de la rejilla no serán lo suficientemente largos como para insertarse en las ranuras dentro de la carcasa del ventilador (A). Homewerks.com...
- Page 23 11. Fije la rejilla (B) apretando los resortes de montaje e insertándolos en las ranuras rectangulares estrechas en la carcasa del ventilador (A). Ranuras Encienda la fuente de alimentación. Pruebe el ventilador en la caja Resortes de montaje Homewerks.com...
-
Page 24: Conexión Un Dispositivo Bluetooth ® Al Altavoz
2. Desde la pantalla de inicio, elija ajustes> BLUETOOTH para buscar el altavoz. ® buscar el altavoz. 3. Elija el altavoz Homewerks . Ingrese la clave de acceso o PIN ™ 3. Elija el altavoz Homewerks . Ingrese la clave de acceso o PIN si se le solicita. - Page 25 5. Fije la rejilla (B) apretando los resortes de montaje e insertándolos en las ranuras rectangulares estrechas en la carcasa del ventilador (A). Ranuras Encienda la fuente de energía. en la caja Resortes de montaje Homewerks.com...
-
Page 26: Solución De Problemas
Los costos de envío para el producto devuelto como parte de una reclamación de la garantía deben ser pagados por el cliente. Las consultas sobre reclamaciones de garantía pueden dirigirse al 1-877-319-3757, de 7:30 a.m. a 4:30 p.m., HCE, de lunes a viernes. Homewerks.com...
Need help?
Do you have a question about the 7130-18-BT and is the answer not in the manual?
Questions and answers