Advertisement
Quick Links
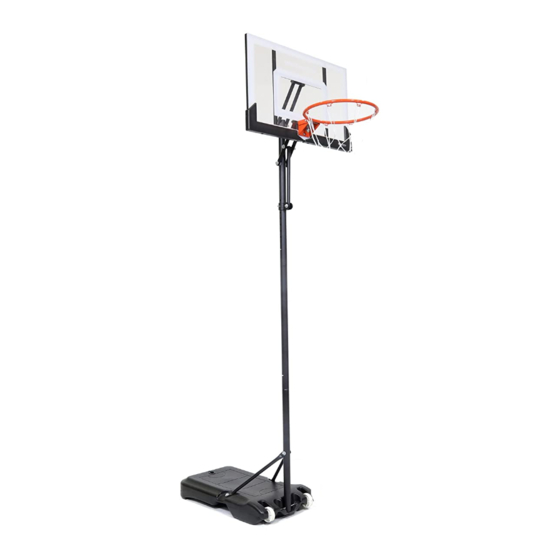
BALLER MINI HOOP SYSTEM
PLEASE SAVE THIS MANUAL
IN THE EVENT THAT YOU
NEED TO CONTACT US FOR
REPLACEMENT PARTS.
SAFETY INSTRUCTIONS & BEFORE YOU BEGIN:
Failure to follow these safety instructions may result in serious injury or
property damage and will void warranty.
To ensure safety, do not attempt to assemble the BALLER MINI HOOP
SYSTEM without following the enclosed instructions carefully. Before
beginning assembly, read the instructions and identify parts and hardware
using the parts list enclosed. If any parts are missing, please contact
customer service before proceeding with assembly.
Proper and complete assembly, use and supervision are essential for
proper operation and to reduce the risk of accident or injury. A high
probability of injury exists if this system is not assembled, maintained and
operated properly.
Always inspect the product prior to and after each use. If you find any flaw
or defect, do not use the BALLER MINI HOOP SYSTEM and contact
Customer Service for a replacement part: info@quickplaysport.com
WARNINGS:
1. Must be assembled by an adult.
2. Read and understand all warning labels affixed to the product and within this
instruction manual.
3. Use under adult supervision. This product is not suitable for children under 3
years of age.
4. Only use on a flat smooth surface, which is free of gravel or other objects.
5. Check the BALLER MINI HOOP SYSTEM is fully and properly assembled
before use.
6. Check the Base is fully filled with sand or water before use. Check Base daily for
leakage. Slow leaks can cause the unit to tip over more easily.
7. If using water in sub-freezing climates, add 1/2 gallon of non-toxic antifreeze to
the Base before filling.
8. Do not slide, stand, jump, climb or play on the Base or Post.
9. BALLER MINI HOOP SYSTEM is intended for home, recreational play only and
is not intended for excessive competitive use.
10. Do not climb on or hang on rim of the BALLER MINI HOOP SYSTEM.
11. During play, especially when performing dunk-type moves, ensure players face is
kept away from the backboard, rim and net. Serious injury could occur if
teeth/face come in contact with backboard, rim or net.
12. Use caution when using this system. Most injuries are caused by misuse and/or
not following instructions.
13. Regularly check for wear and tear. Stop using if any part breaks or shows signs
of damage from use or the environment (e.g. rust). Failure to do so may
result in injury.
14. To increase the lifespan of your BALLER MINI HOOP SYSTEM keep in a garage
or storage shed if possible, especially during winter months or planned non-use.
15. Do not leave the ball outdoors. Exposure to sun, rain and extreme temperatures
will shorten its lifespan. Ball is not covered under the product warranty.
16. Not suitable for use in high winds or severe weather.
17. If technical assistance is required, please contact Customer Service via email:
info@quickplaysport.com
Advertisement

Related Manuals for Quickplay BALLER MINI HOOP SYSTEM


Summary of Contents for Quickplay BALLER MINI HOOP SYSTEM
- Page 1 9. BALLER MINI HOOP SYSTEM is intended for home, recreational play only and is not intended for excessive competitive use. 10. Do not climb on or hang on rim of the BALLER MINI HOOP SYSTEM. 11. During play, especially when performing dunk-type moves, ensure players face is kept away from the backboard, rim and net.
- Page 2 PARTS: 1. Base 6. Right Support Strut 11. Upper Backboard Support Pole (2) 2. Axel 7. Upper Post 12. Backboard 3. Wheel (2) 8. Height Adjust Collar 13. Rim 4. Lower Post 9. Height Adjust Pole 14. Rim Plate 5. Left Support Strut 10.
- Page 3 2 YEARS PARTS WARRANTY: The BALLER MINI HOOP SYSTEM is covered by a 2 YEAR Limited Warranty. This warranty does not cover the mini basketball provided with the unit, general wear and tear, or damage resulting from accident, misuse, abuse or lost parts.
- Page 4 ASSEMBLY INSTRUCTIONS STEP A: ASSEMBLE THE BASE IMPORTANT: Do not fill the base before completing STEP A. 1. Lay the Base (1) on a flat level surface. 2. Slide the Axel (2) through the groove in the Base (1) and the first Wheel (3). 3.
- Page 5 STEP B: ASSEMBLE THE HEIGHT ADJUSTMENT SYSTEM IMPORTANT: Ensure to have filled the base with water / sand before continuing. 1. Connect the Upper post (7) onto the Lower Post (4) and locate with the integrated spring buttons. NOTE: Do not add the Middle Post (14) at this time.
- Page 6 STEP C: ATTACH THE BACKBOARD 1. Lay the Backboard (12) face down on a flat and even surface. 2. Attach the x2 Upper Backboard Support Poles (11) to the upper bracket of the Backboard (12) using Hardware Set (G). Place the Long Spacer between the two poles as shown below: LONG SPACER...
- Page 7 STEP D: ASSEMBLE THE RIM 1. Connect the Rim (13) to the Rim Plate (14) using Hardware Set (H). 2. Attach the Spring using Hardware Set (I) by threading the Bolt through the Rim (13) and Rim Plate (14). Then slide the Spring over the bolt and secure with the Washer and M8 Nut.
- Page 8 THANK YOU! For choosing the QUICKPLAY BALLER MINI HOOP SYSTEM. We hope you enjoy and get years of use out of this product. If you have any issues, please do not return this product to the store. Instead contact us directly: info@quickplaysport.com...
Need help?
Do you have a question about the BALLER MINI HOOP SYSTEM and is the answer not in the manual?
Questions and answers