
Subscribe to Our Youtube Channel
Related Manuals for Simco-Ion Aerostat XC2


Summary of Contents for Simco-Ion Aerostat XC2
- Page 1 Extended Coverage Ionizing Blower Aerostat® XC2 INSTALLATION AND OPERATING INSTRUCTIONS Aerostat XC2 5201333 Rev. A...
-
Page 2: Table Of Contents
FMS Relay Contact ......................12 Optional Air Filter ......................12 6. MAINTENANCE ....................13 Maintenance Scheduling ....................13 Emitter Cartridge Inspection and Cleaning ..............13 Chassis Cleaning .......................15 7. TROUBLESHOOTING ..................16 8. PARTS AND ACCESSORIES ................17 9. WARRANTY ......................18 Aerostat XC2 5201333 Rev. A... -
Page 3: Safety Warnings
Grounding is required to ensure safe and proper operation and to prevent electrical shocks upon contact. WARNING – Fire Hazard Keep the unit dry. Do not operate the unit in flammable or explosive environments. Aerostat XC2 5201333 Rev. A... -
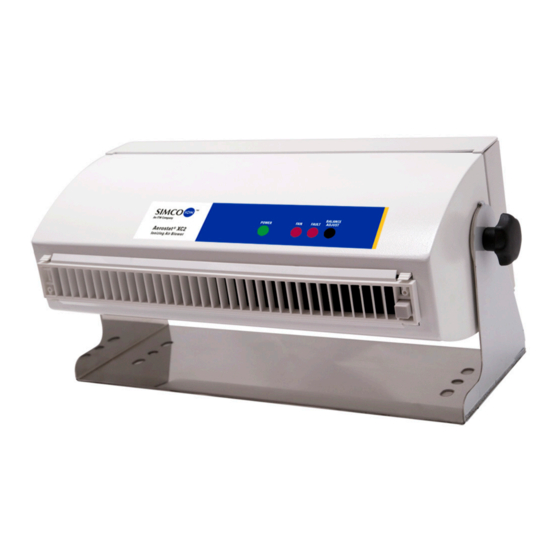
Page 4: Description
The Aerostat XC2 is available with an optional heater to reduce the effects of wind- chill. This manual covers the installation, operation, and maintenance of the Aerostat XC2 Ionizing Blower. - Page 5 • An optional heater for reducing the effects of wind-chill (an optional feature ordered separately at the time of XC2 purchase) Figure 2. Aerostat XC2 Front-panel Figure 3. Aerostat XC2 Rear Panel (with heater and without heater) Aerostat XC2 5201333 Rev. A...
-
Page 6: Performance
Times are slightly higher with the 230V/50 Hz unit. Figure 4. Aerostat XC2 Discharge Times Power Requirements The Aerostat XC2 is powered by an internal universal AC input power supply with an input line voltage range of 100 to 240 VAC, 50/60 Hz single phase. Aerostat XC2... - Page 7 Typical maximum current draw for the Aerostat XC2 at high fan speed: • 100-240 VAC, 50/60 Hz, 0.5A, 55W max (no heater) • 100-120 VAC, 50/60 Hz, 3.5A, 420W max (with heater) • 220-240 VAC, 50 Hz, 1.9A, 460W max (with heater) CAUTION –...
-
Page 8: Specifications
1. Tested in accordance with ANSI/ESD STM3.1-2015. 2. Velocity in fpm measured at center line of air stream; all values ±10%. 3. Will provide specified (to specification) performance when operated in an environment meeting the cleanliness requirements for ISO Class 6. Aerostat XC2 5201333 Rev. A... -
Page 9: Installation
– Operate the Aerostat XC2 ionizer for an initial 24 hours in the application area before conducting any performance measurements. Place the Aerostat XC2 approximately 1 to 4 feet (0.3 to 1.3m) from objects to be neutralized or from the critical work area. Discharge times are longer, the further away the XC2 is placed from the target area. -
Page 10: Power Connections
XC2 to a fixed location using 5/16" (8 mm) diameter screw hardware (not provided). Once the Aerostat XC2 is secured to a surface, the mounting stand can be adjusted and locked to the desired position. Loosen, but do not completely remove, the knobs on each side of the blower. -
Page 11: Operation
Fan Speed Adjustment The airflow (fan speed) may be adjusted using the Fan Speed slide switch on the back of the Aerostat XC2. The XC2 Fan can be set to Low, Medium or High. Alarm There are two red LED alarm indicators located on the front panel. FAN will indicate a stalled fan. -
Page 12: Balance
Balance The Aerostat XC2 has a balance adjust control for setting the initial balance of the blower. The internal feedback control system will then maintain the balance of the XC2 to +/-10V around the initial balance set point. -
Page 13: Alarms
The Aerostat XC2 blower should be OFF when using the push-button emitter point cleaner. Do not clean the emitter points while the blower is operating. Alarms There are two red LED indicators located on the front panel: : When constantly lit, the fan is not rotating properly (stalled fan). This alarm will clear itself if the fan can resume normal operation. -
Page 14: Fms Relay Contact
No disassembly of the original rear fan guard is required. The foam air filter can be cleaned and reused. Simco-Ion also offers a replacement filter pack (see Section 8 Parts and Accessories). -
Page 15: Maintenance
6. MAINTENANCE Maintenance Scheduling The balance of the Model Aerostat XC2 is designed to be maintained by internal circuitry and, after initial set-up, should not need further adjustment by the end- user. The XC2 requires little or no user maintenance other than periodic cleaning of the emitter points with the push button cleaner or more extensive cleaning of the emitter cartridge, case, and fan. - Page 16 Do not bend the emitter wires during cleaning. Periodically inspect the emitter wires' tips in the emitter cartridge for signs of dirt buildup on the tips or other notable degradation. Aerostat XC2 5201333 Rev. A...
-
Page 17: Chassis Cleaning
Reconnect the line cord to the unit and turn ON the XC2. Allow the XC2 to run for at least five minutes before using it to ionize your target area. Simco-Ion offers a replacement emitter cartridge for the XC2 if it becomes damaged. See the Parts and Accessories section at the end of this manual. -
Page 18: Troubleshooting
7. TROUBLESHOOTING The table below provides a quick troubleshooting reference for the Aerostat XC2. If the solutions listed do not remedy the problem, contact Simco-Ion Customer Service (customerservice@simco-ion.com). Problem Possible Cause Solution Check fan guards for any Fan Unit is noisy or slow... -
Page 19: Parts And Accessories
Aerostat XC2 Ionizing Blower 91-XC2-xx-05A Aerostat XC2 Ionizing Blower with Audible Alarm 91-XC2-xx-05H Aerostat XC2 Ionizing Blower with Heater 91-XC2-xx-05HA Aerostat XC2 Ionizing Blower with Heater and Audible Alarm 33-6002-01 Aerostat XC2 Replacement Emitter Cartridge 33-6003-01 Aerostat XC2 Air Filter Kit... -
Page 20: Warranty
The warranty does not apply when Simco-Ion parts and equipment have been energized by other than the appropriate Simco-Ion power supply or generator, or when a Simco-Ion power supply or generator has been used to energize other than Simco-Ion parts and equipment. Simco-Ion makes no warranty, expressed or implied, nor accepts any obligation, liabilities, or responsibility in connection with the use of this product other than the repair or replacement of parts stated herein. - Page 21 Simco-Ion 2257 North Penn Road Hatfield, PA 19440 (215) 822-6401 (800) 203-3419 www.simco-ion.com customerservice@simco-ion.com © 2022 Simco-Ion Printed in the U.S.A. Aerostat XC2 5201333 Rev. A...
Need help?
Do you have a question about the Aerostat XC2 and is the answer not in the manual?
Questions and answers