Table of Contents
Advertisement
Advertisement
Table of Contents
Troubleshooting

Related Manuals for Simco-Ion Aerostat XC2


Summary of Contents for Simco-Ion Aerostat XC2
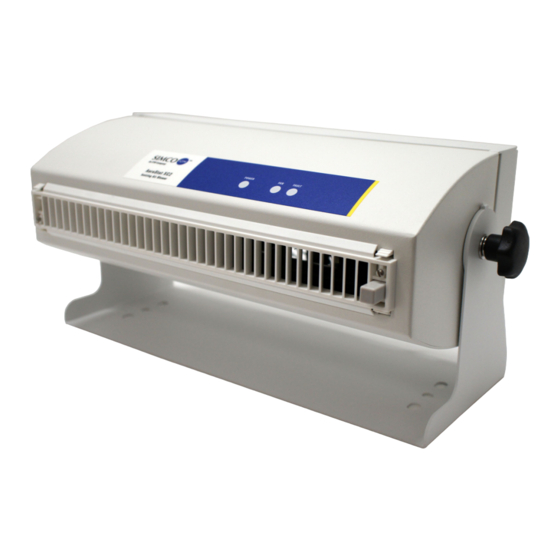
- Page 1 Extended Coverage Ionizing Blower Aerostat ® User’s Manual...
- Page 2 Simco-Ion Technology Group is a division of Illinois Tool Works (ITW), located in Alameda, California. For more information about Simco-Ion visit www.simco-ion.com or call +1 800-367-2452.
-
Page 3: Important Safety Information
Before performing any recommended maintenance, be sure the unit is powered off and unplugged. To insure user safety when operating the Aerostat XC2, do not point the blower face any lower than 45° from horizontal. 19-XC2-M-04 Rev 1... - Page 4 Tout service non autorisé annulera la garantie et peut entraîner des charges de réparation. Contactez votre représentant Simco-Ion si le surpresseur requiert un entretien ou réparation. Pour une utilisation sur porte uniquement dans une non- ...
- Page 5 Pour assurer la sécurité de l'utilisateur lors de l'utilisation du Aerostat XC2, ne pointez pas le visage de soufflante inférieure à 45° de l'horizontale 19-XC2-M-04 Rev 1...
- Page 6 Contents 1 Description ................1 1.1 Product Description.................. 2 1.2 Product Features ..................3 1.3 Performance .................... 5 1.4 Power Requirements ................6 2 Installation & Setup............. 7 2.1 Box Contents ................... 9 2.2 Mounting & Placement................9 2.3 Power Connections................10 3 Operation ................
-
Page 7: Description
Description 1.1 Product Description 1.2 Product Features 1.3 Performance 1.4 Power Requirements 19-XC2-M-04 Rev 1... -
Page 8: Product Description
Technology to meet the performance, particle cleanliness and low maintenance requirements that are necessary to maximize production yield in many applications. The Aerostat XC2 is available with an optional heater to reduce the effects of wind-chill. This manual covers the installation, operation and maintenance of the Aerostat XC2 Ionizing Blower. -
Page 9: Product Features
1.2 Product Features The Aerostat XC2 has the following unique features and benefits: • Large area ionization footprint for complete discharge coverage across an extended work surface. • Patented "Micropulse" Technology with high efficiency output that provides for long periods between maintenance cycles. - Page 10 Figure 3. Aerostat XC2 Rear Panel (with heater and without heater) 19-XC2-M-04 Rev 1...
-
Page 11: Performance
1.3 Performance The Model Aerostat XC2 is factory adjusted to meet the specifications in the centerline static discharge times below: • 1.0 seconds or less @ 1' (30 cm) • 2.0 seconds or less @ 2' (60 cm) • 3.5 seconds or less @ 3' (90 cm) •... -
Page 12: Power Requirements
1.4 Power Requirements The Aerostat XC2 is powered by an internal universal AC input power supply with an input line voltage range of 100 to 240 VAC, 50/60 Hz single phase. Typical maximum current draw for the Aerostat XC2 at high fan speed: •... -
Page 13: Installation & Setup
Installation & Setup 2.1 Box Contents 2.2 Mounting & Placement 2.3 Power Connections 19-XC2-M-04 Rev 1... -
Page 14: Box Contents
2.1 Box Contents The Aerostat XC2 is packaged with the following items: • Mounting Stand (installed on Blower) • User Manual • Certificate of Compliance • Power cord • Rubber feet for use on mounting stand (4 pieces) • Cord clamp w/screw •... -
Page 15: Mounting & Placement
2.2 Mounting & Placement Initial Operation Operate the Aerostat XC2 ionizer for an initial 24 hours in the area of application before any performance measurements are conducted. The Aerostat XC2 should be placed approximately 1 to 4 feet (0.3 to 1.3m) from objects to be neutralized or from the critical work area. -
Page 16: Power Connections
2.3 Power Connections To insure user safety when operating the Aerostat XC2, do not Caution: point the blower face any lower than 45° from horizontal. The XC2 accepts universal AC input (100- 230 VAC 50/60 Hz single phase). The XC2 must be grounded for safe and proper operation. - Page 17 Figure 6. Power Cord Clamp Do not insert anything within the intake or outlet grills. Warning: Electric shock may result. N'introduisez rien dans le collecteur d'admission ou de Avertissement : sortie des barbecues. Provoquer un choc électrique. 19-XC2-M-04 Rev 1...
- Page 18 19-XC2-M-04 Rev 1...
-
Page 19: Operation
Operation 3.1 Operating Environment 3.2 Controls & LED Indicators 3.3 Balance 3.4 Alarms 3.5 FMS Relay Contact 3.6 Optional Air Filter 19-XC2-M-04 Rev 1... -
Page 20: Operating Environment
3.1 Operating Environment Operate the Model Aerostat XC2 in an environment where relative humidity is 30-60% (non-condensing). The operating temperature range for the Blower is 50-95°F (10-35°C). The Model Aerostat XC2 will conform to stated performance specifications when used in an environment that meets the cleanliness limits defined by ISO 14644-1 Class 6 (Fed Std. -
Page 21: Controls & Led Indicators
Fan Speed Adjustment The airflow (fan speed) may be adjusted using the Fan Speed slide switch on the back of the Aerostat XC2. The XC2 fan can be set to Low, Medium or High. Alarm There are two red LED alarm indicators located on the front panel. - Page 22 Heater (“H” Model Only) Turn on the heater by setting the “HEATER”rocker switch to the on (“|”) position. NOTE: The heater will only operate when the fan is The heater provides about a 2-3˚C rise in temperature of the ionized air, at the face of the blower which is just enough to counter the effects of wind chill.
-
Page 23: Balance
The Aerostat XC2 is self-balancing. No balance adjustment is required by the end-user. If the Aerostat XC2 FAULT LED starts to blink after being in operation for a period of time, follow the recommended cleaning procedures discussed in Section 4. -
Page 24: Alarms
Open Table 1. Alarms and LED Status Indicators The alarm of the Aerostat XC2 is not designed or calibrated to function as a maintenance alarm. If the emitter points are allowed to become extremely dirty, there is the possibility that the Ionization fault alarm will start to intermittently turn on. -
Page 25: Troubleshooting
The optional audible alarm will sound upon any alarm condition. An alarm condition may be caused by any of the following: • Failed high voltage power supply • Dirty Emitter points • No power to the Fan Unit • Fan in locked-rotor condition or fan failed •... -
Page 26: Fms Relay Contact
3.5 FMS Relay Contact The Aerostat XC2 provides an opto-isolated relay contact for indicating alarm status to your process equipment or facility monitoring system (FMS). • Relay Open - Blower is in alarm or Power is Off • Relay Closed - Normal Blower operation The "FMS Relay Contact"... -
Page 27: Optional Air Filter
No disassembly of the original rear fan guard is required. The foam air filter can be cleaned and reused. Simco-Ion also offers a replacement filter pack (see Section 5.3 Parts and Accessories). - Page 28 19-XC2-M-04 Rev 1...
-
Page 29: Maintenance
Maintenance 4.1 Maintenance Scheduling 4.2 Emitter Cartridge Inspection & Cleaning 4.3 Chassis Cleaning 4.4 Troubleshooting 19-XC2-M-04 Rev 1... -
Page 30: Maintenance Scheduling
Simco-Ion recommends using the push button emitter point cleaner daily. This will insure the Aerostat XC2 is fully emitting the maximum volume of ions onto your target area. Maintenance schedules will vary depending on environmental conditions. - Page 31 Avant d'effectuer l'une des opérations suivantes le nettoyage, assurez-vous que le Aerostat XC2 est hors tension et débranchée. Pour éviter tout risque de blessure ou de détérioration du matériel, n'effectuez aucune opération d'entretien autres que Attention: celles contenues dans ces instructions.
-
Page 32: Emitter Cartridge Inspection & Cleaning
4.2 Emitter Cartridge Inspection & Cleaning Recommended cleaning materials: • Cleanroom-compatible cleaning cloths • Cleanroom-compatible cloth swabs (polyester cloth is recommended) • Cleaning solution of 50% IPA (electronic-grade isopropanol alcohol)/50% de-ionized water • Clean dry air (CDA) Emitter Cartridge Cleaning With the XC2 turned OFF, emitter cleaning can typically be accomplished by manually... - Page 33 EMITTER CARTRIDGE UNLESS THE BLOWER IS SWITCHED OFF AND DISCONNECTED FROM AC POWER Avant d'effectuer l'une des opérations suivantes le nettoyage, assurez-vous que le Aerostat XC2 est hors tension et débranchée. Pour éviter tout risque de blessure ou de détérioration du Attention: matériel, n'effectuez aucune opération d'entretien autres que...
- Page 34 Figure 10. Emitter Cartridge Removal, Cleaning & Replacement Using the recommended cleaning materials, gently clean the stainless steel (SST) wire emitter points in the cartridge and clean the rear contact corners on the back edge of the emitter assembly plate. Do not bend the emitter wires during cleaning. Periodically inspect the tips of the emitter wires in the emitter cartridge for signs of dirt buildup on the tips or other notable degradation.
- Page 35 Reconnect line cord to unit and turn the XC2 on. Allow the XC2 to run for at least five minutes before using it to ionize your target area. Simco-Ion offers a replacement emitter cartridge for the XC2 if it becomes damaged. See the Parts and Accessories section at the end of this manual.
-
Page 36: Chassis Cleaning
4.3 Chassis Cleaning Moisten a cleanroom cloth with the diluted IPA solution. Thoroughly wipe down the XC2 chassis to remove any accumulated dirt. Change the cloth frequently to make sure the dirt is completely lifted. 19-XC2-M-04 Rev 1... -
Page 37: Troubleshooting
4.4 Troubleshooting The table below provides a quick troubleshooting reference for the Aerostat XC2. If the solutions listed do not remedy the problem, contact Simco-Ion Technical Support (techsupport@simco- ion.com). Problem Possible Cause Solution Check fan guards for any Fan Unit is noisy or slow... - Page 38 Replace the fuse only with an identically rated part. If replacing the fuse does not restore the unit to operation, leave the unit turned OFF and disconnected from power. Contact Simco-Ion technical support for additional information. • 100-230 VAC, 50/60 Hz, 0.5A, 55W max. (no heater); fuse = 2.5A SLO...
-
Page 39: Specifications
Specifications 5.1 Specifications 5.2 Dimensional Drawing 5.3 Parts & Accessories 19-XC2-M-04 Rev 1... -
Page 40: Specifications
5.1 Specifications 100-230 VAC, 50/60 Hz, 0.5A, 55W max (no heater); Fuse: 2.5A Input Voltage 100-120 VAC, 50/60 Hz, 3.5A, 420W max (with heater); Fuse: 5A 220-230 VAC, 50 Hz, 1.9A, 460W max (with heater); Fuse: 2.5A Discharge 1.0 sec @ 1' (1000-100V high fan speed) Balance 0 ±10V Effective Coverage... -
Page 41: Dimensional Drawing
5.2 Dimensional Drawing 19-XC2-M-04 Rev 1... -
Page 42: Parts & Accessories
Contact your Simco-Ion representative or Simco-Ion Sales Services department at salesservices@simco-ion.com or +1 510.217.0460 for more information about these replacement parts and accessories. 33-6002-01 Aerostat XC2 Replacement Emitter Cartridge 33-6003-01 Aerostat XC2 Air Filter Kit 33-6004-01 Aerostat XC2 Air Filter Replacement Pack (6 filters) 19-XC2-M-04 Rev 1... -
Page 43: Warranty & Service
Simco-Ion provides a limited warranty for the Aerostat XC2 Extended Coverage Ionizing Blower. New products manufactured or sold by Simco-Ion are guaranteed to be free from defects in material or workmanship for a period of two (2) years from date of initial shipment. - Page 44 Technology Group 1601 Harbor Bay Pkwy, Ste 150 Alameda, CA USA 94502 Tel: +1 510-217-0600 Fax: +1 510-217-0484 Toll free: +1 800-367-2452 Sales services: +1 510-217-0460 Tech support: +1 510-217-0470 info@simco-ion.com salesservices@simco-ion.com techsupport@simco-ion.com service@simco-ion.com www.simco-ion.com 19-XC2-M-04 Rev 1...
Need help?
Do you have a question about the Aerostat XC2 and is the answer not in the manual?
Questions and answers