Table of Contents
Advertisement
Quick Links
Advertisement
Table of Contents

Related Manuals for RWD RWD-MB-001-A


Summary of Contents for RWD RWD-MB-001-A
- Page 1 RWD-MB-001-A 保密,知识产权归瑞沃德公司所有,未经允许,严禁泄漏。 第 1 页 共 28 页...
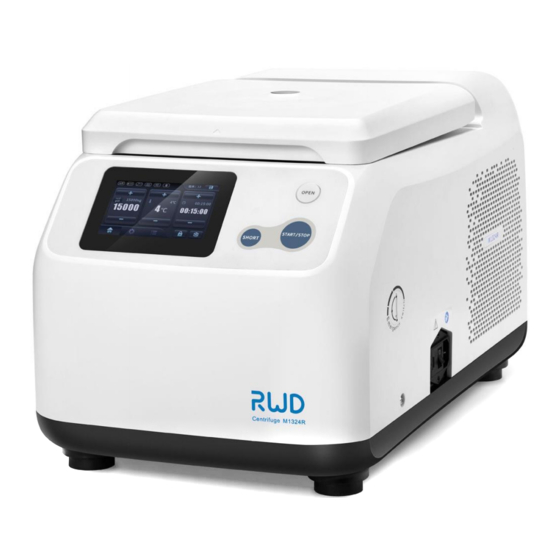
- Page 2 Microcentrifuge User Manual...
- Page 3 RWD’s registered trademark or mark, these trademarks and the related security mark belong to RWD’s intangible property. The use of non RWD’s trademark or mark in this instruction manual are only for editing purposes, without other purposes, the rights belong to their respective rights owners.
-
Page 4: Table Of Contents
Contents 1-Introduction..........................1 1.1 Overview ..........................1 1.2 Safety ............................1 1.3 Comprehensive description ..................... 1 1.4 Product features ........................1 1.5 Environmental requirements for equipment................2 1.6 Product parameters........................2 1.7 Product list ..........................2 2-System safety ..........................3 2.1 Main purposes ......................... - Page 5 5.7.3 Leave the microcentrifuge open..................14 6-Alarm information ........................15 7-Troubleshooting ......................... 18 8-Maintenance ..........................19 8.1 Considerations ........................19 8.2 Regular maintenance ......................19 8.3 Cleaning and disinfection ..................... 20 8.3.1 Clean and disinfect microcentrifuge interior ..............20 8.3.2 Clean and disinfect the rotor ..................20 8.4 Replacement of fuses ......................
-
Page 6: 1-Introduction
1-Introduction 1.1 Overview First of all, thank you for choosing the Microcentrifuge manufactured by RWD. Before the installation and application of this product for the first time, please read all attached materials to help you use this product in a better way. -
Page 7: Environmental Requirements For Equipment
Compact size. Mechanical lock design for the microcentrifuge lid to enable easy opening and closing. Touch screen + functional keys. Quick and convenient setting and use of parameters. Preset program to enable easy calling during operation. ... -
Page 8: 2-System Safety
Manual. The following general precautions should be followed during operation. Failure to follow these precautions will be considered as violation of safety standards and intended use of the equipment. RWD will not be responsible in any case your misuse of the equipment or failure to follow basic safety requirements. - Page 9 It is prohibited to use signal transmitters including mobile phones near the equipment. In case of faults and/or needs for maintenance, please turn off the equipment and contact RWD after-sales service. The equipment is designed and tested in accordance with group A of CISPR 11 for Class A devices that emit radio interference as specified in EN 61326-1/EN 55011.
-
Page 10: 3-Introduction Of Product Structure
3-Introduction of product structure 6 7 8 Fig. 3-1 Fig. 3-2... - Page 11 Part name Description Microcentrifuge lid Display screen Display the user interface SHORT button Start short run START/STOP button Start/stop centrifugation run OPEN button Manually open microcentrifuge lid If the centrifuge cannot open the lid manually after Emergency switch centrifugation, loosen the emergency switch with a wrench to force open the lid Fuse holder For installing/replacing fuse...
-
Page 12: 4-Product Assembling
4-Product assembling Note: Please start the microcentrifuge 4 hours after its assembling. 1) Unpack first and take out fittings. Note: Take out the main body of the microcentrifuge under the cooperation of two persons by placing both hands under the microcentrifuge and carry it out together. -
Page 13: 5- Operation Instruction
5- Operation instruction Operating procedures: 1) Firstly set various parameters such as target centrifugal speed, time of centrifugation, acceleration mode, ATset mode and target temperature as needed or directly call preset program before start of experiments. 2) Turn on precooling. 3) After the microcentrifuge reaches the set temperature, loosen the microcentrifuge lid, put in the microcentrifuge tubes and start centrifugation. - Page 14 rotor accelerates and decelerates quickly. ATset mode: indicates the time when centrifugation timing starts. indicates that centrifugation timing starts when operation starts; Status icon indicates centrifugation timing restarts when 95% of the set relative centrifugal force or speed is reached. indicates that the highest rotor speed is the target speed during short run;...
-
Page 15: Rotor/Short
Save button. Click to enter [Save Program] page. Click once to start [Quick Precooling] and click again to end [Quick Precooling] or wait for the rotor cavity temperature to reach target temperature to automatically end quick precooling. Parameter lock button. Start/cancel parameter lock function. -
Page 16: Setup
Fig. 5-3 After rotor selection is completed, select mode of [Short], which means to select [Set] or [Max] for short run after click “Short” to start short run. Be unable to select rotor during centrifuging. 5.3 Setup Click to enter the previous or next page in the system setup interface and click to enable other system functions, such as Sleep, Sound, auto Auto-open or continuous cooling or click to switch between Chinese and English in the system language tab. -
Page 17: Continuous Cooling
Fig. 5-5 5.3.1 Continuous cooling When select [Continuous Cooling], the rotor cavity temperature can be kept at set temperature if the following four preconditions are met when the rotor stops moving. 1) The microcentrifuge is started. 2) The microcentrifuge lid is closed. 3) The set temperature is lower than ambient temperature. -
Page 18: Placement Of Microcentrifuge Tube
Fig. 5-6 Click to adjust precooling temperature. When the set precooling temperature is reached, the cooling stops and the system gives off intermittent prompt tone to inform operators that the precooling is completed. Click / [START/STOP] button to stop precooling early. 5.5 Placement of microcentrifuge tube Vertically remove the rotor, loosen the rotor cover, put in the microcentrifuge tube, restore the rotor to its original position vertically and tighten the rotor nuts... -
Page 19: Short Run
Fig. 5-7 Click parameter value to pop out a numeric keypad for entering a value within the range prompted in the interface. Here also to set ATset mode and to select the acceleration mode of Soft or NonSoft. Preset time and continuous run modes are identical in above parameter setup, except that for continuous run, ∞... -
Page 20: 6-Alarm Information
6-Alarm information Alarm information prompt Alarm reasons Treatment method “Operation abnormality! The microcentrifuge Wait until the rotor stop moving, Wait until the rotor stops and lid is forced open open the lid and then close it, restart device. still when the face plate restart centrifugation. - Page 21 “Compressor hot! Turn off the equipment for Compressor casing one hour before restarting; Turn off the power supply and temperature is too wait until the device is cool. If If the fault remains, please high. still abnormal, contact contact after-sales after-sales personnel!”...
- Page 22 personnel! ” the fault; if it remains, contact after-sales service. Stop the equipment to cool “Motor hot! hour before Wait until the device is cool. If still The motor is restarting; abnormal, contact the after-sales heating. If the fault remains, please personnel! ”...
-
Page 23: 7-Troubleshooting
7-Troubleshooting Problem Possible cause Solution The rotor hasn’t stopped rotating. 1) Wait for the rotor to stop. The lid cannot be opened. Check the microcentrifuge fuse. Power failure Check the fuse of the lab. Press emergency unlock of the lid The lid is not Unable to start the Close the lid... -
Page 24: 8-Maintenance
8-Maintenance 8.1 Considerations 1) Don’t let any liquid enter the equipment in order to prevent electric shock. 2) It is prohibited to spray to clean/disinfect on the casing. 3) The power can only be turned on when interior and exterior of the equipment are completely dry. -
Page 25: Cleaning And Disinfection
5) Brush away dust at ventilation opening of the microcentrifuge once every half a year. 6) Glass tubes may be broken inside the rotor cavity when used. If glass tubes breaks, please completely clean glass pieces and chips on the rotor, the rotor cavity and its fittings, and replace the sealing ring with a new one. -
Page 26: Record Keeping
It is recommended that the maintenance process should be recorded and kept after maintenance, including time, location, maintenance procedures, etc. for future reference. 8.6 Parts and materials If you find that some parts or materials should be replaced during maintenance, please contact RWD for after-sales support. -
Page 27: 9-Warranty
When the equipment to be reworked arrives, if it has been dismantled without authorization from RWD, the Company will not provide after-sales services such as warranty, free maintenance and parts replacement. The warranty statement (including its restrictions) is exclusively issued by RWD and covers all other warranties. - Page 28 RWD Life Science Web: www.rwdstco.com Add: 850 New Burton Road, Suite 201, Dover, DE 19904, Kent, Delaware, USA Add: 19/20F, Building 9A, Vanke Cloud City III, Liuxin 4 Street, Nanshan District, Shenzhen518000, Guangdong, P.R. China Tel: +001-858-900-6602 +86-755-86111286 After-sales Service: +86-755-86111281...
Need help?
Do you have a question about the RWD-MB-001-A and is the answer not in the manual?
Questions and answers