Table of Contents
Advertisement
Quick Links
Advertisement
Table of Contents

Related Manuals for RWD MP-500


Summary of Contents for RWD MP-500
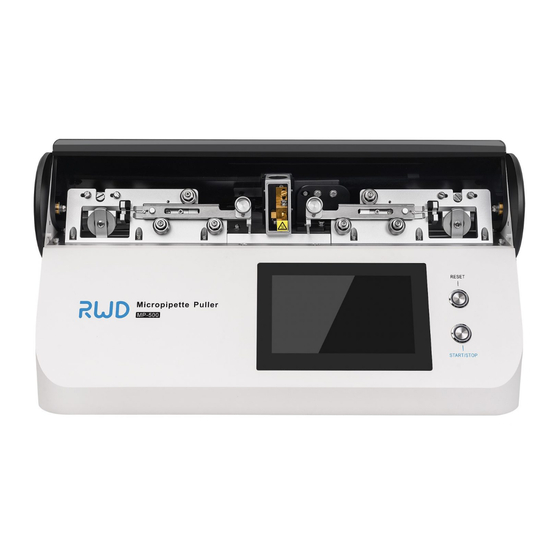
- Page 1 MP-500 Micropipette Puller User Manual...
- Page 2 © 2021 RWD Life Science Co., Ltd. All Rights Reserved. INTELLECTUAL PROPERTY RIGHT The intellectual property rights of this product and its user manual are owned by RWD Life Science Co., Ltd. (hereinafter referred to as RWD), including but not limited to patents, trademark rights, and copyrights.
-
Page 3: Table Of Contents
Content 1-Introduction ........................1 1.1 Overview ..........................1 1.2 Safety ............................ 1 1.3 Product introduction ......................1 1.4 Product Features ......................... 2 1.5 Product Parameters ......................3 1.6 Accessories ........................... 4 1.7 Device Conditions ....................... 4 2-Important information and security ................5 2.1 Labels ............................ - Page 4 4.12.2 Help ........................... 25 4.12.3 System Maintenance ....................27 5-Troubleshooting ......................29 6-Maintenance ......................... 30 6.1 Overview ..........................30 6.2 Cleaning and Maintenance ....................30 6.3 Replace filament ....................... 30 6.4 Replace Drierite canister ....................35 6.5 General check ........................37 6.6 Annual inspection ......................
-
Page 5: 1-Introduction
1-Introduction 1.1 Overview First of all, thank you for choosing MP-500 Micropipette Puller made by RWD! Please be sure to carefully read all the information attached before installing and using this product for the first time, which will help you use the product better. -
Page 6: Product Features
institutions, or used in various application scenarios that require micro-control operations in industry. User Descriptions From scientific research institutions, hospitals, pharmaceutical companies and CROs, engaged in patch clamp and other Electrophysiology electrophysiological recording research, using glass researchers microelectrodes filled with electrolyte solution to collect weak bioelectric signals such as ion channel current potential. -
Page 7: Product Parameters
The mechanical structure specially designed for the capillary glass makes the installation and removal of the glass more convenient and safer. The safe heat mode can avoid the damage of the filament from high temperature. The preheating and constant temperature function can reduce the influence of the ... -
Page 8: Accessories
1.6 Accessories Configuration Name Quantity Description Standard MP-500 Micropipette Puller Main unit Plug-in power wire for device Standard Power wire power input Standard Electrode storage box For storing microelectrodes pulled To disassemble and assemble Standard Double-end screwdriver accessories. One end is cross and the other slotted. -
Page 9: 2-Important Information And Security
The device is only allowed to operate within its applicable scope, and only accessories suitable for this device are allowed to be used. RWD shall not be responsible for any device damage caused by any non-conforming operation, including the damage to a third party. -
Page 10: Safety Function
The microelectrode should be placed in sharp container and sealing for safety after use. Do not disassemble this device. Only after-sales maintenance personnel designated by RWD can disassemble the device or repair accessories. -
Page 11: 3-Product Interface And Buttons
3-Product interface and buttons ② ① ③ ④ ⑤ ⑥ Figure 3-1 ⑦ ⑧ Figure 3-2 Components Quantity Description ① Install the filament ② Drierite canister interface Connect the Drierite canister ③ Capillary glass mounting brackets Install the capillary glass ④... -
Page 12: 4-Operating Procedures
4-Operating Procedures 4.1 Initial start This device should be placed on a stable and level platform during use. Do not place on the unstable platform! Connect the power wire, plug it into the three-hole socket, press the power switch to start the device, and the system first displays the boot interface. - Page 13 Parameters Description The range of current value causing the filament generating enough heat Softening point that can soften the glass is 1-999 Pressure (1-999) The range of air pressure to cool glass and the heating filament is 1-999 The reasonable range of duration of the humidity control chamber Puff(s) being filled with dry gas at the beginning and the end of the pulling is 5-20 seconds...
-
Page 14: Install Glass
4.2 Install glass Figure 4-3 Parts button V-groove Clamping knob Puller bar handle Clamping plate Puller bar Move the puller bars toward opposite directions to the end of their travels respectively until they are caught to prevent them from sliding left and right; First put the glass in the V-groove, turn the knob to fix the glass slightly, and note that the glass can still be slid;... -
Page 15: Softening Point Test
Note! When the microelectrode used in vivo microinjection, RWD recommends the model of glass is B-15086-10F、B-10078-10F、B-12069-10F、B-150110-10F; When the microelectrode used in patch clamp, RWD recommends the model of glass is B-15086-10F、B-12069-10F、B-150110-10F、B-12094-10F! 4.3 Softening point Test The heating assembly of this device increase the temperature of the heating filament via the current to soften the glass. - Page 16 Figure 4-5 Get and record the softening point test value. Figure 4-6 Click on the interface in Figure 4-6 to enter the [Softening point test] interface as shown in Figure 4-4 and retest the softening point. Click to enter the [Main Interface] shown in Figure 4-2, and the current softening point test value will be automatically filled in the softening point input box.
-
Page 17: Edit Parameters
In the [Main Interface], click to select the preset protocols of RWD for pulling. Select the heating filament model. Heating filaments are all box-shaped. When the microelectrode used in vivo microinjection, RWD recommends the HF-2545B filament. Model Specification(box length×width) HF-3025B 3.0×2.5 mm... - Page 18 Select capillary glass. Model Specification(O.D.×I.D.×length) B-15086-10F 1.5×0.86×100 mm B-10050-10F 1.0×0.5×100 mm B-10078-10F 1.0×0.78×100 mm B-12069-10F 1.2×0.69×100 mm B-12094-10F 1.2×0.94×100 mm B-150110-10F 1.5×1.1×100 mm Figure 4-9 Select the application of microelectrodes. Figure 4-10 Finally, the system generates program parameters based on the above three options, and the current protocol can be used as a new program or overwrite current parameters.
-
Page 19: Start And Pause
Figure 4-11 4.6 Start and pause The green button [START/STOP] is a multi-function button, which can start or pause pulling; the red button [RESET] can restart the system. 4.7 Program List Click in the [Main Interface] as shown in Figure 4-2 to save the softening point value and all current parameters. -
Page 20: Remove Microelectrode
Click to create a new program, and enter the [Main Interface] to open a new program; Click to copy the selected program parameters and enter the [Main Interface] to open a new program; Click to rename the selected program; There are 6 factory setting programs in [Default program]. Click the selected program to open it in the [Main Interface]. -
Page 21: Preheat Jaws
4.10 Preheat jaws The jaw preheating function can improve the stability of the pulled microelectrode. When the ambient temperature is too low (lower than 10 °C) or the ambient temperature changes greater than 10 °C, click on the [Main Interface] as shown in Figure 4-2 to turn on the “Preheat jaws to 70°C”... -
Page 22: Parameter Adjustment
4.11 Parameter adjustment After pulling the microelectrode, compare it with the target microelectrode, and adjust the recommended parameters to pull the microelectrode that meets the needs. 1. Patch clamp microelectrode adjustment Select the models of the heating filament and the glass in the [Pull Protocol] interface, select [Patch clamp] to get the recommended parameters, and adjust the parameters according to the following steps. - Page 23 Select velocity Test the impedance corresponding to the median velocity of 4 cycles and 5 cycles, and compares it with the target impedance, and selects the median velocity which the impedance is closer to the target impedance for adjustment. The impedance values in this manual are obtained when both the internal and external fluid of the microelectrode are Ringer's solutions.
- Page 24 Example: Select the velocity of 30 to cycle for 5 times, divide the setting parameters into 5 lines, and then adjust the heat or velocity of last 1-3 lines to obtain the parameters of the target microelectrode. Figure 4-17 Thinwall glass (Model: B-150110-10F, B-12094-10F) ...
- Page 25 The tip of the microelectrode becomes smaller, the increase taper gets longer, and the impedance becomes larger Heat 5 units change The tip of the microelectrode becomes larger, the decrease taper gets shorter, and the impedance becomes smaller The tip of the microelectrode becomes smaller, the increase taper gets longer, and the impedance becomes larger Pull...
-
Page 26: System Setting
4.12 System Setting Click on the [Main Interface] as shown in Figure 4-2 to enter the [Setting] interface. Figure 4-17 Settings Description Turn on the “Preheat jaws to 70°C” function, Preheat jaws to 70°C. referring to 4.10 Preheat jaws. Language Select the language as Chinese or English. -
Page 27: System Diagnosis
4.12.1 System diagnosis Pressure diagnosis Pressure diagnosis is to check whether the air pump runs, whether the air valve is normally opened and closed, and whether there is air leakage. Figure 4-18 Set pressure, the value range is 1-999, turn on [Automatic pressure], the air circuit will automatically run to the set pressure;... - Page 28 Heat diagnosis Figure 4-20 Pull diagnosis Set the pull value within the value range of 0-255, pull the puller bar handles to the middle, and press the green [START] button on the right side of the display. Set the pull value to correspond to the pull during pulling, and the user can judge whether the pull diagnosis is normal.
-
Page 29: Help
Figure 4-22 4.12.2 Help About this puller Figure 4-23 Track leakage Click and operate following the prompts to locate leakages, referring to 4.12.1 System diagnosis. - Page 30 Figure 4-24 Install filament Users can check the installation method of heating filaments step by step, or refer to 6.3 Replace filament. Figure 4-25 Install glass Users can check the installation method of glass step by step, or refer to 4.2 Install glass.
-
Page 31: System Maintenance
Figure 4-26 Preheat jaws Figure 4-27 4.12.3 System Maintenance Click to decrease the brightness and click to increase the brightness. [Maintenance] is only for RWD after-sales personnel. - Page 32 Figure 4-28...
-
Page 33: 5-Troubleshooting
5-Troubleshooting Alarms/Faults Solutions Electric circuit overheated. Wait for the system to be cooled Wait for cooling down to 70°C. Please contact down to 70 °C; technical support if the problem persists after If the alarm is not removed, Please sufficient cooling. contact our after-sales personnel Wait for the jaw to be cooled down to Stop using puller. -
Page 34: 6-Maintenance
Try to prevent vibration or collision when the device is moved; When the accessories of the device are damaged, please contact RWD after-sales service for inspection and maintenance. The device shall not be disassembled by unauthorized personnel to avoid injury to the operator or damage to the device. - Page 35 Figure 6-1 Unscrew the two screws on the jaw, as shown in Figure 6-2, and remove the old heating filament. Figure 6-2 First check whether the jaw groove corresponds to the size of the new filament, as shown in Figure 6-3. If the size corresponds, install the new filament directly on the jaw. If the size does not correspond, unscrew the screw ①...
- Page 36 ① ② ③ Figure 6-4 Replace the jaw ② corresponding to the size of the new filament, and tighten the screw ①. Note that the jaw groove ② should be flush with the jaw ③, as shown in Figure 6-4. Clamp capillary glass in the right puller bar, and make left end of the glass in the middle between two brass jaws, as shown in Figure 6-5.
- Page 37 Slide the glass to the left edge of the filament and extend out as much as possible. Hold the left end of the glass and gently swing it back and forth to finely position the filament centered over air jet opening and around the glass, as shown in Figure 6-7. Figure 6-7 After the filament is centered to proper position, tighten the screws ①...
- Page 38 Figure 6-10 12) If the glass is not horizontally centered, loosen the screw ① and turn the screw ② to finely adjust horizontally until the glass is centered in the filament, as shown in Figure 6-11. Finally, the relative positions of the heating filament, the glass, and the air jet opening are shown in Figure 6-12.
-
Page 39: Replace Drierite Canister
13) Turn on the power switch, pull the glass to verify the installation of the heating filament, and refer to 4.3 Softening point Test——4.9 Pull result. Warning! Do make sure to adjust the filament and test the softening point after replacing a new heating filament! 14) Align the tips of the left and right micropipettes side by side and compare their lengths from tip to shoulder. - Page 40 Unplug the power wire before replacing the drierite canister. ① ② ③ ④ Figure 6-18 Remove the left and right hoses from the drierite canister. Remove the fixing screws①, ②, ③, ④. Replace with a new drierite canister. Tighten the fixing screws①, ②, ③, ④. Connect the left hose, enter the [Pressure diagnosis] interface as shown in Figure 6-19, set [Set pressure] to 999, turn on [Automatic pressure] and [Air valve], turn on the air pump and spray for a few minutes to remove the dust in the canister.
-
Page 41: General Check
Confirm whether the touch screen operation is normal; Confirm whether the identification is firmly pasted; If it is found that some parts or materials need to be replaced during general check or maintenance, please contact RWD after-sales service for support. -
Page 42: Annual Inspection
6.6 Annual inspection RWD recommends a comprehensive inspection of the device on a yearly basis, which is helpful to keep the device in good operating condition. For details, please contact RWD. It is recommended to record the maintenance process, including the maintenance time, location,... -
Page 43: 7-Warranty
7-Warranty The warranty for this system starts from the day when it leaves the factory. RWD provides after-sales support such as device maintenance and parts replacement in case of the device failure due to defects in materials or process during the warranty period. - Page 44 RWD Life Science Co., Ltd. Web: www.rwdstco.com Add: 850 New Burton Road, Suite 201, Dover, DE 19904, Kent, Delaware, USA Add: 19/20F, Building 9A, Vanke Cloud City III, Liuxin 4 Street, Nanshan District, Shenzhen518000, Guangdong, P.R. China Tel: +001-858-900-6602 +86-755-86111286 After-sales Service: +86-755-86111281 After-sales E-mail: service@rwdstco.com...
Need help?
Do you have a question about the MP-500 and is the answer not in the manual?
Questions and answers