Advertisement
Advertisement

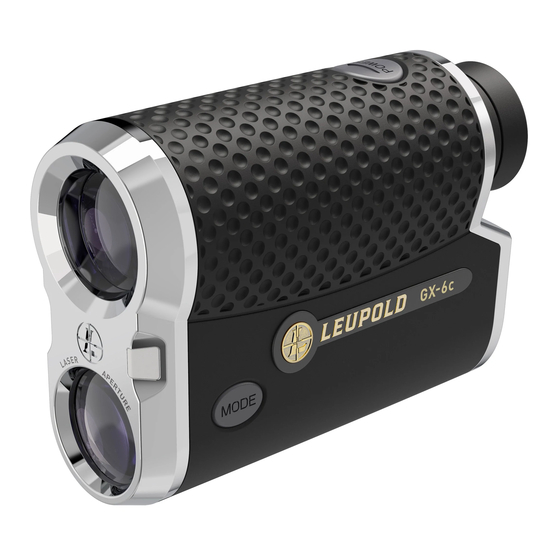
Related Manuals for Leupold GX-6c


Summary of Contents for Leupold GX-6c
- Page 1 GX®-6c RANGEFINDER OPERATING INSTRUCTIONS...
-
Page 3: Table Of Contents
About Leupold & Stevens, Inc . . . . . . . . . . . . . . . . . . -
Page 4: Introduction
GX digital laser rangefinder before operating . The GX-6c is a revolutionary device that uses a ballistic algorithm and advanced digital electronics to guarantee accurate ranges on the course . The DNA® (Digitally eNhanced Accuracy™) engine easily ranges the longest par 5 using advanced signal processing techniques, while the True Golf Range™... -
Page 5: About Leupold & Stevens, Inc
ABOUT LEUPOLD & STEVENS, INC. It’s a decidedly American story: in 1907, a young German immigrant named Fred Leupold set up a one-man shop at 5th and Oak Streets in Portland, Oregon, repairing optics for surveying equipment . The small company survived the First World War and the Great Depression . -
Page 6: Accuracy
ACCURACY The ranging accuracy of the GX-6c series of rangefinder is +/- .5 yard/meter . The maximum effective range depends upon a number of factors including lighting conditions and air quality, but the most important factor is the reflectivity of the target . - Page 7 GX unit is held, the greater the maximum distance . SAFETY AND OPERATION PRECAUTIONS The Leupold GX-6c 6x22mm rangefinder employs an eye safe laser in its operation . Even so, there are a few precautions that are important to remember: •...
- Page 8 • When you see the display through the eyepiece, please be aware that the product is active and emitting an invisible laser and the laser aperture should not be pointed toward anyone . GX-6c Display (TGR on) GX-6c Display (TGR off) (Display as seen through the eyepiece)
-
Page 9: Gx Rangefinder Specifications
SPECIFICATIONS The GX-6c digital laser rangefinder provides a variety of useful modes to tailor performance to the conditions you experience in the field . Model features are identified on the following pages . GX-6c Magnification Inclinometer (Selectable for USGA rule 14-3/0 .5) (True Golf Range ) (Selectable for USGA rule 14-3/0 .5) -
Page 10: Operation
OPERATION QUICK SET MENU™ *GX-6c display shown with all possible characters visible... - Page 11 MODE BATTERY TGR INDICATOR The GX-6c has two buttons: POWER and MODE . When you initially press the POWER button, the display is activated and the unit is ready for ranging . Press the POWER button a second time to range, or press and hold the POWER button to scan . Scanning automatically updates the display .
- Page 12 MODE for at least 2 seconds at any time will exit the Quick Set Menu, save all previous changes, and prepare the rangefinder for immediate use . To reset your GX-6c to factory settings, press POWER to activate the unit . With the rangefinder activated, press and hold MODE, then immediately press and hold POWER .
- Page 13 release the POWER button to toggle between high, medium, and low . Press MODE to save the selection . FOG MODE The Fog Mode can be used in foggy/rainy conditions to screen out false readings from raindrops or other atmospheric interference to provide an accurate range .
- Page 14 another feature, press and release MODE until the appropriate icon is displayed . NOTE: There is no icon for Fog Mode in normal operation. When powered on the unit will display Fog On/OFF status to remind you of the current setting. We recommend turning Fog Mode off during normal ranging to enable easy location of the pin/flag.
- Page 15 above your ball, you should play the shot as if it were 164 yards . NOTE: Turning TGR off will also disable the Club Selector and inclinometer display; all distance readings will be line-of-sight measurements. TO ACTIVATE TGR: 1) Press POWER to activate the rangefinder . 2) Press and hold MODE for at least 2 seconds and then release to enter the Quick Set Menu;...
- Page 16 DAY OF PLAY TEMPERATURE INPUT (dP) Temperature is one of the factors used to determine TGR ranges; inputting the current temperature will increase the accuracy of your TGR measurement . The default temperature setting is 75 degrees °F (25 degrees °C) . NOTE: If yards is selected as the desired measurement output, the temperature will automatically be measured in Fahrenheit.
- Page 17 6) While the temperature is flashing, press and release POWER to change the current temperature setting to match the current conditions . Each depression of POWER will increase the temperature setting by 5 degrees until 120 degrees °F (50 degrees °C) has been reached, at which time the setting will return to 30 degrees °F (0 degrees °C) and begin increasing again .
- Page 18 MANUALLY INPUT THE DAY OF PLAY ALTITUDE: 1) Press POWER to activate the rangefinder . 2) Press and hold MODE for at least 2 seconds to enter the Quick Set Menu . 3) Verify that TGR is turned on; if TGR is not activated, you will not be able to enter the current altitude .
- Page 19 CLUB SELECTOR NOTE: If TGR is not activated, you will not be able to use the Club Selector feature. When TGR is activated, the Club Selector function recommends the proper iron for the current distance, shot angle, environmental conditions, and multiple other factors . This will be shown in the lower portion of the display .
- Page 20 3) Verify that TGR is turned on; if TGR is not activated, you will not be able to enter club selections . See “To Activate TGR” . 4) Press and release MODE until “club” is displayed . 5) While “club” is shown in the lower portion of the display, press and release POWER as necessary until “On”...
- Page 21 NOTE: Though we strongly recommend inputting the specific distances obtained with each of the irons mentioned above, the specialized algorithms used by the GX-6c will make logical assumptions about the remaining club(s) if specific distances are not known for one or more of the remaining clubs.
- Page 22 2) Press and hold MODE for at least 2 seconds to enter the Quick Set Menu . 3) Press and release MODE until “Set Up” flashes briefly in the display, followed by the word “Unit” is shown in the upper display .
- Page 23 2) Press and hold MODE for at least 2 seconds and then release to enter the Quick Set Menu . 3) Press and release MODE until 8 Iron is displayed . 4) The 8-iron indicator will be shown in the upper display, and the last saved distance will be shown in the lower display .
- Page 24 input a distance other than the one shown, proceed to step 7 . To save the shown distance for your 6-iron, press MODE and skip to step 8 below . 7) Press POWER to set the distance obtained with your 6-iron . Each depression of POWER will increase the distance associated with your 6-iron shot in 5-yard/meter increments, the last saved distance, until 220 yards is reached .
- Page 25 is reached . Once 240 yards (220 meters) has been reached, it will reset to the 6-iron distance plus 5 yards/meters and start over again . When the appropriate distance is displayed, let the unit sit idle for at least 30 seconds until an automatic power down occurs, or simply press and hold MODE for at least 2 seconds .
- Page 26 press MODE to save your selection and move on to the altitude input . 3) The last saved altitude will be flashing in the bottom portion of the display . If you wish to input an altitude other than the one shown, proceed to step 4 .
- Page 27 SELECTABLE RETICLES This mode is used to choose from any one of 3 preloaded aiming reticles for your GX digital laser rangefinder . HOW TO CHOOSE A PARTICULAR AIMING RETICLE/ CROSSHAIR: 1) Press POWER to activate the rangefinder . 2) Press and hold MODE for at least 2 seconds and then release to enter the Quick Set Menu .
- Page 28 Flag Lock technology is designed to calculate multiple ranges in order to identify and lock on to the flag the first time, every time . The GX-6c eliminates the guesswork and guarantees an accurate range to the pin .
-
Page 29: Cleaning/Maintenance
. The technology stabilizes both the image and the laser so your GX-6c rangefinder can deliver accurate ranges regardless of user movement . CLEANING/MAINTENANCE Blow away dust or debris on lenses, or use a soft lens brush (such as the one found on the Leupold LensPen) . To remove... -
Page 30: Warranty/Repair
Leupold LensPen . A lens tissue with lens cleaning fluid may be used for more stubborn dirt . Always apply cleaning fluid to the cleaning cloth, never directly to the lenses . - Page 31 Leupold’s rights and may not be used in connection with any product or service that is not Leupold’s, or in any manner that disparages or discredits Leupold, or in a manner likely to cause confusion .
- Page 32 LEUPOLD & STEVENS Inc. P.O. Box 688 Beaverton, OR 97075-0688 U.S.A. 1 (800) LEUPOLD (538-7653) 14400 NW Greenbrier Parkway Beaverton, OR 97006-5790 U.S.A. (503) 526-1400 Part# 179017 Artwork# 179022C...
Need help?
Do you have a question about the GX-6c and is the answer not in the manual?
Questions and answers
Will my gx6 only beep on a flag? I don’t here a beep and you say the beep and image stab is always on?