Table of Contents
Advertisement
Quick Links
Advertisement
Table of Contents

Related Manuals for Robe ROBIN iPointe65


Summary of Contents for Robe ROBIN iPointe65
- Page 1 Version 1.7...
-
Page 2: Table Of Contents
Robin iPointe65 Table of contents 1. Safety instructions ......................3 2. Fixture exterior view ...................... 5 3. Installation........................6 3.1 Connection to the mains .................... 6 3.2 Changing the lamp ..................... 7 3.3 Aligning the lamp ....................... 8 3.4 Rigging the fixture ...................... 9 3.5 DMX-512 connection .................... -
Page 3: Safety Instructions
Please consider that damages caused by manual modifications to the device are not subject to warranty. The Robin iPointe65 was designed for outdoor use and it is intended for professional application only. It is not for household use. - Page 4 (or other light source) lights directly to the front glass cover, even when the fixture is not in operation ! Please use only an original ROBE packaging (paper box, loader case or foam shell) for transporting the device, otherwise potential damage of the device during its transport...
-
Page 5: Fixture Exterior View
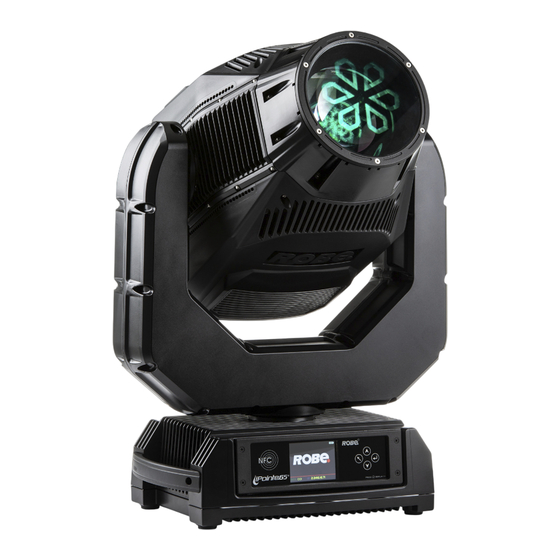
2. Fixture exterior view 1 - Head covers 2 - Lamp cover 3 - Front control panel 4 - Base 5 - Handles 6 - Arm 7 - Front glass cover 8 - Pan lock 9 - Power In (Neutrik TrueOne) 10 - Fuse holder 11 - Ethernet (RJ45) 12 - DMX In (3-pin XLR) -
Page 6: Installation
(residual-current circuit breaker)! Wiring and connection work must be carried out by a qualified electrician. The Robin iPointe65 is equipped with auto-switching power supply that automatically adjusts to any 50-60Hz AC power source from 100-240 Volts. Power cable is enclosed to the fixture. If you need to install a power plug on the power cable to allow connection to power outlets, install a grounding-type (earthed) plug, following the plug manufacturer’s instructions. -
Page 7: Changing The Lamp
3.2 Changing the lamp DANGER ! Install the lamp with the fixture unplug from mains ! 1. Disconnect the fixture from mains and allow it to cool approximately 60 minutes. Lock the head in a suitable position (by means of the pan and tilt locks). 2. -
Page 8: Aligning The Lamp
Inserting and locking the lamp Lamp in unlocked position Turn the lamp right Lamp in locked position 3.3 Aligning the lamp The lamp holder is aligned at the factory. Due to differences between lamps, a fine adjustment of the lamp holder may improve light performance of the fixture. -
Page 9: Rigging The Fixture
3.4 Rigging the fixture A structure intended for installation of the fixture (s) must safely hold weight of the fixture(s) placed on it. The structure has to be certificated to the purpose. The fixture (fixtures) must be installed in accordance with national and local electrical and construction codes and regulations. - Page 10 1-Mounting brackets Omega CL 2-Quick-lock fasteners 3-Safety wire 4-Clamps 5-Attachment point 6-Truss Allowed installation positions of the iPointe65: Note for open-air installation: if the fixture is standing on the ground, min. distance of 4" (10cm) between the fixture base and the ground has to be kept.
- Page 11 When installing fixtures side-by-side, avoid illuminating one fixture with another! In order to protect the internal parts of the head from the sun, the function PARKING POSITION must be switched ON before disconnecting the fixture from mains. The PARKING POSITION function is located on the Power/Special functions channel (120-129 DMX). If the function is on, the fixture will automatically detect via G-sensor whether the fixture is on the floor or hangs on the truss or is mounted sideways on the truss and moves the pan and tilt to the position (including movement of zoom and focus lenses to the front part of the head) in which the front lens of the head will always face down.
-
Page 12: Dmx-512 Connection
Signal (–) and Signal (+) into a 3-pin XLR-plug and plug it in the DMX output of the last fixture. The Robin iPointe65´s panel connectors are dust and water protected according to IP 65 by mating with related cable connectors. They cannot stay disconnected outdoor. -
Page 13: Ethernet Connection
The Universe is a single DMX 512 frame of 512 channels. The Robin iPointe65 is equipped with 8-pin RJ- 45 socket for Ethernet input.Use a network cable category 5 (with four “twisted” wire pairs) and standard RJ-45 plugs in order to connect the fixture to the network. - Page 14 Ethernet / DMX operation Option “ Artnet" (gMaI or gMA2 or sACN) has to be selected from “Ethernet Mode” menu at first fixture. Option “Ethernet To DMX” has to be selected from the menu “Ethernet Mode” at the first fixture (connected to the Ethernet) in the fixture chain, next fixtures have standard DMX setting.
-
Page 15: Wireless Dmx Operation
3.7 Wireless DMX operation The wireless version of the Robin iPointe65 is equipped with the Lumen Radio CRMX module and antenna for receiving DMX signal. CRMX module operates on the 2.4 GHz band. The item " Wireless " from the menu "DMX Input" allows you to activate receiving of wireless DMX (Person- ality-->... -
Page 16: Remotely Controllable Functions
4. Remotely controllable functions Lamp The Robin iPointe65 is to be operated with a Osram Sirius HRI 310W RO lamp. The Osram Sirius HRI 310W RO is a lamp system consisting of a short arc burner within a reflector. Pan/Tilt Fast pan/tilt movement due to built-in electronic motion stabilizer. -
Page 17: Control Menu Map
5. Control menu map Default settings=Bold print Level 1 Level 2 Level 3 Level 4 Level 5 Level 6 Addressing DMX Address 001-512 DMX Presets Mode 1 Mode 2 Ethernet Settings Ethernet Mode Disable ArtNet gMAI gMA2 sACN Ethernet To DMX Off, On IP Address/Net Mask Default IP Address... - Page 18 Level 1 Level 2 Level 3 Level 4 Level 5 Level 6 Fixture States Power On Power Off Lamp On Lamp Off Fixture Position Fixture Temperatures Head Temperature Ambient Temperature Base Temperatures Personality User Mode User A Settings User B Settings User C Settings DMX Presets Mode 1...
- Page 19 Level 1 Level 2 Level 3 Level 4 Level 5 Level 6 Strobe/Hot-Spot Reset Optics/Prism/Frost Reset. Effect Wheel Reset 0-255 Manual Effect Control Dimmer Fine 0-255 Stand -Alone Test Sequences Dynamic Mode Static Mode 0-255 Tilt 0-255 Zoom 0-255 Focus 0-255 MusicTrigger Off, On...
- Page 20 Level 1 Level 2 Level 3 Level 4 Level 5 Level 6 Pri. W. 1 R.2 0-255 Pri. W. 1 R.3 0-255 Prism W. 2 0-255 Pri. W. 2 R.1 0-255 Pri. W. 2 R.2 0-255 Pri. W. 2 R.3 0-255 Frost 1/1 0-255...
-
Page 21: Control Menu
6. Control menu The Robin iPointe65 is equipped with the QVGA screen with battery backup and four control buttons which allow you to set the fixture´s behaviour according to your needs, obtain information on its operation, test its various parts and program it, if it has to be used in a stand-alone mode. - Page 22 "Date &Time Settings" (menu path: Personality--> Date &Time Settings). Locking/unlocking the screen. To lock the screen, display the screen with ROBE logo, touch the [ESCAPE] button and slide your finger clockwise in a circular track of 360° across buttons [ESCAPE] --> [NEXT] --> [ENTER/Display On] -->[PREV]--> [ESCAPE].
-
Page 23: Tab " Address
Total Hours - The item shows the total number of the operation hours with the lamp on since the Robin iPointe65 has been fabricated. Resetable Hours - The item shows the number of the operation hours with the lamp on that the Robin iPointe65 has been powered on since the counter was last reset. - Page 24 Lamp Strikes - Select this menu to read the number of lamp strikes. Total Strikes - The item shows the total number of the lamp strikes since the Robin iPointe65 has been fabricated. Resetable Strikes - The item shows the number of the lamp strikes since the counter was last reset.
-
Page 25: Tab "Personality
6.3 Tab "Personality" User mode - The Robin iPointe65 allows you to recall up to 3 user settings. After switching the fixture on for the first time, the User A settings is active. Now all changes made in the “Personality” menu , ”Addressing” menu and the “Music Trigger“... -
Page 26: Tab "Manual Control
Reset Web Password - The menu item allows you to reset a password for access on the Web server (default password: 2479, user: robe). Default Settings - The menu item allows to set all fixture parameters to the default (factory) values. -
Page 27: Tab "Stand-Alone
Play Program 2 - The option starts user program No. 2. Play Program 3 - The option starts user program No. 3. Edit Program - Use the menu to create or to edit desired program. The Robin iPointe65 offers 3 free programs, each up to 100 steps. -
Page 28: Tab "Service
Pan/Tilt Macro Speed No macro generation 1 - 127 Macro generation from fast to slow-forwards 128 - 129 No macro generation 130 - 255 Macro generation from slow to fast-backwards 6.6 Tab "Service" Adjust DMX Values - The menu allows you to set all effects to desired positions before fine calibration of the effects . - Page 29 By using these items you can calibrate and adjust effects to their right positions. Calibration via the control board 1. Disconnect DMX controller from the fixture and enter the "Calibrate Effects" menu. 2. Use the [up arrow] and [down arrow] to find desired effect and confirm it to enter the fine effect adjustment screen.
- Page 30 If you use the Robe Universal Interface, connect a USB port of your computer with the Robe Universal Interface by means of the USB cable and DMX input of the fixture with the DMX output of the Robe Universal Interface via a DMX cable.
-
Page 31: Icon "Lamp Menu
Another way, how to update software in the fixtures (especially large installation of fixtures) is to use the ROBE Uploader. It is a software for automatized software update of Robe fixtures. It takes advantage of RDM support). For more information please see https://www.robe.cz/robe-uploader/. -
Page 32: Nfc
The NFC point is situated on the front panel of fixture´s base. Download and install the ROBE COM from Google Play (for Android 5.0 and higher) or App Store (for iOS 12.0 and higher) to your mobile phone. Your mobile phone has to support NFC (Near-Field Communication). -
Page 33: Error And Information Messages
9. Error and information messages Error in the fixture is signalled by the yellow warning icon at the bottom line of the screen: Press the [ESCAPE] button to display error messages. List of error and information messages: Lamp Error If the ignition of the lamp is 3 times unsuccessful , the display shows “Lamp Error”, meaning that the lamp could be damaged or even missed or there could be a failure on the lamp driver. - Page 34 Pattern I Rotation Error 1 (Pattern I Rotation Error 2 ) The messages will appear after the reset of the prism wheel 2 if some rotating prism not located in the default position. Pattern 2 Error 1 (Pattern 2 Error 2 ) The messages will appear after the reset of the prism wheel 2 if this wheel is not located in the default position.
- Page 35 Positions of fans in the fixture:...
-
Page 36: Technical Specifications
10. Technical Specifications Electrical Power supply:......electronic auto-ranging Input voltage range:....100-240V, 50-60Hz Fuse:........T 6.3 A Max. power consumption:..550 W (power factor 0.97) Lamp Approved model: Osram Sirius HRI 310W RO CCT: Lamp 8.500K Light output from fixture: 7.200K Ballast Electronic Battery IFR14500;... - Page 37 Rotating gobo wheel 9 glass gobos can be indexed and rotated in both directions at different speeds Gobo wheel continuous rotation Glass gobos: outside diameter=15.8 mm, image diameter=12.5 mm, thickness=1.1-2 mm, +0.15 high temperature borofloat or better glass "Slot&lock" system for easy replacement of gobos Prism wheel 1 Rotating 6-facet linear prism with continuous rotation in both directions Rotating 8-facet 12°...
- Page 38 3 user editable programs, each up to 100 steps Supported protocols: USITT DMX 512, RDM, ArtNet, MANet, MANet2, sACN Support of NFC (application for mobile phones ROBE COM) 2 DMX modes (34, 39 control channels) Wireless DMX/RDM module (only for wireless DMX version) Compliance with USITT DMX-512 (1986 &...
- Page 39 Connection DMX in/Out: IP65 Locking 3-pin & 5-pin XLR connectors Ethernet: IP65 RJ45 connecto Power: IP65 Neutrik powerCON TRUE1 Rigging Mounting points: 2 pairs of 1/4-turn locking points 2x Omega adaptors with 1/4-turn quick locks Temperatures Maximum ambient temperature : +40° C Minimum ambient temperature: -10°C Maximum housing temperature : 80°...
- Page 40 Dimensions (mm)
-
Page 41: Cleaning
-gobo replacement Another maintenance and service operations should be carried out by trained technicians only. If you need any spare parts, please order genuine parts from your local Robe distributor. Replacing the fuse. Before replacing the fuse, disconnect the fixture from the mains. - Page 42 Regular inspections are recommended to ensure proper function and extended life. Be sure all screws and fasteners are securely tightened at all times. Lose screws may fall out during normal operation resulting in damage or injury as larger parts could fall. Damaged rigging points or unsecured rigging could cause the fixture to fall and seriously injure persons.
-
Page 43: Fixture Covers And Torques Of Cover Crews
12.1 Fixture covers and torques of cover crews Keep values of torques as stated on pictures below otherwise leakage issues can occur. Bottom base cover 14 x hex socket head screw M4x16 Screws must be tightened Tightening torque: 2.2-2.5Nm in the order 1-->14. Carefully check the gasket for signs of deformities or hardening and if it is correctly placed before screwing the bottom base cover back. - Page 44 Head covers (on both sides of the head) The front lens module has to be removed Screws must be tightened before removing head cover in order to gain in the order 1-->15. access to the two hex socket head screws M4x10. The plastic cover has to be removed as first to gain access to the 13 screws...
- Page 45 Front lens module Screws must be tightened in the order 1-->8. 8 x hex socket head screw M4x12 with washer Carefully check the gasket for signs of deformities, hardening and if it is correctly placed before screwing the front lens back. Protecting glass on the front lens module 6 x flat head screw M4x12 (with internal...
- Page 46 Arm covers Screws must be tightened in 18 x hex socket head screw M3x12 the order 1-->18. Tightening torque: 1-1.4Nm Carefully check the gasket for signs of deformities or hardening before screwing the arm covers back.
- Page 47 Lamp cover 4 x hex socket head screw M4x16 Screws must be tightened in Tightening torque: 2-2.3 Nm the order 1-->2-->3-->4 Carefully check the gasket for signs of deformities or hardening before screwing the lamp cover back.
- Page 48 Cover of the desiccant chamber 6 x hex socket head screw M3x8 Carefully check the gasket for signs of deformities or hardening before screwing the chamber cover back.
-
Page 49: Replacing Rotating Gobos
12.2 Replacing rotating gobos WARNING! Gobo repleacement should be done by a trained technician! Replace gobos with the device unplug from mains before. 1. Disconnect the fixture from mains and allow it to cool approximately 60 minutes. 2. Lock the head (by means of the pan and tilt locks) in the position that lamp cover is in a readable position as shown on the picture below. - Page 50 Use only gobos intended for the Robin iPointe65. Do not try to use gobos from the Robin Pointe. (The Robin iPointe65 generates heat the gobos of the Robin Pointe are not designed for). Orientation of gobos in the gobo holders...
-
Page 51: Disposing Of The Product
12.3 Disposing of the product To preserve the environment please dispose or recycle this product at the end of its life according to the local regulations and codes. 13. Photometric diagrams Lamp in Standard Mode... -
Page 55: Changelog
Optional frost filters added 30/09/2021 Locking/unlocking screen added September 30, 2021 Copyright © 2020-2021 Robe Lighting - All rights reserved All Specifications subject to change without notice Made in CZECH REPUBLIC by ROBE LIGHTING s.r.o. Palackeho 416/20 CZ 75701 Valasske Mezirici... - Page 56 DMX protocol Robin iPointe65 - DMX protocol Version: 1.1 Mode 1-Standard 16-bit, Mode 2 -Reduced 8-bit Mode/channel Type of Function Value control 0 - 255 Pan movement by 540° (128=default) proportional Pan Fine 0 - 255 Fine control of pan movement (0=default)
- Page 57 DMX protocol Mode/channel Type of Function Value control 125-129 Parking position Off step To activate following functions, stop in DMX value for at least 3 seconds. 130 - 139 Lamp On step 140 - 149 Pan/Tilt reset step 150 - 159 Colour system reset step 160 - 169 Gobo wheels reset step...
- Page 58 DMX protocol Mode/channel Type of Function Value control 167-171 CTO 2700K step 172-176 Blue step 177-180 Orange step 181-185 CTO 3200K step 186-189 UV (Kongo blue) step 190 - 215 Forwards rainbow effect from fast to slow proportional 216 - 217 No rotation step 218 - 243 Backwards rainbow effect from slow to fast proportional...
- Page 59 DMX protocol Mode/channel Type of Function Value control Filter 141 (Bright Blue) 69-70 step 71-72 Filter 147 (Apricot) step 73-74 Filter 148 (Bright Rose) step 75-76 Filter 152 (Pale Gold) step Filter 154 (Pale Rose) 77-78 step Filter 157 (Pink) 79-80 step Filter 158 (Deep Orange)
- Page 60 DMX protocol Mode/channel Type of Function Value control 214-255 Ramp. from half position to full position ( max. --->min. speed) proportional Effect wheel rotation No rotation step 1 - 127 Forwards rotation from fast to slow proportional No rotation (128=default) step 129 -255 Backwards rotation from slow to fast proportional...
- Page 61 DMX protocol Mode/channel Type of Function Value control 64-69 Beam reducer 1 step 70-75 Beam reducer 2 step 76-81 Beam reducer 3 step 82-87 Beam reducer 4 step Shaking gobos from slow to fast 88-95 Gobo 1 proportional 96-103 Gobo 2 proportional 104-111 Gobo 3 proportional...
- Page 62 DMX protocol Mode/channel Type of Function Value control Index - set indexing on channel 21/20 60-67 Gobo 1 proportional 68-75 Gobo 2 proportional 76-83 Gobo 3 proportional 84-91 Gobo 4 proportional 92-99 Gobo 5 proportional 100-107 Gobo 6 proportional 108-115 Gobo 7 proportional 116-123 Gobo 8 proportional...
- Page 63 DMX protocol Mode/channel Type of Function Value control Prism wheel 1 indexing/rotation Prism indexing - set position on channel 23/21 0 - 255 Prism 1 indexing proportional Prism 1 rotation - set position on channel 23/21 No rotation step 1 - 127 Forwards prism rotation from fast to slow proportional No rotation (128=default)
- Page 64 DMX protocol Mode/channel Type of Function Value control 38-39 Pattern 6 step 40-41 Pattern 7 step 42-43 Pattern 8 step 44-45 Pattern 9 step 46-47 Pattern 10 step 48-49 Pattern 11 step 50-51 Pattern 12 step Dynamic patterns-set rotation on channel 28/26 52-53 Pattern 13 step...
- Page 65 DMX protocol Mode/channel Type of Function Value control Open (0=default) step Light Frost Max. time of Light frost movement 0 -->100% (100% -->0) is 10 sec. 1-50 Light Frost from 0% to 100% proportional 51-53 100% Light Frost step 54-63 Pulse closing from slow to fast proportional 64-73...
- Page 66 DMX protocol Mode/channel Type of Function Value control Dimmer intensity - fine 0 - 255 Fine dimming (0=default) proportional Copyright © 2020 Robe Lighting s.r.o. - All rights reserved All Specifications subject to change without notice Page 11...
Need help?
Do you have a question about the ROBIN iPointe65 and is the answer not in the manual?
Questions and answers