Table of Contents
Advertisement
Advertisement
Table of Contents

Related Manuals for Robe ROBIN LEDBeam 350 RGBA


Summary of Contents for Robe ROBIN LEDBeam 350 RGBA
- Page 1 Version 1.6...
-
Page 2: Table Of Contents
ROBIN LEDBeam 350 RGBA ROBIN LEDBeam 350 FW RGBA ROBIN LEDBeam 350 RGBA EP ROBIN LEDBeam 350 FW RGBA EP Table of contents 1. Safety instructions ......................3 2. Fixture exterior view ...................... 5 3. Installation........................6 3.1 Connection to the mains .................... 6 3.2 Rigging the fixture ...................... -
Page 3: Safety Instructions
FOR YOUR OWN SAFETY, PLEASE READ THIS USER MANUAL CAREFULLY BEFORE POWERING OR INSTALLING YOUR ROBIN LEDBeam 350 ! Save it for future reference. This device has left our premises in absolutely perfect condition. In order to maintain this condition and to en- sure a safe operation, it is absolutely necessary for the user to follow the safety instructions and warning notes written in this manual. - Page 4 This fixture was designed for indoor use only, do not expose this unit to rain or use near water. When choosing the installation spot, please make sure that the fixture is not exposed to extreme heat, moisture or dust. Do not block the lens array with any object when the fixture is under operation. The cooling openings in head and base of the fixture should never be covered with cloth or other materials, and never must be blocked.
-
Page 5: Fixture Exterior View
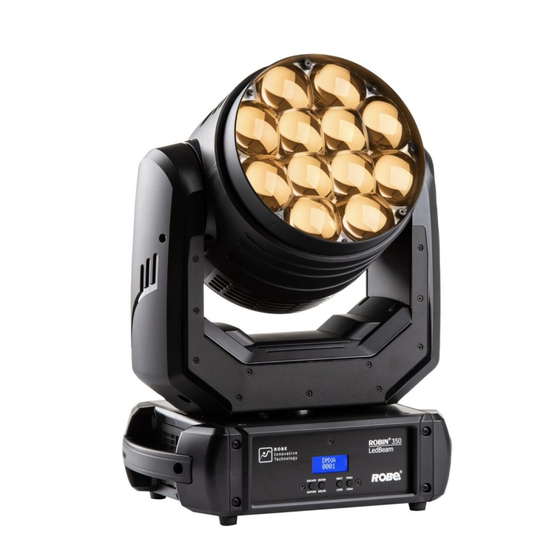
2. Fixture exterior view 1 - Lens array 2 - Arm 3 - Display 4 - Escape button 5 - Enter button 6 - Next button 7 - Preview button 8 - Base 9 - Tilt lock 10 - Top head cover 11 - Rear Head cover 12 - Handle 13 - DMX Out (5-pin XLR) -
Page 6: Installation
3. Installation Fixtures must be installed by a qualified electrician in accordance with all national and local electrical and construction codes and regulations. 3.1 Connection to the mains For protection from electric shock, the fixture must be earthed! The ROBIN LEDBeam 350 is equipped with auto-switching power supply that automatically adjusts to any 50- 60Hz AC power source from 100-240 Volts. -
Page 7: Rigging The Fixture
3.2 Rigging the fixture The installation of the fixture has to be built and constructed in a way that it can hold 10 times the weight for 1 hour without any harming deformation. The installation must always be secured with a secondary safety attachment, e.g. an appropriate catch net. This secondary safety attachment must be constructed in a way that no part of the installation can fall down if the main attachment fails. - Page 8 Truss installation 1-Quick-lock fastener 2-Omega holder 3-Trust 4-Clamp 5-Safety wire with a snap hooks with screw lock gates 6-Attachment point 1. Bolt each clamp (1) to the omega holder (2) with M12 bolt and lock nut through the hole in the holder. 2.
-
Page 9: Eggcrate Installation
3.3 Eggcrate installation Disconnect the fixture from mains before installing the eggcrate . 1.Unscrew three screws M3x8 (1) which hold safety locks (2) of the lens array. Remove the safety locks (2). 2. Insert the eggcrate (3) on the lens array and screw it to the lens array by means of the three enclosed screws M3x10 (4). -
Page 10: Diffusion Filter Installation (Ledbeam 350 Only)
3.4 Diffusion filter installation (LEDBeam 350 only) Disconnect the fixture from mains before installing the eggcrate . 1.Unscrew three screws M3x8 (1) which hold safety locks (2) of the lens array and remove them. 2.Unscrew the five screws M3x12 (3) with rubber rings (4) and remove the lens array (5) and the plastic film (6). 3.Insert diffusion filter (7) matt side towards the lens array (5). -
Page 11: Dmx-512 Connection
3.5 DMX-512 connection The fixture is equipped with 5-pin XLR sockets for DMX input and output. Only use a shielded twisted-pair cable designed for RS-485 and 5-pin XLR-plugs and connectors in order to connect the controller with the fixture or one fixture with another. DMX output DMX input XLR socket:... -
Page 12: Ethernet Connection (Ep Version Only)
3.6 Ethernet connection (EP version only) The fixtures on a data link are connected to the Ethernet with appropriate communication protocol (e.g. ArtNet). The control software running on your PC (or light console) has to support this communication protocol. Art-Net communication protocol is a 10 Base T Ethernet protocol based on the TCP/IP.Its purpose is to allow transfer of large amounts of DMX 512 data over a wide area using standard network technology. -
Page 13: Wireless Dmx Operation
3.7. Wireless DMX operation The external ROBE Wireless CRMX Dongle allows receiving wireless DMX. This device is equipped with the Lumen Radio CRMX module and antenna for receiving DMX signal. CRMX module operates on the 2.4 GHz band. ROBE Wireless CRMX Dongle... -
Page 14: Control Menu Map
4. Control menu map Default settings=Bold print Level 1 Level 2 Level 3 Level 4 Level 5 Level 6 Level 7 DMXA Set DMXA 001-512 DMX Pres Mode 1 Mode 2 Mode 3 IP Addr* Def addr Apply Cus addr IP 1 0-255 IP 2... - Page 15 Level 1 Level 2 Level 3 Level 4 Level 5 Level 6 Level 7 MANet IsIDi 1-32 IGMP r Off, 1-10s DMX Pres Mode 1 Mode 2 Mode 3 On, Off Pan Rev Tilt Rev On, Off P/T Mode Speed Time P/T Feed On, Off...
- Page 16 Level 1 Level 2 Level 3 Level 4 Level 5 Level 6 Level 7 Prog 2 Prog 3 Step 40 F.Tim 0-25.5 S.Tim 0-25.5 COPY Prg End 1-40 Reset Special RDM Low RDM Hight Wireless Stat Unlink Adjust DMX Val 0-255 Dimm F 0-255...
-
Page 17: Control Menu
5. Control menu The ROBIN LEDBeam 350 is equipped with 2-row LCD display which allows to set the fixture´s behaviour ac- cording to your needs, obtain information on its operation, test its various parts and lastly program it, if it has to be used in a stand-alone mode. -
Page 18: Personality (Pers)
Reset - The item shows the number of the operation hours that the ROBIN LEDBeam 350 has been powered on since the counter was last reset. In order to reset this counter to 0, press and hold both [NEXT] and [PREV] buttons and the [Enter] button at the same time. - Page 19 Mode 2 - 16 control channels Mode 3 - 24 control channels (default) Pan Rev - Pan reverse. The item allows to invert pan movement. Tilt Rev - Tilt reverse. The item allows to invert tilt movement. P/T Mode - Pan and Tilt movement mode. Use this menu to set mode of the pan/tilt movement. Speed - both Pan and tilt will move with the same speed as adjusted at the channel 5 "Pan/Tilt speed, Pan/Tilt time".
-
Page 20: Manual Control (Manual)
Dimmer C - Dimmer curve. Use the menu to select desired dimmer curve. Linear - a linear curve. Square - a square law curve. LED Freq - LEDs frequency setup. The function allows you to set the PWM (Pulse Width Modulation) output frequency of LEDs to Standard or High. -
Page 21: Reset
which effects last in the current step and a fade time- during which effects move to new positions. To edit program: Procedure: 1. Press [NEXT] or [PREV] to select the menu "Edit" and press [ENTER]. 2. Press [NEXT] or [PREV] to select the desired program step and press [ENTER] button. 3. - Page 22 If you use the Robe Universal Interface, connect a USB port of your computer with the Robe Universal Interface by means of the USB cable and DMX input of the fixture with the DMX output of the Robe Universal Interface via a DMX cable.
-
Page 23: Rdm
Another way, how to update software in the fixtures (especially large installation of fixtures) is to use the ROBE Uploader. It is a software for automatized software update of Robe fixtures. It takes advantage of RDM support). -
Page 24: Error And Information Messages
ROBE_DMX_INPUT ROBE_WIRELESS_UNLINK RDM model ID for the Robin LEDBeam 350 is 0x0113. 7. Error and information messages Tilt Err This message will appear after reset of the fixture if the head´s indexing circuit malfunctions (sensor failed) or the stepping motor or its driving PCB is defective. The head is not located in the default tilt position after fixture reset. Pan Err This message will appear after reset of the fixture if the head´s indexing circuit malfunctions (sensor failed) or the stepping motor or its driving PCB is defective. -
Page 25: Technical Specifications
LED life expectancy: min. 20.000 hours Typical lumen maintenance: 70% @ 20.000 hour Optical System Robe’s proprietary optical design Zoom range: 3.8° - 60° (LedBeam 350 RGBA, LedBeam 350 FW RGBA ) Two light output modes: CRI and High output CRI >= 90 (at CRI light output mode) - Page 26 Producer: LumenRadio Max. number of fixtures in Ethernet IN/Out line Connection DMX data in/out: Locking 5-pin XLR Ethernet In/Out: 2 x RJ 45 (Robin LEDBeam 350 RGBA EP only) Power IN: Neutrik powerCON TRUE1 Power OUT: Neutrik powerCON TRUE1 Rigging...
-
Page 27: Maintenance And Cleaning
(P/N 10980559) Diffusion Filter 2° for LEDBeam 350 (P/N 10980560) EggCrate for LEDBeam 350 (P/N 10980127) ROBE Wireless CRMX Dongle (P/N 1305 2405) Mains Cable PowerCon In TRUE1/Schuko, 2m, indoor (P/N 1305 2406) Mains Cable PowerCon In TRUE1/US, 2m, indoor... -
Page 28: Replacing Fuse
2. Remove the old fuse from the fuse holder. 3. Install the new fuse in the fuse holder (only the same type and rating). 4. Replace the fuseholder in the housing and fix it. 10. Photometric diagrams Robin LedBeam 350 RGBA Min. zoom - CRI light output mode... - Page 29 Max. zoom - CRI light output mode...
- Page 30 Min. zoom - High light output mode...
- Page 31 Max. zoom - High light output mode...
-
Page 32: Changelog
03/02/2022 Light output mode added to display menu February 3, 2022 Copyright © 2020-2022 Robe Lighting - All rights reserved All Specifications subject to change without notice Made in ROBE Lighting s.r.o., Palackého 416, 757 01 Valašské Meziříčí, Czech Republic... - Page 33 DMX protocol Robin LedBeam 350 RGBA/Robin LedBeam 350FW RGBA - DMX protocol Version: 1.2 Mode 1-Standard 16-bit, Mode 2 -Reduced 8-bit, Mode 3 - Cpulse mode Mode/channel Type of Function Value control Pan (8 bit) 0 - 255 Pan movement by 540° or 450° (128=default)
- Page 34 DMX protocol Mode/channel Type of Function Value control 140 - 149 Pan/Tilt reset step 150 - 159 Zoom reset step 160 - 169 Reserved step Tungsten effect simulution for whites 2700K-4200K 170-171 Tungsten effect simulation (750W) On step 172-173 Tungsten effect simulation (1000W) On step 174-175 Tungsten effect simulation (1200W) On step...
- Page 35 DMX protocol Mode/channel Type of Function Value control LED Frequency (step +124) step LED Frequency (step +125) step LED Frequency (step +126) step Selected LED Frequency step Virtual colour wheel No function (0=default) step Filter 4 (Medium Bastard Amber) step Filter 25 (Sunset Red) step Filter 19 (Fire)
- Page 36 DMX protocol Mode/channel Type of Function Value control 85-86 Filter 164 (Flame Red) step 87-88 Filter 165 (Daylight Blue) step 89-90 Filter 169 (Lilac Tint) step Filter 170 (Deep Lavender) 91-92 step Filter 172 (Lagoon Blue) 93-94 step 95-96 Filter 194 (Surprise Pink) step 97-98 Filter 180 (Dark Lavender)
- Page 37 Dimmer intensity - fine (16 bit) 0 - 255 Fine dimming (0=default) proportional *Select RGBA or CMY mixing mode on channel "Power/Special functions" . Copyright © 2021-2022 Robe Lighting s.r.o. - All rights reserved All Specifications subject to change without notice Page 5...
- Page 38 Robin LEDBeam 350 RGBA/350 FW RGBA - colours on Virtual Colour Wheel Green Blue Amber Colour name (DMX) (DMX) (DMX) (DMX) Filter 4 (Medium Bastard Amber) Filter 25 (Sunset Red) Filter 19 (Fire) Filter 26 (Bright Red) Filter 58 (Lavender)
- Page 39 Green Blue Amber Colour name (DMX) (DMX) (DMX) (DMX) Filter 172 (Lagoon Blue) Filter 194 (Surprise Pink) Filter 180 (Dark Lavender) Filter 181 (Congo Blue) Filter 197 (Alice Blue) Filter 201 (Full C.T. Blue) Filter 202 (Half C.T. Blue) Filter 203 (Quarter C.T. Blue) Filter 204 (Full C.T.
Need help?
Do you have a question about the ROBIN LEDBeam 350 RGBA and is the answer not in the manual?
Questions and answers
350 ledbeam fw is staggering
The Robe ROBIN LEDBeam 350 RGBA may stagger during operation if there is a malfunction in the head's indexing circuit, a sensor failure, or a defect in the stepping motor or its driving PCB. These issues can cause errors such as "Tilt Err" or "Pan Err," indicating that the head is not in the default tilt or pan position after a fixture reset.
This answer is automatically generated