EvenGlo GA301 Series Installation, Operation And Service Instructions
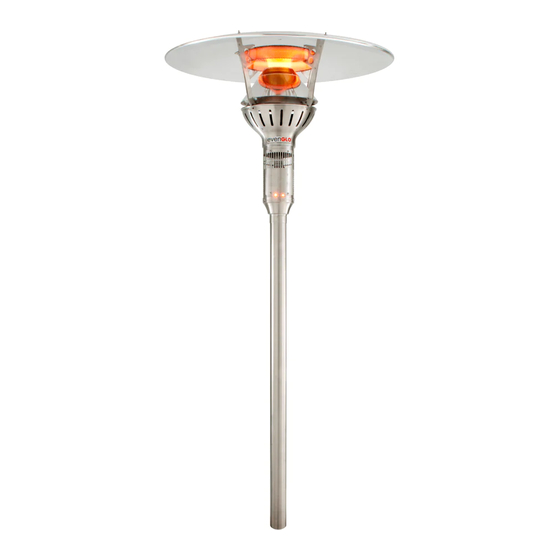
Infrared patio heater
Hide thumbs
Also See for GA301 Series:
- Installation, operation & maintenance manual (30 pages) ,
- Manual (53 pages)
Table of Contents
Advertisement
Quick Links
DANGER
If you smell gas:
1. Shut off gas to heater.
2. Extinguish any open flame.
If odor continues, keep away from the heater and
immediately call your gas supplier or fire department.
WARNING
Improper installation, adjustment, alteration, service,
or maintenance can cause injury, death or property
damage. Read the installation, operation, and
maintenance instructions thoroughly before installing
or servicing this equipment.
IMPORTANT
Please retain these instructions for future reference.
The installer must leave these instructions with the
owner. Only those who are certified to do so should
perform service on these heaters.
__________________________________________________________________________________________________________________
Series GA301
Installation, Operation and Service Instructions
INFRARED PATIO HEATER
DANGER
This heater can produce carbon monoxide which
has no odor.
Using it in an enclosed space can kill you.
Never use this heater in an enclosed space such as
a camper, tent or home.
Canada: 563 Barton St., Stoney Creek, Ontario L8E 5S1
www.irenergy.ca
SERIES GA301
Models U, T, H (24 VAC)
Do not store or use gasoline or other flammable
vapors and liquids in the vicinity of this or any other
heater.
A propane Cylinder not connected for use shall not be
stored in the vicinity of this or any other heater.
FOR OUTDOOR USE ONLY
The evenGLO® heater has been approved for indoor
use in non-residential applications for natural gas
units ONLY!
CALIFORNIA PROPOSITION 65
This heater, its related accessories and by-product of
operation, contain chemicals known to the State of
California to cause cancer and birth defects or other
reproductive harm. For more information go to
www.P65Warnings.ca.gov.
CARBON MONOXIDE HAZARD
1
Models M, MP (pilot)
DANGER
WARNING
LT071 Aug 2021
Advertisement
Table of Contents
Troubleshooting

Related Manuals for EvenGlo GA301 Series


Summary of Contents for EvenGlo GA301 Series
- Page 1 Improper installation, adjustment, alteration, service, FOR OUTDOOR USE ONLY or maintenance can cause injury, death or property The evenGLO® heater has been approved for indoor damage. Read the installation, operation, and use in non-residential applications for natural gas maintenance instructions thoroughly before installing units ONLY! or servicing this equipment.
- Page 2 CAUTION - MAINTENANCE INSTRUCTION 1. Keep the heater area clear and free from combustible materials, gasoline and other flammable vapors and liquids. 2. Do not obstruct the flow of combustion and ventilation air. 3. Visually check burner flames. 4. Clean the heater, including special surfaces, with recommended cleaning agents, if necessary. Check the maintenance section in this manual for additional instructions.
-
Page 3: Table Of Contents
Contents CONTENTS ..................................3 INTRODUCTION.................................. 4 ..................................4 NSTALLATION ODES GENERAL SPECIFICATIONS ..............................5 DIMENSIONAL CHART ................................ 6 GA301-U, GA301-T, GA301-M ..............................6 GA301-H ..................................... 7 GA301-MP ....................................8 COMPONENTS ................................... 9 GA301-U, GA301-T, GA301-M ..............................9 GA301-MP ....................................10 ................................... -
Page 4: Introduction
INTRODUCTION IR Energy is a company in the infrared heating industry founded on the principles of product quality and customer commitment. Quality commitments are evidenced by superior design, a regard for design detail and an upgrade of materials wherever justifiable. Customer commitment is apparent through our ready responses to market demands and a never- ending training and service support program for and through our distributor network. -
Page 5: General Specifications
GENERAL SPECIFICATIONS GA301-U, GA301-T, GA301-H Gas Supply Inlet Pressure Natural Gas Propane Minimum 6.5" W.C. 11.0” W.C. Maximum 14.0” W.C. 14.0” W.C. Manifold Pressure Natural Gas Propane High Fire 5.5" W.C. 9.8” W.C. Low Fire 4.0" W.C. 7.0” W.C. Inlet Connection Natural Gas Propane ½”... -
Page 6: Dimensional Chart
DIMENSIONAL CHART GA301-U, GA301-T, GA301-M Figure 1: GA301-U, GA301-M Figure 2: GA301-T Pole Hole Configuration GA301-U, GA30-T, GA301-M Figure 3: Pole Hole Configuration (Mounted Heaters) __________________________________________________________________________________________________________________ Series GA301 LT071 Aug 2021... -
Page 7: Ga301-H
GA301-H Figure 4: GA301-H Top Dimensions Figure 5: GA301-H Side Dimensions __________________________________________________________________________________________________________________ Series GA301 LT071 Aug 2021... -
Page 8: Ga301-Mp
GA301-MP Figure 6: GA301-MP __________________________________________________________________________________________________________________ Series GA301 LT071 Aug 2021... -
Page 9: Components
COMPONENTS GA301-U, GA301-T, GA301-M Fixed Heater Heat Mounting with Gas Pole Hose QTY (1) QTY (1) Reflector QTY (1) GA301-H Heater Base QTY (1) __________________________________________________________________________________________________________________ Series GA301 LT071 Aug 2021... -
Page 10: Ga301-Mp
GA301-MP Heater Head with Reflector Gas Hose QTY (1) QTY (1) Fixed Mounting Pole with Detachable Pole Neck QTY (1) ½” QD Socket Regulator with Mounting Plate and Nipple QTY (1) Supply Hose with Quick Disconnect QTY (1) Bottom Base with Top Cover and Wheel Kit QTY (1) -
Page 11: Hardware Kits
Hardware Kits Model GA301-U, GA301-T: EH001: Top Reflector to Support Arms • EH027: 1/4”-20 x 1/2” S.S Carriage Bolt (x4), CH143: 1/4” S.S Flat Washer (x4), EH028 1/4”-20 S.S Acorn Nut (x4) • EH021: Pole Package EG011: 3/8” x 3/8” FPT x FJIC Swivel Adapter (x1) EG013: 3/8”... - Page 12 Model GA301-M: EH001: Top Reflector to Support Arms • EH027: 1/4”-20 x 1/2” S.S Carriage Bolt (x4), CH143: 1/4” S.S Flat Washer (x4), EH028 1/4”-20 S.S Acorn Nut (x4) EH085: Heater Head to Pole Neck • EH041: #10 – 24 S/S Button Socket Cap Screw (x4) EH063: 1/8”...
-
Page 13: Clearance To Combustible Materials
CLEARANCE TO COMBUSTIBLE MATERIALS The following clearance data is based on a maximum limit of 90°F (50°C) plus ambient temperature. Note with an ambient temperature of 70°F the surface temperatures at the clearance distances listed below could reach 160°F. Care should be taken with placement of plastic or vinyl in the proximity of the heater as they tend to distort and soften at these temperatures. -
Page 14: Location Planning
LOCATION PLANNING WARNING This heater is NOT approved for any indoor Residential application. If in doubt of your application consult with your local fire marshal or gas authority having jurisdiction. A Residential Dwelling is a housekeeping unit used or intended to be used as a domicile by one or more persons, containing cooking, eating, living, sleeping, and/or sanitary facilities. -
Page 15: Indoor Installations (Natural Gas Models Only)
Indoor Installations (Natural Gas models only) The Even-GLO heater has been approved for indoor use in non-residential applications (Natural Gas Models ONLY). Venting of the flue gases is accomplished by means of an interlocked fan. Refer to the Natural Fuel Gas Code, ANSI Z.223.1 (NFPA 54) in the US and CSA B149.1 and B149.2 Installation Codes in Canada. -
Page 16: Installation Instructions
Installation Instructions Floor Mount Models (GA301-U, GA301-T, GA301-M) Mounting Plate Hole Pattern (Full size) __________________________________________________________________________________________________________________ Series GA301 LT071 Aug 2021... - Page 17 1. Mount pole base onto a concrete floor or cast concrete with a minimum below grade depth of 12” and having a 12” diameter. If forming concrete, cast in place appropriate passage for gas and control wires. Use minimum 3/8” x 5” 90° lag bolts or equivalent to mount heater base to the concrete base. The pole base could also be mounted on wood decks with 3/8”...
- Page 18 3. Secure burner head to pole with four #10 screws provided. Figure 10: Burner Head Installation 4. Push the gas connection into the slot by slightly pushing on the gas line through the electrical box. The gas fitting should be positioned as illustrated below. Figure 11: Gas Connection Position __________________________________________________________________________________________________________________ Series GA301...
- Page 19 5. Place gas connection cover onto the fitting and install the nut to fasten the cover assuring the nut is properly seated. See below. Figure 12: Gas Connection 6. Install reflector using the four carriage bolts, nuts and washers provided. Figure 4 Figure 13: Reflector Installation __________________________________________________________________________________________________________________...
-
Page 20: Hanging Model (Ga301-H)
Hanging Model (GA301-H) 1. Disconnect gas hose from reducing coupling. Connect flared elbow to reducing couple and align elbow to point at a right angle to the heater door opening. Figure 14: Gas Hose Connections 2. After inserting the heater assembly into the frame base, connect the swivel fitting on the opposite end of the gas hose to the flared elbow. - Page 21 4. Assemble angular arms to the base. Figure 17: Angular Arm Assembly 5. Assemble vertical arm to angular arm using two gusset plates and 5/16” carriage bolts with nuts and washers. Repeat this for the other side. Figure 18: Vertical Arm Assembly 6.
- Page 22 7. Mount the heater base assembly to the ceiling in the desired location keeping in mind clearance to combustibles. Use a minimum of 6 #14x1.5” wood screws to mount heater. Caution: To prevent possible head injury provide pedestrian protection if the lowest point of the heater is less than 7 feet in height.
- Page 23 9. Feed the gas line and control wires through either side of the assembly. Figure 22: Feed Gas Lines / Wires Through Assembly 10. Install the heat shields as illustrated using the #8-32 type F screws supplied. Figure 23: Install Heat Shields __________________________________________________________________________________________________________________ Series GA301 LT071 Aug 2021...
- Page 24 11. Install the bottom cover to complete the assembly using 4 #8-32 type F screws supplied. Figure 24: Install Bottom Cover 12. Install the reflector brackets to the frame in an upright position. Attach the reflector to the reflector support brackets using screws supplied.
-
Page 25: Portable Model (Ga301-Mp)
Portable Model (GA301-MP) 1. Secure the wheels to the bottom base: a. Flip over base. Line up holes and press carriage bolt through the wheel bracket and the bottom base. Place the lock washer over the threads of the carriage bolt and hand tighten the nut. Figure 26: Attach Wheels to Base b. - Page 26 b. Line up pole flange indicator dot with the bottom base indicator dot. Slide bottom housing into place as shown below. Figure 29: Line Up Pole and Slide Bottom Housing into Place c. Unplug the quick disconnector from the one side of the supply hose and feed the hose through the inside of the bottom housing until it reaches the other end of the hose.
- Page 27 a. Slide the rest of the bottom housing assembly down the pole. Figure 32: Slide Housing Assembly Down Pole b. Place the pole neck in the pole, line up the 4 holes. Place the button socket cap screws into the holes and place the internal stainless-steel lock washer over the threads inside the pole and hand tighten the nylon insert brass nuts as shown below.
- Page 28 a. Place heater head onto pole neck and line up the holes. Figure 35: Install Heater Head b. Hand tighten the 4 button socket cap screws into the weld nuts on heater head. Tighten with the allen key provided. Figure 36: Hand Tighten Heater Head 5.
- Page 29 b. Place top reflector onto heater head and line up the 4 arms of heater head. Place stainless-steel carriage bolts through the arms and top reflector. Figure 38: Place Reflector onto Heater Head c. Place stainless-steel flat washers over threads of carriage bolts and tighten the stainless-steel acorn nuts, Figure 39: Install Reflector 6.
-
Page 30: Gas Supply
Gas Supply General Requirements • The gas meter and service must be sufficiently large to supply gas to the connected building gas load including the heating equipment and any other gas fired equipment. • Additionally, the gas distribution piping must be designed according to local and national ordinances. Generally (low pressure) systems designed with a maximum ½"... -
Page 31: Electrical Wiring
Electrical Wiring Internal Wiring GA301-U, GA301-T, GA301-H Figure 40: GA301-U, GA301-T, GA301-H Wiring Diagram Internal Wiring GA301-M, GA301-MP Figure 41: GA301-M, GA301-MP Wiring Diagram __________________________________________________________________________________________________________________ Series GA301 LT071 Aug 2021... -
Page 32: External Wiring Options Ga301-U, Ga301-T, Ga301-H
External Wiring Options GA301-U, GA301-T, GA301-H Figure 42: Wiring with Toggle Switches Figure 43: Wiring with 2-Stage Switch __________________________________________________________________________________________________________________ Series GA301 LT071 Aug 2021... -
Page 33: Startup & Shutdown Instructions
Startup & Shutdown Instructions GA301-U, GA301-T, GA301-H Startup 1. Open manual gas supply valve (ensure the gas supply lines have been purged). 2. Turn on switch to energize electric supply. 3. The electronic control module will time out in 45 seconds 4. -
Page 34: Maintenance & Troubleshooting
Maintenance & Troubleshooting Maintenance CAUTION Always follow all Caution and General Safety rules before / during use. • Before performing ANY service to the heater, shut off the gas supply and electrical supply • If any maintenance issues are found place the heater OUT OF SERVICE until it has been •... -
Page 35: Care And Cleaning
Cleaning should always be followed by rinsing with CLEAN HOT WATER and drying with clean towels. Preventative Care and Maintenance EH105 – Custom Dome Cover – A custom protective cover designed to increase the life of your EvenGlo. Item is not included with purchase, please contact your Representative for further details. -
Page 36: Troubleshooting Ga301-U, Ga301-T, Ga301-H
Troubleshooting GA301-U, GA301-T, GA301-H No Gas Supply at Burner • Ensure manual shut off valve is in proper position Ensure there is pressure and flow at inlet to gas valve • • Ensure gas valve receives 24VAC power from control module during ON cycle Ensure the gas valve switch is set to ON position •... -
Page 37: Replacement Parts
REPLACEMENT PARTS GA301-U, GA301-T, GA301-H Replacement Parts Item Part No. Description ES041 Reflector Package EG014 For GA301-U, GA301-H: Gas Hose Assembly 55” EG027 For GA301-T: Gas Hose Assembly 67” RP-ES011 Emitter RP-EE002 Flame Sensor RP-EE001 Spark Electrode EE151 Electronic Ignition Module (Channel 2021-142, 6 pin) Electronic Ignition Module Kit (Channel 2021-96, 5 pin) EE030 EG002... -
Page 38: Ga301-M & Ga301-Mp Replacement Parts
GA301-M & GA301-MP Replacement Parts Item Part No. Description RP-ES170* Pole Neck RP-ES171* Housing Top Cover RP-ES172* Pole Assembly RP-ES011 Emitter RP-EH016 Knob ES185* For GA301-MP: Burner Housing Assembly RP-EH066 For GA301-MP: Wheel Assembly RP-ES161* For GA301-MP: Main Housing RP-ES119 Arm Assembly w/ Shield Support RP-EE034 For GA301-MP:... -
Page 39: Warranty
WARRANTY SERIES GA301-U, GA301-T, GA301-H GA301-M, GA301-MP e v e n G L O P A T I O H E ATER WARRANTY THE MANUFACTURER WARRANTS TO THE ORIGINAL OWNER THAT THE EMITTER OF THE PRODUCT WILL BE FREE OF DEFECTS IN MATERIAL AND WORKMANSHIP FOR A PERIOD OF 3 YEARS FROM THE DATE OF PURCHASE.
Need help?
Do you have a question about the GA301 Series and is the answer not in the manual?
Questions and answers