Table of Contents
Advertisement
A P
PATIO HE
EATER L
Please retai
P
in these in
IM
MPORTANT
T:
T
he installer
r must leave
Only those w
O
who are cer
LIKE NO
OTHER
R
If you sm
mell gas:
1. Sh
hut off gas
2. Ex
xtinguish a
3. If o
odor contin
im
mediately
Do not st
tore or use
in the vic
cinity of thi
An LP Cy
ylinder not
vicinity o
of this or an
Improper
r installatio
maintena
ance can c
installatio
on, operat
before in
stalling or
WA
!
nstructions
s for future
e these inst
tructions w
rtified to do
so should
CARB
This applia
monoxide
Using it in
Never use
space suc
Mo
odel N
Inf
frared O
Outdoor
Manual
for Installa
DANGE
to applian
nce.
ny open fla
ame.
nues, keep
p away from
call your g
gas supplie
WARNIN
e gasoline
or other fl
is or any o
other applia
t connected
d for use s
ny other ap
ppliance.
WARNIN
on, adjustm
ment, alter
ause injury
ry, death or
ing and ma
aintenance
r servicing
this equip
ARNING:
FOR OUT
e reference
e.
ith the own
er.
perform se
ervice on the
BON MON
NOXIDE H
ance can p
produce ca
which has
s no odor.
n an enclos
sed space
e this appli
ance in an
ch as a cam
mper, tent
No. G
GA20
Patio He
ation, Ope
ration & M
ER
m the appl
liance and
er or fire d
department
NG:
ammable v
vapors and
ance.
shall not be
e stored in
NG:
ration, serv
vice or
r property
damage. R
e instructio
ons thorou
pment.
TDOOR US
SE ONLY
ese heaters
s.
HAZARD
arbon
can kill yo
ou.
n enclosed
or home.
1M2
eater
aintenance e
t.
d liquids
n the
Read the
ughly
LT126
Advertisement
Table of Contents
Troubleshooting

Related Manuals for EvenGlo GA201M2


Summary of Contents for EvenGlo GA201M2
- Page 1 odel N No. G GA20 frared O Outdoor Patio He eater Manual for Installa ation, Ope ration & M aintenance e PATIO HE EATER L LIKE NO OTHER DANGE If you sm mell gas: 1. Sh hut off gas to applian nce.
-
Page 2: Table Of Contents
Replacing The Battery ..................... 22 Maintenance and Trouble Shooting ................ 23 Maintenance ........................ 23 Replacement Parts ...................... 24 Functional Wiring Diagram ..................... 25 Care and Cleaning of Stainless Steel Patio Heater ............ 26 Parts Reference ........................ 27 Warranty ........................ 29 Series GA201M2 Page 2 Sept 19 /2014 ... -
Page 3: Caution And General Safety
Cleaning of the appliance should only be done with non-combustible and non-corrosive cleaning agents. DO NOT alter the heater in any way; this includes shortening the pole or removing the Base Body cover or Top Reflector. Series GA201M2 Page 3 Sept 19 /2014 ... -
Page 4: Caution And General Safety
LP-Gas Cylinders must be stored outdoors in a well-ventilated area out of the reach of children. A disconnected cylinder must have dust caps tightly installed and must not be stored in a building, garage or any other enclosed area. Ensure the storage area meets all local fire & safety requirements. Series GA201M2 Page 4 Sept 19 /2014 ... -
Page 5: Applicable Regulations
Provided with a cylinder connection device compatible with a QCC1 connection (Quick Connect Coupling). Installation or repair of this heater should only be done by personnel qualified for the installation of powered gas appliances. (Certified by the local or national regulating body) Series GA201M2 Page 5 Sept 19 /2014 ... -
Page 6: Location Planning
Always allow room for removal of the Top Reflector and Burner head for maintenance purposes. The heater aspirates (needs) air for combustion. Do not locate heater where there are severe draft conditions or airflow restrictions to the Burner head of the heater. Series GA201M2 Page 6 Sept 19 /2014 ... -
Page 7: Specifications / Details
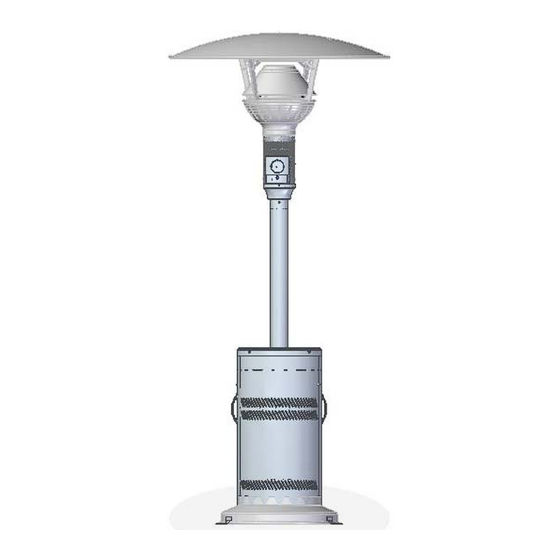
/ De etails Equipme ent Dimensi ions Floor Mo ount Model # # GA201M2 LP-Gas Cylinder C ompatibility To be use ed ONLY wit th 20 lb LP-G Gas Cylinder rs with a max ximum capac city of 8kg (2... -
Page 8: Clearance To Combustible Materials
NOTE: Some materials deteriorate or soften at sustained temperatures below 160°F. Consult material manufacturer for recommendations The Installer is responsible to ensure that building materials with a low heat tolerance which may degrade at higher temperatures are protected to prevent degradation. Series GA201M2 Page 8 Sept 19 /2014 ... -
Page 9: Installation Instructions
Installation Instructions Shipping Crate Contents Heater Head Assembly Base Body, Base Cover, Pole & Counterweight Wheels Reflector Regulator w/ Quick Connect Series GA201M2 Page 9 Sept 19 /2014 ... - Page 10 Installation Instructions Hardware Kits: Contents: Bags 1, 2, and 3 will be taped to the internal packaging of the base body. Bag 4 is zip tied to Head assembly and Bag 5 will be taped to the reflector. Bag 1 = 8‐32 x 3/8” Button Socket (x4) Bag 2 = A. 3/8” – 16 S.S Nylon Lock Nuts (x6) B. 3/8” S.S Washers (x6) Bag 3 = A. 1/4”– 20 x 1/2” S.S Button Sock (x6) B. 1/4” – 20 S.S Nylon Lock Nuts (x6) C. Hold Down Bracket (x3) Bungee = 15” Bungee Cord Wheel Kit = A. Wheel Assembly B. 1/4” – 20 x 1/2” S.S Button Sock (x2) C. 1/4” – 20 S.S Nylon Lock Nuts (x2) Bag 4 = #10 – 24 Socket Head Screw (x3) Bag 5 = A. 1/4”‐20 x 1/2” S.S Carriage Bolt (x4) B. 1/4” Washer S.S (x4) C. 1/4”‐20 Acorn Nut (x4) Series GA201M2 Page 10 Sept 19 /2014 ...
-
Page 11: Assembly Of Outdoor Patio Heater
3. Rotate the head assembly so the front control knob is facing the coloured sticker on the pole neck as shown below. Series GA201M2 Page 11 Sept 19 /2014 ... - Page 12 7. Carefully take off the packaging holding the housing top cover up the pole. Carefully slide the top cover down the pole covering the pole-mounting flange and hardware. Use the contents of Bag 1 (#8-32 x 3/8”) to secure the cover to the base body in 4 places. Series GA201M2 Page 12 Sept 19 /2014 ...
- Page 13 Insert both bolts into the matching set of mounting holes. Tip the heater slightly to be able to thread on the Nylon Nuts provided underneath the Main Base. Tighten the nuts until the wheel assembly is secure. Series GA201M2 Page 13 Sept 19 /2014 ...
- Page 14 This heater will not operate at an inclined position. Ensure the heater is in the upright position, and should not be positioned on an incline. Your Patio heater is now assembled and is ready to connect to your LP-Gas Supply Cylinder. Series GA201M2 Page 14 Sept 19 /2014 ...
-
Page 15: Connecting The Lp-Gas Supply
Make sure the LP-Gas cylinder is in the upright position. Feed Bungee through the handle of the LP cylinder, then hook the Bungge on the other set of securing holes. Series GA201M2 Page 15 Sept 19 /2014 ... - Page 16 Before using the patio heater: Perform a leak test to make sure Regulator connection does not have leaks.. Move Heater to desired location. Secure the Base Body to the floor. Series GA201M2 Page 16 Sept 19 /2014 ...
-
Page 17: Position / Move The Heater
5. If the Heater is going to be operated at the new location, the “Testing / Commissioning 6. ” procedure must be completed Series GA201M2 Page 17 Sept 19 /2014 ... -
Page 18: Secure The Heater
Drill 3 - Pilot Holes Secure using Wood Screws in Wood Screw Pilot hole drill size: Wood Deck pilot holes aligned with Base #10 x 1 1/2" Hardwood = 7/64" Brackets Softwood = 3/32" Series GA201M2 Page 18 Sept 19 /2014 ... -
Page 19: Leak Test Method
7. Repeat steps 1, 2, and 3 until no leaks are detected at all hose connection locations as shown below. If you cannot stop the leaks, shut OFF the supply valve on the LP-Gas Cylinder and disconnect the cylinder from the heater. Place the heater OUT OF SERVICE and consult a certified service person. Series GA201M2 Page 19 Sept 19 /2014 ... - Page 20 Heater will produce smoke the first time it is lit. This is normal. Make sure NOT to light the heater in an enclosed area. Make sure all protective plastic has been removed from all surfaces before lighting. Series GA201M2 Page 20 Sept 19 /2014 ...
-
Page 21: Operating Instructions
2. Turn propane tank gas valve clockwise to ’OFF' position when heater is not in use. WARNING: Improper Lighting, Shutting Down can cause injury, death or property damage. Read the Lighting and Shutting Down instructions thoroughly before operating or servicing this equipment. Series GA201M2 Page 21 Sept 19 /2014 ... -
Page 22: Operating Instructions
3. Pull out battery while taking note polarity orientation. (+ -) 4. Replace battery and screw Knob back into place. 5. Test spark by going to the front of the heater and pressing Ignition Knob in the pilot position. 6. Replace the Housing Service Cover. Series GA201M2 Page 22 Sept 19 /2014 ... -
Page 23: Maintenance And Trouble Shooting
2. Check condition of the Burner, especially the integrity of the flame screen. 3. Inspect condition of spark and sense electrode. Check for cracks in ceramic insulators or excessive corrosion. 4. Inspect condition of high tension lead to spark rod Series GA201M2 Page 23 Sept 19 /2014 ... -
Page 24: Replacement Parts
Ensure there is no overpowering wind. Ensure sense electrode is not corroded, is not grounded or has a cracked insulator. Replacement Parts Use only manufacturer recommended replacement parts. For a complete list of replacement parts contact your dealer. Series GA201M2 Page 24 Sept 19 /2014 ... -
Page 25: Functional Wiring Diagram
(H i/L o ) P ilo t A s s e m b ly G a s V a lv e T ip S w itc h In te rru p te r B lo c k Series GA201M2 Page 25 Sept 19 /2014 ... -
Page 26: Care And Cleaning Of Stainless Steel Patio Heater
Non-halogenated solvents, such as Acetone, Methyl Alcohol, and Ethyl Alcohol work well. The preferred solvent is one that does not contain Chlorine. Cleaning should always be followed by rinsing with CLEAN HOT WATER and drying with clean towels. Series GA201M2 Page 26 Sept 19 /2014 ... -
Page 27: Parts Reference
Every part is replaceable; if the part is not listed, above please contact your IR Energy Rep for part information. NOTE: For parts with “*” suffix add S, B, or BR to the end of the part numbers for desired finish. “S” = Stainless Steel “B” = Black “BR” = Bronze Series GA201M2 Page 27 Sept 19 /2014 ... -
Page 28: Maintenance And Trouble Shooting
Maintenance and Trouble Shooting Series GA201M2 Page 28 Sept 19 /2014 ... -
Page 29: Warranty
Warranty MODEL No. GA201M2 - INFRARED OUTDOOR PATIO HEATER WARRANTY The Manufacturer warrants to the original owner that the burner and the emitter which have a replacement warranty period of 5 years and that product will be free of defects in material and workmanship for a period of 1 year from the date of purchase, for all other parts.
Need help?
Do you have a question about the GA201M2 and is the answer not in the manual?
Questions and answers