Table of Contents
Advertisement
Quick Links
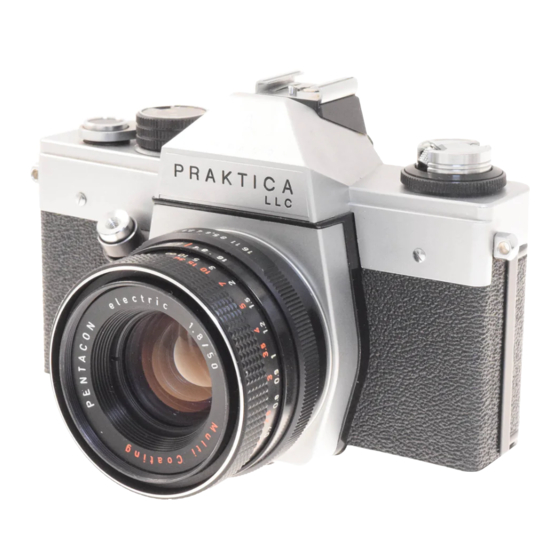
Praktica LLC
This camera manual library is for reference and historical purposes, all rights reserved.
This page is copyright by
, M. Butkus, NJ.
This page may not be sold or distributed without the expressed permission of the producer
I have no connection with Chinon Co., Japan
On-line camera manual library
This is the full text and images from the manual. This may take 3 full minutes for all images to appear.
If they do not all appear. Try clicking the browser "refresh" or "reload button" or right click on the image, choose "view image" then go back. It should now appear.
To print, try printing only 3 or 4 pages at a time.
Back to main on-line manual page
If you find this manual useful, how about a donation of $3 to:
M. Butkus, 29 Lake Ave., High Bridge, NJ 08829-1701
and send your e-mail address so I can thank you.
Most other places would charge you $7.50 for a electronic copy
or $18.00 for a hard to read Xerox copy.
This will allow me to continue to buy new manuals and pay their shipping costs.
It'll make you feel better, won't it?
If you use Pay Pal, use the link below. Use the above address for a check, M.O. or cash.
Venmo is
@mike-butkus-camera
www.PayPal.me/butkus
(posted 3-02)
Advertisement
Table of Contents

Related Manuals for Praktica LLC


Summary of Contents for Praktica LLC
- Page 1 Praktica LLC This camera manual library is for reference and historical purposes, all rights reserved. This page is copyright by , M. Butkus, NJ. This page may not be sold or distributed without the expressed permission of the producer I have no connection with Chinon Co., Japan On-line camera manual library This is the full text and images from the manual.
- Page 2 1. Knob for setting the shutter speeds 9. Exposure speed index 2. Cocking lever for delayed-action release 10. Film speed scales 3. Delayed-action release knob ; 11. Film speed index 4. Shutter release -A 12. Rapid cocking lever 5. Rewind knob 13.
- Page 3 16. Selector ring for automatic exposure control 22. Film transport sprocket 17. Symbols for measuring at full aperture or taking 23. Wire bracket aperture 24. Metal-blade focal - plane shutter 18. Rewind catch 25. Ocular mount with fitting for accessories 19.
- Page 4 31. Depth-of-field scale We are very pleased that you have chosen the high quality PRAKTICA LLC, and we wish you every success in working with this modern reflex camera. Before using your camera, however, we would request you to read these Instructions for Use very carefully.
- Page 5 Due to the special type of bridge circuit, the reading is not affected by any variation in voltage of the power source. But also all the PRAKTICA lenses without electric transmission of the diaphragm values may be used thanks to the possibility of readjusting the light meter for measuring with the lens at taking aperture.
-
Page 6: Opening The Camera
K. Releasing and cocking the shutter Depress shutter release (4) to beyond the pressure point. After the shutter has run down a signal appears in the left- hand side of the viewfinder. Swing cocking lever (12) around as far as it will go and return it into its initial position. - Page 7 Push the rewind knob, with slight backward and forward movements, right back into the camera. The rewind catch will engage In the core of the cartridge. Push the beginning of the film projecting out of the cartridge slit from above as far as it will go underneath the supporting piece (23) arranged above the transport sprocket (22).
-
Page 8: Setting The Film Speed
To avoid inadvertent tripping, the shutter release (4) is provided with a locking device. The release mechanism is locked when the red dots on the knob and on the outer ring meet. The mechanism is unlocked by rotation of the knob through 90°. - Page 9 (9) on the cover plate of the camera. Please note that the knurled ring of the setting knob must not be lifted up since this would alter the film speed setting and cause the automatic exposure system in the PRAKTICA LLC to give incorrect results.
-
Page 10: Automatic Exposure Control
H. Automatic Exposure Control The newly devised automatic exposure system in the PRAKTICA LLC makes it possible, by means of the electric transmission of the diaphragm values, to take the meter readings with the photographic lens at full aperture, so that the viewfinder image remains at its maximum brightness. - Page 11 But it is also possible to use the well-known lenses of the PRAKTICA family without automatic diaphragm control. In this case, metering is performed with the lens stopped down to taking aperture. The finder image will thus be somewhat darker, according to the aperture selected, or determined by the exposure meter.
- Page 12 the center of the circular mark, the diaphragm ring has to be moved for fine adjustment. The diaphragm ring can be set to intermediate values between the click-stops. Metering at taking aperture with shutter speed preselected This method is employed in connection with lenses not permitting electric transmission of the diaphragm values. Move selector ring (16) to the El symbol.
- Page 13 1/15 sec. to 1/1000 sec. 1600 1/30 sec. to 1/1000 sec. I. FOCUSING To brighten up the image, the prism viewfinder of the PRAKTICA LLC is fitted with a Fresnel lens, in the center of which are the two focusing systems:...
- Page 14 - the microprism screen right in the middle and --the circular ground glass area surrounding it. Focusing is performed by rotating the distance setting ring (14) on the taking lens. To achieve utmost definition when using lenses with pre-set diaphragm or simple diaphragm adjustment, it is advisable to focus with the lens set to the smallest diaphragm numeral (full aperture).
- Page 15 While the value of the camera-to-subject distance figure stands opposite the distance mark, the limits of the range of definition can be read from the distance scale above the numerals on the depth-of-field scale, which latter are equivalent to the diaphragm numerals of the lens. As an example, the illustration shows a zone of sharpness from 2 m to 5 m (7 ft.
- Page 16 We advise you to hold your PRAKTICA LLC so that it lies firmly in both hands and you are able to actuate the shutter release (4) comfortably. Depress the shutter release steadily -- never with a jerk past the soft-running limit, where the automatic exposure system is switched in, until the shutter runs down.
-
Page 17: Changing The Film
N. Exchanging lenses The standard lens of the PRAKTICA LLC can easily be replaced by lenses of other focal lengths. You take hold of the lens body, as shown in the illustration below, and turn it in an anti-clockwise direction. The exchange lens is... - Page 18 PRAKTICA lenses with this camera, in which case metering has to be performed with the lens stopped down to taking aperture. Because of their structural design, some of the older types of lenses cannot be used with the PRAKTICA LLC. (For details please refer to Section H).
- Page 19 PD = pre-set diaphragm O. Flash exposures The shutter of the PRAKTICA LLC is designed for synchronization wit flash bulbs and electronic flash units. When the flash unit is attached to the camera, the electric connection between camera and unit is automatically effected by means of the center contact (8) in accessory shoe (7).
- Page 20 Flash bulb exposures In connection with bulbs for short flash duration, the shutter has to be set for a speed of 1/30 sec. -- marked by the lamp symbol -- or slower. The ignition circuit is closed only as long as the shutter runs down and is open after the shutter has terminated running-down and during the tensioning procedure, so that flash bulbs can be exchanged also before the shutter is cocked.
-
Page 21: Maintenance And Care
Q. Maintenance and care The PRAKTICA LLC is a high quality precision instrument. Perfect functioning of the camera depends very largely on proper handling and careful maintenance. The camera must, above all, be protected against shock and impact, dust and moisture. That is why the Eveready case should be used wherever possible. -
Page 22: Ever Ready Case
Do not interfere with the mechanism of the camera. Repair work should be carried out only by one of our special Repair Workshops. R. Accessories The various accessories make the single-lens reflex camera universally applicable and help to open up many New fields of activity. - Page 23 These rings are screwed in between camera and lens as a means of increasing the picture ratio in close-up work. The Intermediate Rings for the PRAKTICA LLC are provided with plunger pins to keep the automatic diaphragm mechanism operative and with contacts for the electric transmission of the diaphragm values.
- Page 24 Reversing Ring To screw the lens into the camera by its filter thread for extreme close-ups with an image ratio exceeding 1.5x. Miniature Close-up Bellows Attachment This equipment permits an infinite variation of the image ratio in close-up work within a range of 0.7x to 2.5x in combination with the standard lens.
- Page 25 Universal Tripod Highly rigid, permits varying the position of the camera from close to ground up to approximately eye level. All- direction pan and tilt movement of camera. Focusing Slide Of great advantage in close-up work with a tripod (e.g. the Universal Tripod).
- Page 26 Please follow these Instructions for Use carefully. Improper handling of the camera may cause damage for which we can accept no liability. Kombinat VEB PENTAGON DRESDEN Further development of the PRAKTICA LLC cand its accessories may lead to slight alterations of the details given in this booklet.
Need help?
Do you have a question about the LLC and is the answer not in the manual?
Questions and answers