Table of Contents
Advertisement
Available languages
Available languages
Quick Links
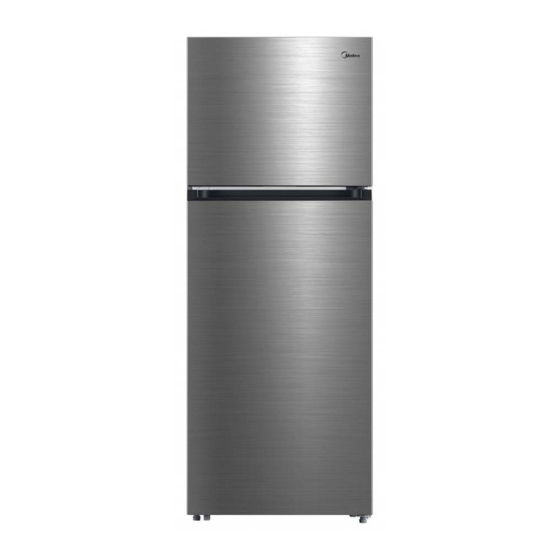
REFRIGERATOR
Top Freezer
Warning:
Before using this product,
please read this manual carefully
and keep it for future reference.
The design and specifications
are subject to change without
prior notice for product
improvement. Consult with your
dealer or manufacturer for
details.
version:003-8-2021
USER MANUAL
MODEL: MDRT645MTF46
www.midea.com
EN
PT
ES
DE
IT
GR
Advertisement
Chapters
Table of Contents

Related Manuals for Midea MDRT645MTF46


Summary of Contents for Midea MDRT645MTF46
- Page 1 Before using this product, please read this manual carefully and keep it for future reference. The design and specifications are subject to change without prior notice for product improvement. Consult with your dealer or manufacturer for details. MODEL: MDRT645MTF46 version:003-8-2021 www.midea.com...
- Page 2 • • • • • • • • • • • • • • • • • • • • • • • • • • • • • • • • • • • • • • • • • • • • • • • • • • • • • • • • • • • • • • Dear users, thank you for choosing Midea refrigerator!
- Page 3 1 Safety Warnings 1.1 Warning Warning: risk of fire / flammable materials THIS appliance is intended to be used in household and similar applications such as staff kitchen areas in shops, offices and other working environments; farm houses and by clients in hotels, motels and other residential type environments;...
- Page 4 REFRIGERANT and cyclopentane foaming material used for the appliance are flammable. Therefore, when the appliance is scrapped, it shall be kept away from any fire source and be recovered by a special recovering company with corresponding qualification other than be disposed by combustion, so as to prevent damage to the environment or any other harm.
- Page 5 1.2 Meaning of safety warning symbols This is a prohibition symbol. Any incompliance with instructions marked with this symbol may result in damage to the product or endanger the personal safety of the user. Prohibition symbol This is a warning symbol. It is required to operate in strict observance of instructions marked with this symbol;...
- Page 6 1.4 Warnings for using Do not arbitrarily disassemble or reconstruct the refrigerator, nor damage the refrigerant circuit; maintenance of the appliance must be conducted by a specialist Damaged power cord must be replaced by the manufacturer, its maintenance department or related professionals in order to avoid danger.
- Page 7 Do not store beer, beverage or other fluid contained in bottles or Freezing chamber enclosed containers in the freezing chamber of the refrigerator; or otherwise the bottles or enclosed containers may crack due to freezing to cause damages. 1.6 Warnings for energy Warning for energy 1) Refrigerating appliances might not operate consistently (possibility of defrosting of contents or temperature becoming too warm in the frozen food...
- Page 8 2 Proper use of refrigerators 2 1 P lacement Before use, remove all packing materials, including bottom cushions, foam pads and tapes inside of the refrigerator; tear off the protective film on the doors and the refrigerator body. Keep away from heat and avoid direct sunlight. Do not place the freezer in moist or watery places to prevent rust or reduction of insulating effect.
- Page 9 2.2 Leveling feet Schematic diagram of the leveling feet (The picture above is only for reference.The actual configuration will depend on the physical product or statement by the distributor) Adjusting procedures: a. Turn the feet clockwise to raise the refrigerator; b.
- Page 10 1)Please power off this appliance before conduct this operation. 2)Remove the hinge cover and screw on the top right side of the box, as well as the upper hinge and the hole cover on the left side. Hole cover Hinge cover Upper hinge Sleeve 3)Unscrew the hinge screw, take off the middle hinge and the upper shaft sleeve, depart the two hinge...
- Page 11 4)Install the hinge shaft and shaft sleeve to the left hole of the lower hinge, and then the lower hinge to the left corner of the refrigerator, then adjusting foot A according to the position shown in the Figure, and finally the adjusting foot B to the right lower corner of the refrigerator. Sleeve Adjusting foot foot A Lower hinge...
- Page 12 5)Dismantle the door stop of the two door bodies and the self-locking screws of right door, then take out the self-locking of left door from the accessory bag and install it to the left corner of the door body together with the door stop; take out the bottom support block of the door body of refrigeration chamber and install it to the lower left corner,Finally take out the hole plug and shaft sleeve for the door of refrigeration chamber and adjust their positions, and then install them into the door body.;...
- Page 13 7)Install the door of freezer on the middle hinge, take out the left upper hinge and the cover for the left upper hinge from the accessory bag, install the left hinge and tighten the screws, install the cover for the left upper hinge and tighten the screw, install the right sensor in the original left hole cover, and then fix the hole cover on the right box.
- Page 14 2.4 Changing the Light Any replacement or maintenance of the LED lamps is intended to be made by the manufacturer, its service agent or similar qualified person. 2.5 Starting Before initial start, keep the refrigerator still for two hours before connecting it to power supply.
- Page 15 3 Structure and functions 3.1 Key components LED light shelf Door tray Damper adjusting slider Temperature control Door tray shelf Deoderizer Fruits and vegetables box (The picture above is only for reference.The actual configuration will depend on the physical product or statement by the distributor) Refrigerating chamber The Refrigerating Chamber is suitable for storage of a variety of fruits, vegetables, beverages and other food consumed in the short term.
- Page 16 Damper Slider COLDEST COLD The temperature inside the freezer can be adjusted by changing the position of the damper slider.The initial position of the damper slider is at position A.If lower temperature inside the freezer is required, you can adjust the damper slider from the position A to left side. For better use of the refrigerator , it is recommended to keep the damper slider at initial position.
- Page 17 4. Maintenance and care of the refrigerator 4.1 Overall cleaning Dusts behind the refrigerator and on the ground shall be timely cleaned to improve the cooling effect and energy saving. Check the door gasket regularly to make sure there are no debris. Clean the door gasket with a soft cloth dampened with soapy water or diluted detergent.
- Page 18 4.4 Out of operation Power failure: In case of power failure, even if it is in summer, foods inside the appliance can be kept for several hours; during the power failure, the times of door opening shall be reduced, and no more fresh food shall be put into the appliance.
- Page 19 5 Trouble shooting You may try to solve the following simple problems by yourself. If them cannot be solved, please contact the after-sales department. Check whether the appliance is connected to power or whether the plug is in well contact . Failed operation Check whether the voltage is too low.
- Page 20 Table 1 Climate classes Ambient temperature range Class Symbol + 10 to + 32 Extended temperate Temperate + 16 to + 32 Subtropical + 16 to + 38 Tropical + 16 to + 43 Dear customer 1. If you want to return or replace the product, please contact the store where you buy.
-
Page 21: Table Of Contents
Limpeza geral ............................ 15 Limpar a prateleira de vidro ....................... 15 Descongelar ............................15 Fora de serviço ..........................16 Resolução de problemas ....................17 Parâmetros ......................... 18 Estimado cliente, obrigado por escolher um frigorífico Midea! -
Page 22: Avisos De Segurança
1 Avisos de segurança 1.1 Aviso Aviso : perigo de incêndio / materiais inflamáveis ESTE aparelho destina-se a ser utilizado em casa e em aplicações semelhantes, tais como áreas de cozinha para pessoal em lojas, escritórios e outros ambientes de trabalho; quintas e por clientes em hotéis, motéis e outros tipos de ambientes residenciais;... - Page 23 O REFRIGERANTE e material de espuma ciclopentano usados para o eletrodoméstico são inflamáveis. Portanto, quando o aparelho é eliminado, deve ser mantido afastado de qualquer fonte de fogo e ser recuperado por uma empresa de recuperação especial com qualificação correspondente que não seja ser eliminado por combustão, de modo a evitar danos para o ambiente ou qualquer outro dano.
-
Page 24: Significado Dos Símbolos De Aviso De Segurança
1.2 Significado dos símbolos de aviso de segurança Isto é um símbolo de proibição. O não cumprimento das instruções marcadas com este símbolo pode resultar em danos ao produto e pôr em perigo Símbolo de proibição a segurança pessoal do utilizador. Isto é... -
Page 25: Avisos Relativos À Utilização
1.4 Avisos relativos à utilização ● Não desmonte ou reconstrua arbitrariamente o frigorífico, nem danifique o circuito de refrigeração; a manutenção do aparelho deve ser realizada por um especialista. ● O cabo de alimentação danificado deve ser substituído pelo fabricante, pelo respetivo departamento de manutenção ou por profissionais do setor, a fim de evitar perigos. -
Page 26: Avisos Relativos À Energia
recipientes a de con ocar 1.6 Avisos relativos à energia podem n de a temperatura se tornar demasiado nte no compartimento dos alimentos instalados durante um ão de as scentes n colocadas nos compartimentos ou temperatur serem c necessidade de de c o recomendados pelos produtores de tipo de... -
Page 27: Utilização Correta De Frigoríficos
2 Utilização correta de frigoríficos 2.1 Posicionamento ● Antes da utilização, remova todos os materiais de embalagem, incluindo as almofadas do fundo, as espumas e as fitas no interior do frigorífico; rasgue a película de proteção das portas e do corpo do frigorífico. ●... -
Page 28: Pés De Nivelamento
2.2 Pés de nivelamento Diagrama esquemático dos pés de nivelamento (A imagem acima é apenas para referência. A configuração real dependerá do produto físico ou da declaração do distribuidor.) Procedimentos de ajuste: a. Rode os pés no sentido dos ponteiros do relógio para elevar o frigorífico; b. - Page 29 Desligue este aparelho da corrente antes de realizar esta operação. Remova a cobertura da dobradiça e o parafuso na parte superior direita da caixa, bem como a dobradiça superior e a cobertura do orifício no lado esquerdo. Cobertura do orifício Cobertura da dobradiça Dobradiça superior Manga...
- Page 30 Instale o eixo da dobradiça e a manga de eixo no orifício da esquerda da dobradiça inferior e, em seguida,a dobradiça inferior no canto esquerdo do frigorífico. Depois, ajuste o pé A de acordo com a posição mostrada na Figura e, finalmente, ajuste o pé B no canto inferior direito do frigorífico. Manga Ajustar o pé...
- Page 31 Desmonte o batente da porta dos dois corpos da porta e os parafusos de bloqueio automático da porta direita; retire o bloqueio automático da porta esquerda do saco de acessórios e instale-o no canto esquerdo do corpo da porta, juntamente com o batente da porta; retire o bloco de suporte inferior do corpo da porta da câmara de refrigeração e instale-o no canto inferior esquerdo.
- Page 32 Instale a porta do congelador na dobradiça do meio, retire a dobradiça superior esquerda e a cobertura da dobradiça superior esquerda do saco de acessórios, instale a dobradiça esquerda e aperte os parafusos. Instale a cobertura da dobradiça superior esquerda e aperte o parafuso; instale o sensor direito na cobertura do orifício esquerdo original e, em seguida, fixe a tampa do orifício na caixa direita.
-
Page 33: Mudar A Lâmpada
2.4 Mudar a lâmpada A substituição ou a manutenção das lâmpadas LED destinam-se a ser realizadas pelo fabricante, o seu agente de assistência técnica ou um profissional igualmente qualificado. 2.5 Início ● Antes do arranque inicial, mantenha o frigorífico imobilizado durante duas horas antes de ligá-lo à... -
Page 34: Estrutura E Funções
3 Estrutura e funções 3.1 Componentes principais Luz LED Prateleira Prateleira da porta Controlador de deslize de ajuste do amortecedor Controlo da temperatura Prateleira da porta Prateleira Desodorizante Caixa de frutas e legumes (A imagem acima é apenas para referência. A configuração real dependerá do produto físico ou da declaração do distribuidor.) Câmara de refrigeração ●... -
Page 35: Funções
3.2 Funções (A imagem acima é apenas para referência. A configuração real dependerá do produto físico ou da declaração do distribuidor.) 1) Principal A. Botão de definição da temperatura do compartimento de refrigeração 2) Visor definição 1: definição 2: ... -
Page 36: Manutenção E Cuidados Com O Frigorífico
Para uma melhor utilização do frigorífico, é recomendado manter o controlador de deslize do amortecedor na posição inicial. 4 Manutenção e cuidados com o frigorífico 4.1 Limpeza geral ● O pó e poeira atrás do frigorífico e no chão devem ser limpos para melhorar o efeito de arrefecimento e poupar energia. -
Page 37: Fora De Serviço
4.4 Fora de serviço ● Falha de energia: Em caso de falha de energia, mesmo no verão, os alimentos dentro do aparelho podem ser mantidos por várias horas; durante uma falha de energia, o número de vezes que a porta é aberta deve ser reduzido e não devem ser postos mais alimentos frescos no aparelho. -
Page 38: Resolução De Problemas
5 Resolução de problemas Pode tentar resolver problemas simples, como os seguintes, por si mesmo. Se não puderem ser resolvidos, entre em contacto com o departamento de pós-venda. Verifique se o aparelho está ligado à corrente ou se a ficha está bem ligada. Falha de Verifique se a tensão é... - Page 39 Tabela 1 Classes climáticas Limite de temperatura ambiente Classe Símbolo °C Temperatura alargada +10 a +32 Temperado +16 a +32 Subtropical +16 a +38 Tropical +16 a +43 Caro cliente Se pretender devolver ou substituir o produto, deve contactar o estabelecimento comercial onde o mesmo foi comprado.
- Page 40 Limpieza general ..........................15 Limpieza de la estantería de cristal ....................15 Descongelación ..........................15 Sin funcionamiento ..........................16 Problemas y soluciones ...................... 17 Parámetros ......................... 18 ¡Estimados usuarios, gracias por elegir un frigorífico Midea!
-
Page 41: Advertencias De Seguridad
1 Advertencias de seguridad 1.1 Advertencia Advertencia : riesgo de incendio / materiales inflamables ESTE aparato está diseñado para usarse en aplicaciones domésticas y similares como áreas con personal de cocina, oficinas y otros entornos laborales, casas de labranza y por clientes de hoteles, moteles y otros entornos de tipo residencial, entornos de hostales, catering y aplicaciones similares no al por menor. - Page 42 EL REFRIGERANTE y el material de la espuma de ciclopentano usados en el aparato con inflamables. Por lo tanto, cuando se ralla el aparato, se debe mantener alejado de cualquier fuente de calor y lo debe recubrir una empresa especial de recubrimientos con la cualificación correspondiente en ligar de eliminarse por medio de combustión para evitar daños al medioambiente o cualquier otro daño.
-
Page 43: Significado De Los Símbolos De Advertencia De Seguridad
1.2 Significado de los símbolos de advertencia de seguridad Este es un símbolo de prohibición. Cualquier incumplimiento de las instrucciones marcadas con este símbolo puede provocar daños en el producto o Símbolo de puede poner en peligro la seguridad personal del usuario. prohibición Este es un símbolo de advertencia. -
Page 44: Advertencias De Uso
1.4 Advertencias de uso ● No desmonte o reconstruya arbitrariamente el frigorífico no daño el circuito del refrigerante; un especialista debe realizar el mantenimiento del aparato. ● El fabricante, su departamento de mantenimiento o profesionales relacionados deben reemplazar el cable de alimentación dañado para evitar cualquier peligro. -
Page 45: Advertencias De Energía
recipientes cerrados en la n caso tellas o reci a la 1.6 Advertencias de energía operen de nsistente contenidos o temperatura sea demasiado c en el compartimento de alimentos cuando se colocan durante un periodo de tiempo por d del e ma de temperaturas para las aparato en los compartimentos para... -
Page 46: Uso Adecuado Del Frigorífico
2 Uso adecuado del frigorífico 2.1 Colocación ● Antes de su uso, retire todos los materiales del embalaje, incluyendo almohadillados inferiores, almohadillados de espuma y Cintas del interior del frigorífico; retire la película protectora de las puertas y de la carcasa del frigorífico. -
Page 47: Nivelación De Los Pies
2.2 Nivelación de los pies Diagrama esquemático del nivelado de los pies (La imagen que aparece arriba tiene solo una finalidad de referencia. La configuración real dependerá del producto físico o declaración por parte del distribuidor.) Procedimientos de ajuste: a. Gire los pies en sentido horario para subir el frigorífico; b. - Page 48 Apague este aparato antes de realizar esta operación. Retire la cubierta del quicio y atorníllela en la parte superior derecha de la caja, así como el quicio superior y la cubierta del agujero en el lateral izquierdo. Cubierta del agujero Cubierta del quicio Quicio superior Manguito...
- Page 49 Instale el eje del quicio y el manguito del eje en el agujero izquierdo del quicio inferior y después el quicio inferior en la esquina izquierda del frigorífico; posteriormente ajuste el pie A según la posición que se muestra en la figura y finalmente ajuste el pie B en la esquina inferior derecha del frigorífico. Manguito Pie de ajuste A Quicio inferior...
- Page 50 Desmonte el tope de la puerta de las dos carcasas de la puerta y los tornillos de cierre automático de la pueta derecha; posteriormente, extraiga el cierre automático de la puerta izquierda de la bolsa de accesorios e instálelo en la esquina izquierda de la puerta conjuntamente con el tope de la puerta; extraiga el bloque de soporte inferior del cuerpo de la puerta de la cámara de refrigeración e instálelo en la esquina inferior izquierda.
- Page 51 Instale la Puerta del congelador en el quicio medio extraiga el quicio superior izquierdo y la cubierta para el quicio superior izquierdo de la bolsa de accesorios; instale el quicio izquierdo y apriete los tornillos; instale la cubierta para el quicio superior izquierdo y apriete el tornillo; instale el sensor derecho en la cubierta del agujero izquierdo original y después fije la cubierta del agujero a la caja derecha.
-
Page 52: Cambio De Luz
2.4 Cambio de luz 2.5 Inicio 2.6 Consejos de ahorro de energía ES-12... -
Page 53: Estructura Y Funciones
3 Estructura y funciones 3.1 Componentes clave Luz LED Estantería Bandeja de la puerta Control deslizante de ajuste de la humedad Control de temperatura Bandeja de la puerta Estantería Desodorante Receptáculo de frutas y verduras (La imagen que aparece arriba tiene solo una finalidad de referencia. La configuración real dependerá del producto físico o declaración por parte del distribuidor.) Cámara de refrigeración ●... -
Page 54: Funciones
3.2 Funciones (La imagen que aparece arriba tiene solo una finalidad de referencia. La configuración real dependerá del producto físico o declaración por parte del distribuidor.) 1) Teclas A. Botón de configuración de temperatura del compartimento del frigorífico 2) Pantalla ... -
Page 55: Mantenimiento Y Cuidado Del Frigorífico
Para un mejor uso del frigorífico, se recomienda mantener el control deslizante de humedad en la posición inicial. 4 Mantenimiento y cuidado del frigorífico 4.1 Limpieza general ● El polvo detrás del frigorífico y del suelo debe limpiarse rápidamente para mejorar el efecto de refrigeración y el ahorro energético. -
Page 56: Sin Funcionamiento
4.4 Sin funcionamiento ● Fallo de alimentación: En caso de un fallo de alimentación, incluso si ese n verano, los alimentos en el interior del aparato pueden mantenerse durante varias horas; durante un fallo de alimentación, se debe reducir las veces que se abre la puerta y no se deben colocar más alimentos frescos en el aparato. ●... -
Page 57: Problemas Y Soluciones
5 Problemas y soluciones Puede intentar resolver estos simples problemas por usted mismo. Si no pueden resolverse, póngase en contacto con el departamento de postventa. Compruebe si el aparato está conectado a la alimentación I si el enchufe Fallo en el tiene bien los contactos. - Page 58 Tabla 1 Clases de climas Alcance de temperatura ambiente Clase Símbolo °C Templada extendida + 10 hasta + 32 Templada + 16 hasta + 32 Subtropical + 16 hasta + 38 Tropical + 16 hasta + 43 Estimado cliente Si desea devolver o sustituir el producto, póngase en contacto con el establecimiento donde lo compró.
- Page 59 Gesamtreinigung ..........................16 Reinigen der Glasablage ........................16 Abtauen ............................. 16 Außer-Betrieb-Zustand ........................17 Problembehebung ....................... 18 Parameter ........................... 19 Sehr geehrte Benutzerin, sehr geehrter Benutzer, vielen Dank, dass Sie sich für einen Midea-Kühlschrank entschieden haben!
-
Page 60: Sicherheitshinweise
1 Sicherheitshinweise 1.1 Warnungen Warnung : Brandgefahr / Entflammbare Materialien DIESES Gerät ist für die Verwendung bestimmt in: Haushalten und ähnlichen Anwendungen wie Mitarbeiter-Küchenbereiche in Geschäften, Büros und anderen Arbeitsumgebungen; Landwirtschaftshäusern und durch Kunden in Hotels, Motels und anderen Wohnumgebungen; Umgebungen in der Art wie Frühstückspensionen;... - Page 61 KÄLTEMITTEL und Cyclopentan-Schaumstoffmaterialien, die in diesem Gerät zum Einsatz kommen, sind brennbar. Aus diesem Grund muss bei der Entsorgung des Geräts darauf geachtet werden, dass es von Wärmequellen ferngehalten und die Entsorgung durch eine Fachrecyclingfirma mit den entsprechenden Qualifikationen für eine Entsorgung außer durch Verbrennung vorgenommen wird, um Schäden an der Umwelt sowie weiteren Schäden vorzubeugen.
-
Page 62: Bedeutung Der Sicherheitshinweissymbole
1.2 Bedeutung der Sicherheitshinweissymbole Das ist ein Verbotszeichen. Die Nichtbeachtung der mit diesem Symbol gekennzeichneten Hinweise kann zu Schäden am Produkt führen oder die persönliche Sicherheit des Benutzers Verbotszeichen gefährden. Das ist ein Warnzeichen. Eine Bedienung unter strikter Einhaltung der mit diesem Zeichen gekennzeichneten Anweisungen ist unabdingbar. -
Page 63: Warnungen Bezüglich Der Benutzung
1.4 Warnungen bezüglich der Benutzung ● Nehmen Sie eigenmächtig den Kühlschrank weder auseinander oder bauen Sie ihn um noch beschädigen Sie den Kühlmittelkreislauf; die Gerätewartung muss durch eine Fachkraft durchgeführt werden. ● Ein beschädigtes Netzkabel muss durch den Hersteller, seiner Wartungsabteilung oder eine entsprechend ausgebildete Fachkraft ersetzt werden, um Gefahren zu vermeiden. -
Page 64: Warnungen Bzgl. Des Betriebs
● Bewahren Sie im Gefrierschubfach des Kühlschranks keine mit Bier, Gefrierschubfach Getränken oder anderen Flüssigkeiten gefüllte Flaschen oder geschlossene Behältnisse auf; durch Missachtung können die Flaschen oder geschlossenen Behältnisse durch Gefrieren Flüssigkeit zerbrechen Beschädigungen verursachen. 1.6 Warnungen bzgl. des Betriebs Warnung bezüglich Energie Kühlgeräte können u. -
Page 65: Ordnungsgemäße Benutzung Des Kühlschranks
2 Ordnungsgemäße Benutzung des Kühlschranks 2.1 Aufstellen neren des e oder direkter oder ssen Orten oder keit und e den in dem der in oder gegen 30cm m sein und 10cm 10cm on der DE-6... -
Page 66: Nivellierfüße
2.2 Nivellierfüße Prinzipbild des Nivellierfußes (Die vorstehende Abbildung dient lediglich als Referenz. Die vorhandene Konfiguration ist vom tatsächlichen Produkt oder den Angaben des Lieferanten abhängig.) Vorgehensweise beim Nivellieren: a. Drehen Sie die Nivellierfüße in Uhrzeigersinn, um den Kühlschrank anzuheben; b. Drehen Sie die Nivellierfüße gegen Uhrzeigersinn, um den Kühlschrank abzusenken; c. - Page 67 Teile zum Wechseln des Türanschlags Teile Menge Hinweise Schraube der unteren Endabdeckung der Am Kühlschrank vormontiert, wird beim Wechseln des Türanschlags Gefriertür verwendet Begrenzungsblock der unteren Endabdeckung Am Kühlschrank vormontiert, wird beim Wechseln des Türanschlags der Gefriertür verwendet Schraube der unteren Endabdeckung der Am Kühlschrank vormontiert, wird beim Wechseln des Türanschlags Kühlschranktür verwendet...
- Page 68 Schrauben Sie die Scharnierschraube ab, nehmen Sie das mittlere Scharnier und die obere Wellenhülse ab, entfernen Sie die beiden Scharnierlochabdeckungen (Steckstifte) am mittleren Scharnier und nehmen Sie den Türkorpus des Kühlschranks nach oben heraus. Steckstifte Schraube Hülse Mittleres Scharnier Montieren Sie die Scharnierwelle und die Wellenhülse in die linke Bohrung des unteren Scharniers, dann das untere Scharnier in die linke Ecke des Kühlschranks, dann den Stellfuß...
- Page 69 Nach Abschluss des Aufbaus. Stellfuß A Stellfuß B DE-10...
- Page 70 Demontieren Sie den Türanschlag der beiden Türkörper und die Selbstsicherungsschrauben der rechten Tür, entnehmen Sie dann die Selbstsicherung der linken Tür aus dem Zubehörbeutel und montieren Sie sie zusammen mit dem Türanschlag an der linken Ecke des Türkörpers; nehmen Sie den unteren Stützblock des Türkörpers des Kühlschranks heraus und montieren Sie ihn an der unteren linken Ecke, nehmen Sie schließlich den Lochstopfen sowie die Wellenhülse für die Tür des Kühlschranks heraus und stellen Sie ihre Positionen ein, montieren Sie sie dann in den Türkörper;...
- Page 71 Montieren Sie die Tür des Gefrierfachs am mittleren Scharnier, nehmen Sie das linke obere Scharnier und die Abdeckung für das linke obere Scharnier aus dem Zubehörbeutel, montieren Sie das linke Scharnier und ziehen Sie die Schrauben an, montieren Sie die Abdeckung für das linke obere Scharnier und ziehen Sie die Schraube an, montieren Sie den rechten Sensor in der originalen linken Lochabdeckung, und befestigen Sie dann die Lochabdeckung am rechten Kasten.
-
Page 72: Wechseln Des Leuchtmittels
2.4 Wechseln des Leuchtmittels Der Austausch oder die Wartung ALLER LED-Lampen muss vom Hersteller, seinem Kundendienst oder einer ähnlich qualifizierten Person durchgeführt werden. 2.5 Inbetriebnahme ● Lassen Sie den Kühlschrank zwei Stunden ausgeschaltet stehen, bevor Sie ihn am Stromnetz anschließen. ●... -
Page 73: Bestandteile Und Funktionen
3 Bestandteile und Funktionen 3.1 Hauptkomponenten Kühlbereich Gefrierschubfach DE-14... -
Page 74: Funktionen
3.2 Funktionen (Die vorstehende Abbildung dient lediglich als Referenz. Die vorhandene Konfiguration ist vom tatsächlichen Produkt oder den Angaben des Lieferanten abhängig.) 1) Taste A. Temperatureinstelltaste des Kühlfachs 2) Displayanzeige Einstellung 1: Einstellung 2: Einstellung 3: Einstellung 4: 3) Display Wenn Sie den Kühlschrank zum ersten Mal mit Strom versorgen, leuchtet die Anzeige 3 Sekunden lang voll auf, danach läuft der Kühlschrank mit der Einstellung 3. -
Page 75: Wartung Und Pflege Des Kühlschranks
4 Wartung und Pflege des Kühlschranks 4.1 Gesamtreinigung ● Staub hinter dem Kühlschrank und auf dem Boden muss regelmäßig entfernt werden, um den Kühleffekt effizient zu halten und Energie zu sparen. ● Überprüfen Sie regelmäßig die Türdichtung, um sicherzustellen, dass Sie nicht verschmutzt ist. Reinigen Sie die Türdichtung mit einem weichen, mit Seifenlauge oder verdünnten Reinigungsmittel angefeuchteten Tuch. -
Page 76: Außer-Betrieb-Zustand
4.4 Außer-Betrieb-Zustand ● Stromausfall: Bei einem Stromausfall können Nahrungsmittel selbst im Sommer im Inneren des Geräts mehrere Stunden lang aufbewahrt werden, wobei die Tür so wenig wie nur möglich geöffnet werden sollte und keine weiteren frischen Nahrungsmittel in den Kühlschrank gelegt/gestellt werden dürfen. ●... -
Page 77: Problembehebung
5 Problembehebung Sie können versuchen, die folgenden einfachen Probleme selbst zu beheben. Wenn Sie sie hierdurch jedoch nicht beheben können, dann setzen Sie sich bitte mit dem Kundendienst in Verbindung. Überprüfen Sie, ob das Gerät am Stromnetz angeschlossen ist und der Netzstecker ordnungsgemäß... - Page 78 Tabelle 1 Klimaklassen Umgebungstemperaturbereich Klasse Symbol °C Erweitertes gemäßigtes +10 bis +32 Klima Gemäßigt +16 bis +32 Subtropisch +16 bis +38 Tropisch +16 bis +43 Sehr geehrte Kundin, sehr geehrter Kunde Wenn Sie das Produkt zurückgeben oder ersetzen möchten, dann setzen Sie sich bitte mit dem Geschäft in Verbindung, in dem Sie das Produkt erworben haben.
- Page 79 Pulizia complessiva ........................... 15 Pulizia degli scaffali in vetro ....................... 15 Sbrinamento ............................15 Guasti di funzionamento ........................16 Risoluzione dei problemi ..................... 17 Parametri ..........................18 Gentile utente, grazie per aver scelto il frigorifero Midea!
-
Page 80: Informazioni Di Sicurezza
1 Informazioni di sicurezza 1.1 Avvertenza Avvertenza : rischio di incendio/materiali infiammabili presente elettrodomestico è destinato ad uso domestico e altre applicazioni simili, quali cucine e mense in negozi, uffici e altri ambienti di lavoro; in strutture per agriturismo, camere di hotel, motel e altri ambienti di tipo residenziale per utilizzo da parte dei clienti;... - Page 81 Il fluido refrigerante e la schiuma al ciclopentano usati per l’apparecchio sono materiali infiammabili. Di conseguenza, in caso di demolizione dell’apparecchio, tenere lontano da qualsiasi fonte di calore. L’unità dovrà essere recuperata da un’azienda appositamente specializzata e dotata di certificazione. L’apparecchio, infatti, non può...
-
Page 82: Significato Dei Simboli Per Gli Avvisi Di Sicurezza
1.2 Significato dei simboli per gli avvisi di sicurezza Questo è un simbolo di divieto. Il mancato rispetto delle istruzioni contrassegnate con questo simbolo potrebbe causare danni al prodotto o Simbolo di divieto compromettere la sicurezza del personale o degli utenti. Questo è... -
Page 83: Avvertenze Per L'utilizzo
1.4 Avvertenze per l'utilizzo 1.5 Avvertenze di sistemazione IT-4... -
Page 84: Avvertenze Sull'energia
lie o altri ontenitori amento e danni 1.6 Avvertenze sull'energia non po nare alte nel ano dei atori mparti a troppo prodo i tempi di dai prod tori per alla tte le pr delle ento i di tempe delle ano re elettrod di porte e dotati di... -
Page 85: Uso Corretto Dei Frigoriferi
2 Uso corretto dei frigoriferi 2.1 Collocazione ● Prima dell'utilizzo, rimuovere tutti i materiali di imballaggio, le imbottiture della base e quelle in gommapiuma, oltre ai nastri adesivi all'interno del frigorifero; inoltre rimuovere le pellicole protettive sulle porte e il corpo del frigorifero. -
Page 86: Piedini Di Livellamento
2.2 Piedini di livellamento Schema dei piedini di livellamento (La figura precedente è a solo scopo indicativo. La configurazione effettiva dipende dalle caratteristiche fisiche del prodotto e dalle indicazioni del distributore.) Procedure di aggiustamento: a. Ruotare i piedini in senso orario per sollevare il frigorifero; b. - Page 87 Spegnere l'elettrodomestico prima di effettuare questa operazione. Rimuovere il coperchio della cerniera e la vite sul lato superiore destro della cassetta, nonché la cerniera superiore e il coperchio dei fori sul lato sinistro. Coperchio dei fori Coperchio della cerniera Cerniera superiore Manicotto Svitare la vite della cerniera, togliere la cerniera centrale e il manicotto dell'asse superiore, togliere le due coperture dei fori della cerniera (perni di collegamento) sulla cerniera centrale, dopodiché...
- Page 88 Installare l'asse della cerniera e il manicotto dell'asse nel foro sinistro della cerniera inferiore, quindi la cerniera inferiore nell'angolo sinistro del frigorifero, successivamente il piedino di regolazione A secondo la posizione indicata in figura e infine il piedino di regolazione B nell'angolo inferiore destro del frigorifero. Manicotto Piedino di regolazione A Cerniera inferiore...
- Page 89 Smontare il fermo dei due corpi dello sportello e le viti autobloccanti dello sportello destro, quindi estrarre il meccanismo autobloccante dello sportello sinistro dalla borsa degli accessori e installarlo nell'angolo sinistro del corpo dello sportello insieme al fermo dello stesso; estrarre il blocco di supporto inferiore del corpo dello sportello del vano frigorifero e installarlo nell'angolo inferiore sinistro, infine estrarre il tappo dei fori e il manicotto dell'asse per lo sportello del vano frigorifero e regolare le loro posizioni, quindi installarli nel corpo dello sportello;...
- Page 90 Installare lo sportello del congelatore sulla cerniera centrale, estrarre la cerniera superiore sinistra e il coperchio per la cerniera superiore sinistra dalla borsa degli accessori, installare la cerniera sinistra e stringere le viti, installare il coperchio per la cerniera superiore sinistra e stringere la vite, installare il sensore destro nel coperchio per i fori sinistro originale, infine fissare il coperchio per i fori sulla cassetta destra.
-
Page 91: Sostituzione Dell'illuminazione
2.4 Sostituzione dell'illuminazione Tutte le operazioni di sostituzione e manutenzione sulle lampade a LED devono essere svolte dal produttore, dal suo personale di assistenza autorizzato o altro personale qualificato. 2.5 Di partenza ● Prima di iniziare a usarlo, tenere il frigorifero fermo per due ore prima di collegarlo all'alimentazione. -
Page 92: Struttura E Funzioni
3 Struttura e funzioni 3.1 Componenti principali Luce LED Scaffale Vassoio porta Cursore di regolazione del frigorifero Controllo della temperatura Vassoio porta Scaffale Deodorante Contenitore per frutta e verdura (La figura precedente è a solo scopo indicativo. La configurazione effettiva dipende dalle caratteristiche fisiche del prodotto e dalle indicazioni del distributore.) Vano refrigerante ●... -
Page 93: Funzioni
3.2 Funzioni (La figura precedente è a solo scopo indicativo. La configurazione effettiva dipende dalle caratteristiche fisiche del prodotto e dalle indicazioni del distributore.) 1) Tasti A. Pulsante di impostazione della temperatura del vano frigorifero 2) Schermo del display impostazione 1: ... -
Page 94: Manutenzione E Cura Del Frigorifero
4 Manutenzione e cura del frigorifero 4.1 Pulizia complessiva ● La polvere dietro al frigorifero e sul pavimento deve essere regolarmente rimossa per migliorare il funzionamento e risparmiare energia. ● Controllare periodicamente l'accumulo di detriti sulla guarnizione della porta. Pulire la guarnizione della porta con un panno morbido imbevuto con acqua e sapone o un detergente diluito. -
Page 95: Guasti Di Funzionamento
4.4 Guasti di funzionamento ● Interruzione di corrente: In caso di interruzioni di corrente, il frigorifero è in grado di conservare le vivande contenute al suo interno per diverse ore, anche in estate. Durante l'interruzione di corrente, ridurre le aperture del frigo ed evitare di inserirvi nuove vivande fresche. ●... -
Page 96: Risoluzione Dei Problemi
5 Risoluzione dei problemi I piccoli problemi elencato di seguito possono essere di solito risolti direttamente dall'utente. Se non possono essere risolti, contattare il servizio post-vendita. Controllare che l'elettrodomestico sia collegato all'alimentazione elettrica e che la spina sia ben inserita nella presa. Mancato Verificare che la tensione non sia troppo bassa. - Page 97 Tabella 1 Classi climatiche Intervallo di temperatura Classe Simbolo ambientale °C Area temperata estesa da + 10 a + 32 Temperatura da + 16 a + 32 Area Subtropicale da + 16 a + 38 Area Tropicale da + 16 a + 43 Gentile cliente Per restituire o sostituire il prodotto, rivolgersi al punto vendita presso cui è...
- Page 98 Συντήρηση και φροντίδα ψυγείων ..................16 Γενικός καθαρισμός ........................... 16 Καθαρισμός του γυάλινου ραφιού ...................... 16 Απόψυξη............................16 Διακοπή λειτουργίας .......................... 17 Αντιμετώπιση προβλημάτων ....................18 Παράμετροι ......................... 19 Αγαπητοί χρήστες, σας ευχαριστούμε που επιλέξατε το ψυγείο Midea!
-
Page 99: Προειδοποιήσεις Ασφαλείας
1 Προειδοποιήσεις ασφαλείας 1.1 Προειδοποίηση Προειδοποίηση : κίνδυνος πυρκαγιάς / εύφλεκτα υλικά Αυτή η συσκευή προορίζεται να χρησιμοποιηθεί σε οικιακές και παρόμοιες εφαρμογές, όπως χώροι κουζίνας προσωπικού σε καταστήματα, γραφεία και άλλα περιβάλλοντα εργασίας, αγροικίες και πελάτες σε ξενοδοχεία, πανδοχεία και άλλα περιβάλλοντα οικιστικού τύπου, περιβάλλοντα τύπου πανσιόν, εφαρμογές τροφοδοσίας... - Page 100 Το ψυκτικό και το αφρώδες υλικό κυκλοπεντανίου που χρησιμοποιείται για τη συσκευή είναι εύφλεκτα. Επομένως, όταν η συσκευή απορρίπτεται, πρέπει να διατηρείται μακριά από οποιαδήποτε πηγή φωτιάς και να ανακτάται από μια ειδική εταιρεία ανάκτησης με αντίστοιχες πιστοποιήσεις που δεν αφορούν την...
-
Page 101: Έννοια Των Προειδοποιητικών Συμβόλων Ασφαλείας
1.2 Έννοια των προειδοποιητικών συμβόλων ασφαλείας Αυτό είναι ένα σύμβολο απαγόρευσης. Οποιαδήποτε μη συμμόρφωση με τις οδηγίες που σημειώνονται με αυτό το σύμβολο μπορεί να οδηγήσει σε Σύμβολο ζημιά στο προϊόν ή να θέσει σε κίνδυνο την προσωπική απαγόρευσης ασφάλεια του χρήστη. Αυτό... - Page 102 1.4 Προειδοποιήσει για χρήση ● Μην αποσυναρμολογείτε ή ανακατασκευάζετε αυθαίρετα το ψυγείο και μην επιφέρετε βλάβη στο κύκλωμα ψυκτικού. Η συντήρηση της συσκευής πρέπει να γίνεται από ειδικό. ● Καλώδιο τροφοδοσίας που έχει υποστεί βλάβη πρέπει να αντικατασταθεί από τον κατασκευαστή, το τμήμα συντήρησής του ή σχετικούς επαγγελματίες για...
- Page 103 στον ή τα σ να προ 1.6 Προειδοποιήσει για την ενέργεια να ην τ ή ης της στον των όταν ται το ό α ή αι ότι ο α ν να ν τ ς τ τ α ι ή ν τ...
-
Page 104: Σωστή Χρήση Ψυγείων
2 Σωστή χρήση ψυγείων 2.1 Τοποθέτηση 30cm 10cm 10cm GR-6... -
Page 105: Πόδια Οριζοντιότητας
2.2 Πόδια οριζοντιότητας Σχηματικό διάγραμμα των ποδιών οριζοντιότητας (Η παραπάνω εικόνα είναι μόνο για αναφορά. Η διαμόρφωση εξαρτάται από το εκάστοτε προϊόν ή τη δήλωση του διανομέα.) Διαδικασίες ρύθμισης: a. Γυρίστε τα ποδαράκια δεξιόστροφα για να υψώσετε το ψυγείο. b. Γυρίστε τα ποδαράκια αριστερόστροφα για να χαμηλώσετε το ψυγείο. c. - Page 106 Ανταλλακτικά που πρέπει να χρησιμοποιηθούν για αντιστροφή του ανοίγματος πόρτας εξαρτήματα Ποσότητα Σημειώσεις Βίδα καλύμματος κάτω άκρου της πόρτας Προεγκατεστημένος στο ψυγείο και για χρήση κατά την αντιστροφή της καταψύκτη πόρτας Στοπ καλύμματος κάτω άκρου πόρτας Προεγκατεστημένος στο ψυγείο και για χρήση κατά την αντιστροφή της κατάψυξης...
- Page 107 3) Ξεβιδώστε τη βίδα μεντεσέ, αφαιρέστε τον μεσαίο μεντεσέ και το περίβλημα του επάνω άξονα,τοποθετήστε τα δύο καλύμματα των οπών μεντεσέ (πείροι) στον μεσαίο μεντεσέ και αφαιρέστε το σώμα της πόρτας του θαλάμου ψυγείου προς τα πάνω. Τάπα Βίδα Περίβλημα μεσαίος...
- Page 108 Μετά την ολοκλήρωση της συναρμολόγησης. Σκέλος ρύθμισης Α Σκέλος ρύθμισης Β GR-10...
- Page 109 5) Αποσυναρμολογήστε το στοπ πόρτας του σώματος των δύο πορτών και τις βίδες αυτόματου κλειδώματος της δεξιάς πόρτας και, στη συνέχεια, αφαιρέστε το αυτόματο κλείδωμα της αριστερής πόρτας από την τσάντα εξαρτημάτων και τοποθετήστε το στην αριστερή γωνία του σώματος της πόρτας μαζί με το στοπ της πόρτας. Αφαιρέστε...
- Page 110 7) Τοποθετήστε την πόρτα του καταψύκτη στον μεσαίο μεντεσέ, βγάλτε τον αριστερό επάνω μεντεσέ και το κάλυμμα για τον πάνω αριστερό μεντεσέ από την τσάντα εξαρτημάτων, εγκαταστήστε τον αριστερό μεντεσέ και σφίξτε τις βίδες, τοποθετήστε το κάλυμμα για τον επάνω αριστερό μεντεσέ και σφίξτε τη βίδα , εγκαταστήστε τον...
- Page 111 2.4 Αλλαγή λυχνία Οποιαδήποτε αντικατάσταση ή συντήρηση των λυχνιών LED προορίζεται να εκτελείται από τον κατασκευαστή, τον αντιπρόσωπο σέρβις ή αντίστοιχα εξουσιοδοτημένα άτομα. 2.5 Έναρξη λειτουργία ● Πριν από την αρχική έναρξη λειτουργίας, αφήστε το ψυγείο ακίνητο για δύο ώρες προτού...
-
Page 112: Βασικά Στοιχεία
οµή και λειτουργίε 3.1 Βασικά στοιχεία Λυχνία LED Ράφι Δίσκος πόρτας Ρυθμιστικό προσαρμογής αποσβεστήρα Έλεγχος θερμοκρασίας Δίσκος πόρτας Ράφι Διάταξη απόσμισης Φρουτοθήκη (Η παραπάνω εικόνα είναι μόνο για αναφορά. Η διαμόρφωση εξαρτάται από το εκάστοτε προϊόν ή τη δήλωση του διανομέα.) Θάλαµο... - Page 113 3.2 Λειτουργίε (Η παραπάνω εικόνα είναι μόνο για αναφορά. Η διαμόρφωση εξαρτάται από το εκάστοτε προϊόν ή τη δήλωση του διανομέα.) 1) Πλήκτρο A. Κουμπί ρύθμισης θερμοκρασίας του ψυγείου 2) Οθόνη Ρύθμιση 1: Ρύθμιση 2: Ρύθμιση 3: ...
-
Page 114: Συντήρηση Και Φροντίδα Ψυγείων
4 Συντήρηση και φροντίδα ψυγείων 4.1 Γενικό καθαρισµό 4.2 Καθαρισµό του γυάλινου ραφιού 4.3 Απόψυξη GR-16... - Page 115 ιακοπή λειτουργία ● Διακοπή ρεύματος: Σε περίπτωση διακοπής ρεύματος, ακόμα κι αν είναι το καλοκαίρι, τα τρόφιμα μέσα στη συσκευή μπορούν να διατηρηθούν για αρκετές ώρες. Κατά τη διάρκεια της διακοπής ρεύματος, οι χρόνοι ανοίγματος της πόρτας πρέπει να μειωθούν και δεν θα πρέπει να τοποθετούνται επιπλέον φρέσκα τρόφιμα μέσα...
-
Page 116: Αντιμετώπιση Προβλημάτων
5 Αντιμετώπιση προβλημάτων Μπορείτε να προσπαθήσετε να επιλύσετε μόνοι σας τα ακόλουθα απλά προβλήματα. Εάν δεν μπορούν να επιλυθούν, επικοινωνήστε με το τμήμα εξυπηρέτησης μετά την πώληση. Ελέγξτε εάν η συσκευή είναι συνδεδεμένη στην τροφοδοσία ρεύματος και εάν το βύσμα έχει καλή επαφή. Αποτυχία... - Page 117 Πίνακας 1 Κατηγορίες κλίματος Εύρος θερμοκρασίας Κατηγορία Σύμβολο λειτουργίας °C Παρατεταμένο εύκρατο +10 έως +32 Εύκρατο + 16 έως + 32 Υποτροπικό + 16 έως + 38 Τροπικό + 16 έως + 43 Αγαπητέ πελάτη Εάν θέλετε να επιστρέψετε ή να αντικαταστήσετε το προϊόν, επικοινωνήστε με το κατάστημα αγοράς.
- Page 118 Light source in this product is replaceable only by qualified engineers. A fonte de luz neste produto é substituível apenas por engenheiros qualificados. La fuente de luz de este producto es reemplazable solo por ingenieros calificados. La sorgente luminosa in questo prodotto è sostituibile solo da tecnici qualificati. Die Lichtquelle in diesem Produkt darf nur von qualifizierten Technikern ausgetauscht werden.
- Page 119 Make yourself at home...
Need help?
Do you have a question about the MDRT645MTF46 and is the answer not in the manual?
Questions and answers