Table of Contents
Advertisement
Quick Links
Item # XXXX XXX XXX
Model # SP6778
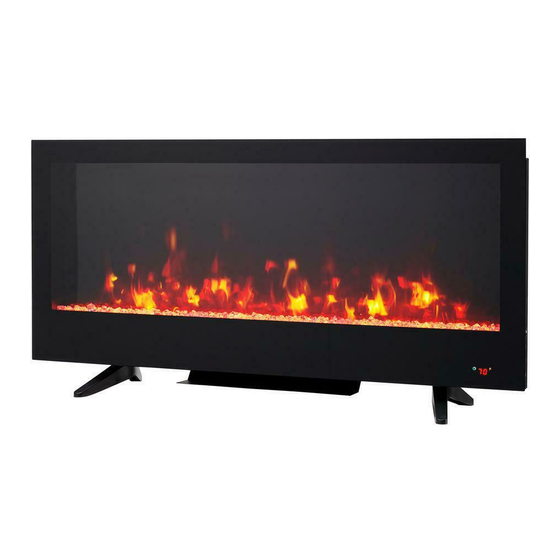
USER MANUAL
42 in. Infrared Wall Mount Electric Fireplace
Unit size: 19.85 in h x 42 in w x 5.98 in d
21.72 in h x 42 in w x 11.4 in d (with legs)
QUESTIONS, PROBLEMS, MISSING PARTS? BEFORE RETURNING TO THE STORE,
CALL HOME DECORATORS COLLECTION CUSTOMER SERVICE
8 A.M. - 7 P.M., EST, MONDAY - FRIDAY, 9 A.M. - 6 P.M., EST, SATURDAY
1-800-986-3460
HOMEDEPOT.COM/HOMEDECORATORS
THANK YOU
We appreciate the trust and confidence you have placed in Home Decorators through the purchase of this electric fireplace. We strive to
continually create quality products designed to enhance your home. Visit us online to see our full line of products available for your home
improvement needs. Thank you for choosing Home Decorators Collection!
DATE: MMYYYY
Advertisement
Table of Contents

Related Manuals for Home Decorators Collection SP6778


Summary of Contents for Home Decorators Collection SP6778
- Page 1 We appreciate the trust and confidence you have placed in Home Decorators through the purchase of this electric fireplace. We strive to continually create quality products designed to enhance your home. Visit us online to see our full line of products available for your home improvement needs. Thank you for choosing Home Decorators Collection! DATE: MMYYYY...
-
Page 2: Table Of Contents
Table of Contents Table of Contents ........2 Installation . -
Page 3: Important Safety Instructions
Important Safety Instructions Please read and understand this entire manual before attempting 14. This appliance has hot and arcing or sparking parts inside. to assemble, operate or install the product. If you have any question regarding the product, please call customer service at be used as a drying rack for clothing. -
Page 4: Warranty
Important Safety Instructions (continued) ELECTRICAL CONNECTION □ This product is equipped with a polarized plug (one blade is wider than the other blade). To reduce the risk of electrical shock, this plug will t into a polarized outlet only one way. This is a safety feature. If you are unable to insert the plug into the electrical outlet, try reversing the plug. -
Page 5: Pre-Installation
Pre-Installation PLANNING ASSEMBLY □ Before you begin, locate the instructions and hardware. Be sure you have all of the parts and can identify them. □ □ Assembly of this product may require more than one person. TOOLS REQUIRED Philips Screwdriver Hand Drill PRODUCT SPECIFICATIONS Voltage... -
Page 6: Package Contents
Pre-Installation (continued) PACKAGE CONTENTS Part Description Quantity Top Mounting Bracket Fireplace Heater directional bracket (optional) Front Glass Decorative crystals Bottom Mounting Bracket Left Foot Right Foot Remote Control... -
Page 7: Installation
Installation The Fireplace can be installed with 2 options: 1. Mount the unit on the wall..Page 8 2. Freestanding..Page 12 HOMEDEPOT.COM/HOMEDECORATORS Please contact 1-800-986-3460 for further assistance. - Page 8 Installation - Wall Mount Determine the desired location □ WARNING: direct sunlight and away from overhead lighting. WARNING: For safe operation choose a mounting 150mm location with at least 6" of clear space around the unit. 6in. 150mm 6in. 150mm 6in.
- Page 9 Installation - Wall Mount (continued) Secure the top bracket to the wall □ Select hardware best suited for your wall type and secure the top mounting bracket (A) to the wall. WARNING: Enclosed wall anchors (BB) only can be used on the concrete wall.
- Page 10 Installation - Wall Mount (continued) Remove the front glass □ Remove the front glass for easy installation. Install the bottom bracket □...
- Page 11 Installation - Wall Mount (continued) □ □ Select hardware best suited for your wall type and secure the bottom bracket (F) to the wall. WARNING: Enclosed wall anchors (BB) only can be used on the concrete wall. STUD WALL: DRYWALL: CONCRETE WALL: Secure the bottom mounting Screw wall anchors (not included)
- Page 12 Installation - Freestanding Remove the front glass and assemble the base □ Remove the front glass. □ Attach the heater directional bracket (C) using two screws (DD) to the replace (B). □ Attac...
- Page 13 Installation - Freestanding Put the crystals in and mount the front glass back □ Put the decorative crystals (E) into the replace media tray, and mount the front glass (D) to the replace (B). HOMEDEPOT.COM/HOMEDECORATORS Please contact 1-800-986-3460 for further assistance.
-
Page 14: Operation
Operation Power Flame Heater Brightness Lock Timer Control Panel The replace can be operated by either the remote control or the control panel unit side. Heater Power Brightness Flame Timer... - Page 15 Operation (continued) Powering the Fireplace Adjusting the Temperature □ The Heater button controls the heater ’s thermostat □ Push the Power button to supply power to all functions of setting. □ Press button to select the desired □ Push the Power button again to turn off all functions. □...
- Page 16 Operation (continued) Adjusting the Flame and Emberbed Using the Child Lock feature Colors □ When the unit is ON, hold the Lock button for 3 seconds □ to activate the Child Lock function. E3 will be displayed, buzz □ display when adjust temperature setting. settings: C5, C4, C3, C2 and C1.
-
Page 17: Fcc/Ic Information
FCC/IC Information Please read and understand this entire manual before attempting to assemble, operate or install the product. This equipment has been tested and found to comply with the limits for Class B digital devices, pursuant to part 15 of the FCC rules. These limits are designed to provide reasonable protection against harmful interference in a residential installation. -
Page 18: Care And Maintenance
Care And Maintenance (Continued) NOTE: When the heater is not in use, the heater should be stored in a dry location, away from possible damage. The power cord should be stored properly to avoid contact with hot or sharp objects. Replacing the Remote Control Battery When the remote control stops operating or its range seems reduced, it is time to replace the batteries. -
Page 19: Troubleshooting
Troubleshooting Problem Possible Cause Corrective Action Check that the unit is plugged into a standard There is no power and the logs do not glow. The unit does not have power. 120 volt outlet. Then make sure power is set to the “ON”... - Page 20 Questions, problems, missing parts? Before returning to the store, call Home Decorators Collection Customer Service 8 a.m. - 7 p.m., EST, Monday - Friday, 9 a.m. - 6 p.m., EST, Saturday 1-800-986-3460 HOMEDEPOT.COM/HOMEDECORATORS Retain this manual for future use.
Need help?
Do you have a question about the SP6778 and is the answer not in the manual?
Questions and answers