Advertisement
Warning
•
Keep fountain out of reach of children.
•
Use proper power source as indicated on water pump label.
•
Keep electrical cords away from all heat sources. D not place electrical cords in high temperatures.
•
Check water level at pump location regularly, avoid damage the pump must be fully submerged.
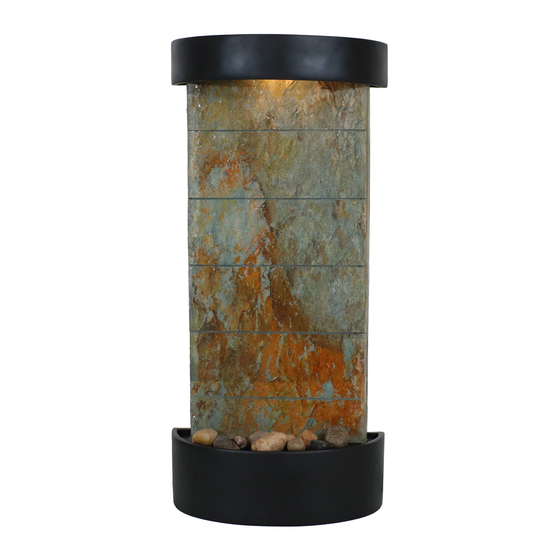
PARTS:
A. Basin -1pc
B. Pump and Transformer with finger light -1pc
C. Fountain body-1pc
D. Top lid -1pc
E. Pebbles-1 bag
F. Wall mount bracket- 1 pc
G. Wall Anchors- 5 pcs
H. Wall Screws- 5 pcs
I.
Cord Channel- 1 pc
J.
Cord Covers- 2 pcs
ASSEMBLY:
1. Insert the pump into the basin and connect the pump with the hose.
2. Put the fountain body into the basin and screw in.
3. Connect the transformer.
4. Insert the light into the top lid then put the lid on the fountain body and
screw in.
5. Place pebbles on top of the basin and spread out.
6. Fill with water, and then plug fountain into electrical outlet.
GSI-298
1
Advertisement
Table of Contents

Related Manuals for Sunnydaze Decor GSI-298


Summary of Contents for Sunnydaze Decor GSI-298
- Page 1 GSI-298 Warning • Keep fountain out of reach of children. • Use proper power source as indicated on water pump label. • Keep electrical cords away from all heat sources. D not place electrical cords in high temperatures. • Check water level at pump location regularly, avoid damage the pump must be fully submerged.
- Page 2 Optional Wall Mount: 1. Place the bottom of the wall mount bracket against wall 17½ inch above where you want the bottom of the fountain to rest on the wall. Make sure it is level. 2. Mark the holes in the bracket with a pencil. 3.
Need help?
Do you have a question about the GSI-298 and is the answer not in the manual?
Questions and answers