LEITZ TruSens Z-3000 Manual
Hide thumbs
Also See for TruSens Z-3000:
- Owner's manual (20 pages) ,
- Manual (327 pages) ,
- Manual (377 pages)
Table of Contents
Advertisement
Quick Links
Advertisement
Table of Contents

Related Manuals for LEITZ TruSens Z-3000


Summary of Contents for LEITZ TruSens Z-3000
- Page 1 TruSens Z-3000 ™...
- Page 3 Welcome to clean air with TruSens. Thank you for allowing us to join you on your journey towards wellness. The air you breathe should be clean, no matter where you are in the room. TruSens SensorPod™, PureDirect™ Technology & 360 degree filtration ensure the whole room benefits from cleaner air.
-
Page 4: Safety Information
SAFETY INFORMATION PLEASE READ AND SAVE THESE INSTRUCTIONS • Remove all packaging, including the filter bag, Unplug or disconnect the appliance from the power before use. supply before replacing filters or UV-C emitter, or when • Appliances that are obviously damaged must not be appliance is not in use. - Page 5 WEEE is not to be disposed of as unsorted municipal waste Leitz TruSens air purifiers also come equipped with a UV-C emitter. Upon replacement of this item (during the lifetime of the product), these must also be returned and disposed of at your local WEEE collection facility.
-
Page 6: Feature Highlights
FEATURE HIGHLIGHTS SensorPod™ Remote air quality monitor that ensures cleaner air, right where you need it. PureDirect™ Technology Independent lab testing confirms that two airflow streams are better than one, moving air e ectively and more comfortably throughout the room. AQ I Informs and Adapts Colour-coded illuminated ring provides additional... -
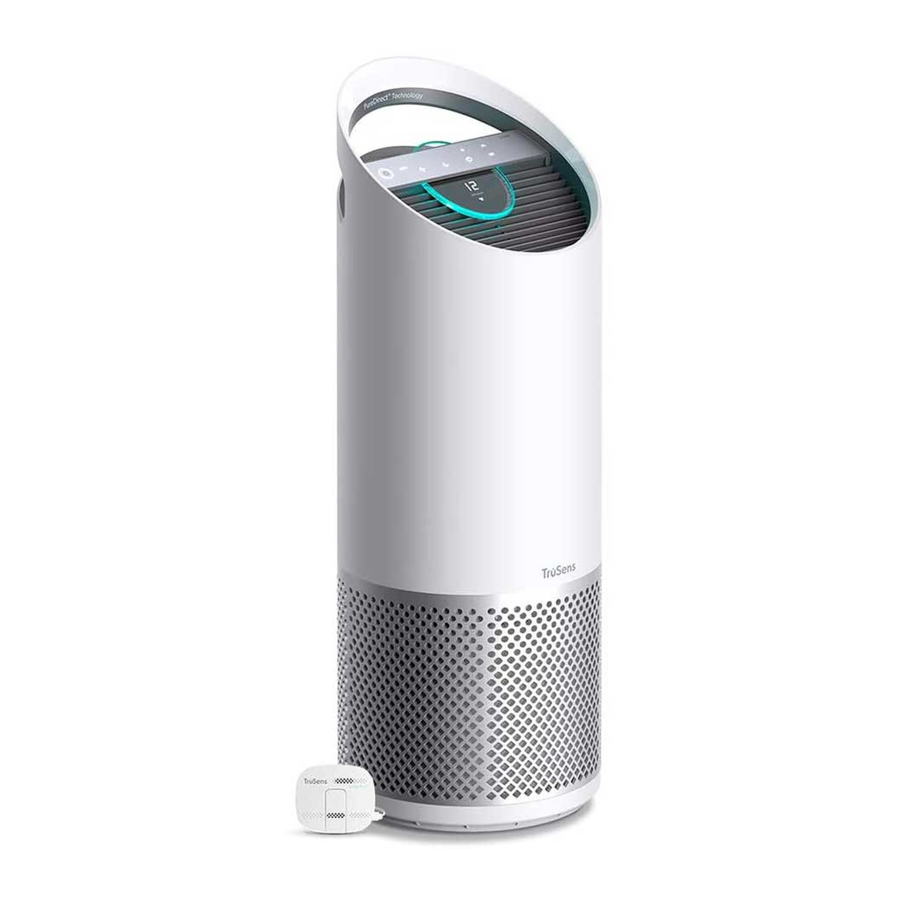
Page 7: Product Overview
PRODUCT OVERVIEW Air Purifier Easy-carry handle Air quality indicator display Simple touch control panel 360° air intake Filter cover & knob (underneath) SensorPod Filter & UV-C Lamp ™ Power & signal Washable Prefilter indicator Air outlet Carbon Filter Power cord HEPA Filter Air inlet Easy-access door... -
Page 8: Getting Started
GETTING STARTED 1. Remove plastic bag from filter Unscrew the bottom cover and remove the plastic bag from the filter. 2. Re-attach filter Secure filter on the bottom cover and replace inside the purifier. - Page 9 3. Set up Plug-in your SensorPod , and place upright on tabletop or counter across the ™ room, within line of sight of the purifier. Plug-in your air purifier unit and power on. Place the purifier on a flat surface, free from obstructions.
-
Page 10: Control Panel
CONTROL PANEL Timer Mode Power Button hours. To cancel this countdown, simply press button until no timer setting is displayed. Fan Speed Settings Select fan speed or AUTO mode. In AUTO mode, UV Mode purifier automatically adjusts fan speed based on air UV-C lamp within the purifier’s filter chamber is on when quality readings from SensorPod ™... -
Page 11: Air Quality Display
AIR QUALITY DISPLAY Real-time Feedback The revolutionary SensorPod evaluates the condition of your air by measuring ™ both small (PM2.5) and larger (PM10) particulate matter. It calculates the overall air quality using a proprietary algorithm that is reactive to genuine increases in pollutants without overreacting to someone entering the room or settling into the couch. -
Page 12: Specifications
SPECIFICATIONS Air Inlet 360° Air changed 2 times per hr 70 m² Air Delivery Type PureDirect ™ Sensor SensorPod , works up to 15 m from purifier ™ Fan Speed Settings Whisper, 1, 2, 3, Turbo Purification Levels Washable Prefilter, Carbon, HEPA, UV-C Lamp Timer Settings 2, 4, 8, 12 hr Filter Change Indicators... -
Page 13: Care And Maintenance
CARE & MAINTENANCE Accessing the filter chamber 1. Always power o the purifier by pressing the Power Button and unplugging the power cord. 2. Gently place the unit on its side on the floor so that the filter chamber cover and knob are exposed. Fig. -
Page 14: Replacing Carbon Filter
REPLACING CARBON FILTER 1. The Carbon indicator will glow red when it is time to replace the Carbon layer. 2. Gently peel away the Prefilter from the fastener strips (Fig. E). 3. Gently peel away the used Carbon layer from the fastener Fig. - Page 15 REPLACING UV-C LAMP 1. The indicator will glow red when it is time to 5. Your replacement UV-C lamp (on page 12) will plug replace the UV-C lamp. directly into the same socket (Fig. L). 2. Remove HEPA filter drum (Fig. A), and use a 6.
-
Page 16: Cleaning The Sensorpod
CLEANING THE SENSORPOD ™ Cleaning the air quality sensor The SensorPod uses an infrared light to detect particulate ™ matter, so it is important that you clean the viewing chamber every 1-2 months to remove any dust or particles that may a ect the accuracy of the sensor’s readings. 1. -
Page 17: Faq And Troubleshooting
FAQ & TROUBLESHOOTING Where do I place the SensorPod Anywhere you want to measure the air quality within the room! ™ For optimal results, place the SensorPod ™ up to 15 m away from the air purifier on a counter or table, within line of sight of the purifier. In Auto Mode, the purifier will work to distribute clean air until the SensorPod reads an acceptable level of air quality. - Page 18 FAQ & TROUBLESHOOTING Purifier won’t go into Auto Mode. First, check that the SensorPod is plugged-in and that its light is solid. Next, check that the SensorPod is within range of the purifier (up to 15m). Air quality indicators are o . If both are true and the connection is still failing, see below instructions on repairing the SensorPod’s connection.
- Page 19 fit your lifestyle. If you have any questions or feedback, please reach out! Visit our website at www.leitz.com/trusens Email us at service.uk@acco.com Call us at...
Need help?
Do you have a question about the TruSens Z-3000 and is the answer not in the manual?
Questions and answers