Table of Contents
Advertisement
Quick Links
Advertisement
Table of Contents

Related Manuals for Asus GigaX1104PS


Summary of Contents for Asus GigaX1104PS
- Page 1 GigaX1104PS User’s Manual Revision 1.0 May 2, 2005...
-
Page 2: Table Of Contents
2.1 Connecting the Hardware ..........10 2.1.1 Connect to your USB Printer........10 2.1.2 Connect to computers or a Network......10 2.1.3 Connect the AC Adapter with GigaX1104PS ...11 2.1.4 Power on the USB printer, your computers and/or other LAN Devices ........... 11 2.2 Configuring a Static IP Address for Your Computer .. - Page 3 GigaX1104PS User's Manual 2.3 Setting Up GigaX1104PS for Print Sharing ......15 2.3.1 Login into the Configuration Manager ......15 2.3.2 Configure IP Address of GigaX1104PS ....17 2.3.3 Install Printer Server Manager .........18 2.3.4 Install Your Printer Driver .........20 2.3.4.1 Windows XP/2000 ........23 2.3.4.2 Windows ME/98 ...........33...
- Page 4 GigaX1104PS User's Manual List of Figures Figure 1.1 Front Panel LEDs ............6 Figure 1.2 Rear Panel Connectors ..........7 Figure 2.1 Overview of Hardware Connections ......10 Figure 2.2 Login Screen ............... 16 Figure 2.3 System Information Page ..........17 Figure 2.4 Printer Server Setting Page ........
-
Page 5: Introduction
LAN Web-based configuration – requires Microsoft Internet Explorer 6.0 or later. 1.2 System Requirements In order to configure the GigaX1104PS for printer sharing, you must have: One computer containing an Ethernet 10Base-T or 100Base-T or 1000Base-T network interface card (NIC) An Ethernet hub/switch, if you want to connect the printer server to more than four computers on your network. -
Page 6: Notational Conventions
Glossary. Provides messages of high importance, including messages relating to personal safety or system integrity. 1.4 Package Content In addition to this manual, GigaX1104PS package comes with the following items: One GigaX1104PS AC adapter – output: 12VDC, 1.25A. Quick Installation Guide... -
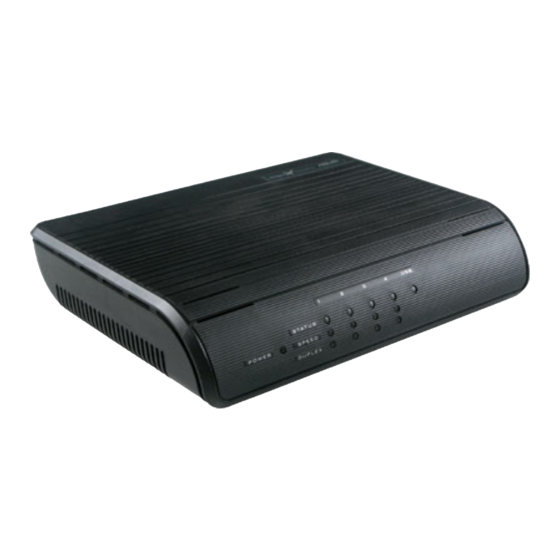
Page 7: Finding Your Way Around
LED Label Color Status Indication ① POWER Green GigaX1104PS is powered on GigaX1104PS is powered off ② 1 – 4 Identifies the LAN port LEDs. Status of each LAN port is indicated by 3 LEDs: STATUS, SPEED and DUPLEX. -
Page 8: Rear Panel
GigaX1104PS User's Manual mode and collision is occurring. The LAN port is operating in half duplex mode and no collision is detected. Identifi es the USB port LED ⑥ STATUS Green A USB printer is connected and detected by ③... -
Page 9: Bottom View
Ethernet cable length and etc., you can hang GigaX1104PS in 4 different ways: front panel up, rear panel up, left side up or right side up. -
Page 10: Wall Mount Instructions
2. Line up the wall mount slots with the screws and maneuver GigaX1104PS so that both screws are inserted into the wall mount slots as indicated in the following fi gures. Line up the wall mount slots with... -
Page 11: Quick Start Guide
2.1.1 Connect to your USB Printer. Connect one end of the USB cable to the port labeled USB on the rear panel of GigaX1104PS , and connect the other end to your USB printer. 2.1.2 Connect to computers or a Network. -
Page 12: Connect The Ac Adapter With Gigax1104Ps
2.1.3 Connect the AC Adapter with GigaX1104PS Plug the rounded connector on the AC adapter cable into the POWER input jack on the back of GigaX1104PS and plug the AC adapter in a power outlet or a power strip. 2.1.4 Power on the USB printer, your computers... -
Page 13: For Windows® Xp Pcs
GigaX1104PS User's Manual of your computer within the 192.168.1.0 network, e.g. 192.168.1.2. Warning: You may change the IP address of GigaX1104PS later to match your network settings. However, for initial configuration, the IP address of your computer must be set within the 192.168.1.0 network. -
Page 14: For Windows® 2000 Pcs
GigaX1104PS User's Manual 2.2.2 For Windows® 2000 PCs: Firstly, Search for the IP protocol and, if necessary, install it: 1. In the Windows task bar, click the <Start> button, point to Settings, and then click Control Panel. 2. Double-click the Network and Dial-up Connections icon. -
Page 15: For Windows® 98, And Me Pcs
GigaX1104PS User's Manual 11. Before changing the TCP/IP settings, write down the existing settings for your computer. You will need this information later to return to your original settings. In the Internet Protocol (TCP/IP) Properties dialog box, click the radio button labeled Use the following IP address:. -
Page 16: Setting Up Gigax1104Ps For Print Sharing
“Connections” tab → “LAN settings...” and then uncheck “Use proxy server for your LAN ...” 2. open your Web browser on any PC connected to one of the four LAN ports on the GigaX1104PS, and type the following URL in the address/location box, and press <Enter>: http://192.168.1.1 This is the predefined IP address for the LAN port on GigaX1104PS. -
Page 17: Figure 2.2 Login Screen
GigaX1104PS User's Manual Figure 2.2 Login Screen If you fail to connect to GigaX1104PS, you may need to check whether an IP address in the 192.168.1.0 network, such as 192.168.1.2. is set on your PC. 3. Enter your username and password, and then click [OK] to enter the Configuration Manager. -
Page 18: Configure Ip Address Of Gigax1104Ps
Click “Enable” or “Disable” radio button to enable or disable by DHCP this option. It is recommended that you disable this option and use a static IP address for the GigaX1104PS. There are both advantage and disadvantage to enable this option. The advantage is that the DHCP server provides the IP address to GigaX1104PS automatically. -
Page 19: Install Printer Server Manager
2. Enter a desired system name in the “System Name” text fi eld. 3. Enter an IP address and subnet mask for GigaX1104PS. 4. (Optional) Enter gateway IP address for GigaX1104PS if the print sharing service is to be provided to other networks. - Page 20 95 are not supported as the USB port is not supported on the two operating systems. Follow the instructions below to install USB remote printer port: 1. Run setup.exe from the CD that came with GigaX1104PS. And click [Next] to continue. 2. Click “I accept the terms of the license agreement” and then click [Next] again to continue.
-
Page 21: Install Your Printer Driver
GigaX1104PS User's Manual 4. For Windows® ME and Windows® 98, you will be prompted to reboot your computer. Please click “Yes, I want to restart my computer now.” and then click the [Finish] button to reboot your computer. 2.3.4 Install Your Printer Driver 1. - Page 22 GigaX1104PS User's Manual 2. Skip this step if you are not running Windows XP SP2. For Windows XP SP2, you may be prompted to confi rm if you allow the computer to run the Printer Server Manager. Click [Upload] to run the Printer Server Manager program.
- Page 23 GigaX1104PS User's Manual 4. Click " + " again to check what printer is attached to your printer server. 5. Double click on the printer name to start the installation of the printer driver. In the fi gure shown below, the name of the...
-
Page 24: Windows Xp/2000
GigaX1104PS User's Manual Follow the instructions that correspond to the operating system installed on your PC to install the printer driver for the attached printer. Note that the figures shown below are screen shots from Windows XP. The specifi c pictures will be shown only if there is a signifi... - Page 25 GigaX1104PS User's Manual 2. Click “Local printer attached to this computer”, clear the “Automatically detect and install my Plug and Play printer” check box, and then click [Next] to proceed. 3. Click “Create a new port:”, select “Standard TCP/IP Port”...
- Page 26 GigaX1104PS User's Manual Windows 2000 4. Confi gure the standard TCP/IP printer port. a) Click [Next] to proceed.
- Page 27 GigaX1104PS User's Manual b) Enter the IP address of GigaX1104PS in the “Printer Name or IP Address:” field and then click [Next] to proceed. c) Click “Standard” device type, select “Genric Network Card” from the device type drop-down list and then click [Next] to...
- Page 28 GigaX1104PS User's Manual d) Click [Finish] to proceed 5. Install the printer driver for your printer. a) If your printer is listed: select the manufacturer and the model of your printer and then click [Next] to continue. You may then skip to step f). If your printer is not listed, click [Have Disk...] to load the printer driver.
- Page 29 GigaX1104PS User's Manual If your printer is not listed: b) Locate the printer driver by clicking the [Browse...] button.
- Page 30 GigaX1104PS User's Manual c) A Windows Explorer-like dialog box pops up. After the printer driver is located, click the [Open] button. d) Click on the [OK] button to continue.
- Page 31 GigaX1104PS User's Manual e) Select your printer and then click on the [Next] button to continue. f) Enter a desired printer name, select whether you want to set this printer as the default printer, and then click on the [Next]...
- Page 32 GigaX1104PS User's Manual g) Select “Do not share this printer” and then click on the [Next] button to continue. h) Please do select “No” to skip printing a test page as the printer is not initialized yet for printing. Click on [Next] to...
- Page 33 GigaX1104PS User's Manual i) Click on the [Finish] button to complete the printer driver installation. j) Click [OK] to exit the Printer Server Manager. Your printer server set up is now completed. You may print a test page to verify your printer server setup.
- Page 34 GigaX1104PS User's Manual 2.3.4.2 Windows ME/98 1.In the “Add Printer Wizard” dialog window, and click [Next] to proceed. 2. Click “Local”, and then click [Next]. 3. Install the printer driver as you normally would for your printer. a) If your printer is listed: select the manufacturer and the model of your printer and then click [Next] to continue.
- Page 35 GigaX1104PS User's Manual If your printer is listed: If your printer is not listed: b) Locate the printer driver by clicking on the [Browse...] button.
- Page 36 GigaX1104PS User's Manual c) A Windows Explorer-like dialog box pops up. After the printer driver is located, click on the [OK] button. d) Click on the [OK] button to continue. e) Select your printer and then click on the [Next] button to continue.
- Page 37 GigaX1104PS User's Manual continue. g) Enter a desired printer name, select whether you want to set this printer as the default printer and then click on the [Finish] button to complete the printer driver installation.
- Page 38 GigaX1104PS User's Manual 4. Skip to step 5 if you select an existing USB remote printer port in the step before. The following instructions are for changing the installed printer driver to use the proper USB remote printer port. a) Open the “Printers” setting window by clicking “Start” →...
- Page 39 GigaX1104PS User's Manual b) Right click on the printer that you want to set as a remote USB printer port and then select properties. c) In the printer properties dialog, click on the “Details” tab.
- Page 40 GigaX1104PS User's Manual d) Click [Add Port..] . e) Check “Other” box. Click “USB Remote print port” and then click [OK] to proceed. Note that if USB Remote print port is not in the list of ports available, please install it first following the instructions described in Section 2.3.3 “Install USB...
- Page 41 GigaX1104PS User's Manual f) Enter IP address of GigaX1104PS and then click [Choose Printer] to find the printer connected to GigaX1104PS. g) Click [Find] to search for the printer connected to GigaX1104PS.
- Page 42 GigaX1104PS User's Manual h) The printers found are displayed in the printer list. Please select a printer and then click [OK] to proceed. i) Click [OK] to proceed.
- Page 43 GigaX1104PS User's Manual j) Click [OK] again to fi nish adding the USB remote printer port for the printer driver. 5. Click [OK] to exit the Printer Server Manager. Your printer server set up is now completed. You may print a test page to verify the...
-
Page 44: Linux (Redhat 7.3)
GigaX1104PS User's Manual 2.3.4.3 Linux (RedHat 7.3) 1. Log in Linux and start x window service. 2.Select Main Menu → Programs → System → Printer Configuration. - Page 45 GigaX1104PS User's Manual 3. Click 4. Click...
- Page 46 GigaX1104PS User's Manual 5. Enter Queue’s Name, such as “ Epson”, Select Queue Type such .Then click 6. Enter IP Address of Printer Server. Enter “ lp0” as Queue Name. Click...
- Page 47 GigaX1104PS User's Manual 7. Select a printer driver for your printer. Then Click 8. Click Your printer server set up is now completed. You may print a test page to verify the printer server setup.
-
Page 48: Mac Os X
GigaX1104PS User's Manual 2.3.4.4 MAC OS X 1. Go to System Preferences in your Dock and select Network. The following panel should appear: a) Click the TCP/IP tab, and then select "Manually" from the "Configure" pull-down menu. b) Enter your static address in the "IP Address" field, such as “... - Page 49 GigaX1104PS User's Manual 2. Go to Applications → Utilities → Print Center. Click [Add] and wait for the following box to appear. a) Select “ LPR Printers using IP” from the pull-down window. b ) Enter the printer's IP address in the field right to "LPR's Printer Address".
-
Page 50: Testing Your Setup
Login password admin LAN Port IP Address Static IP address: This is the IP address of the LAN 192.168.1.1 port on GigaX1104PS. The LAN port connects the device to your Ethernet subnet mask: network. You may need to change 255.255.255.0 this address to match that of your network. -
Page 51: System Management
GigaX1104PS User's Manual 3 System Management This chapter describes the following administrative tasks that you can perform using the Configuration Manager: Modify password and system-wide settings View system information Reboot system Reset to factory default settings Update firmware 3.1 Change Login Password Figure 3.1 System Administration Page... -
Page 52: Viewing System Information
2. Click on the [Apply] button to save the new password. 3.2 Viewing System Information System Information page displays whenever you log into GigaX1104PS. It contains information for the overall system settings. You may click on the “System” tab to see system settings at any time. -
Page 53: System Reboot
3. Click the [Apply] button to reboot the system. Figure 3.3 System Administration Page - Reboot 4. Your browser will be reconnected back to GigaX1104PS within the time as illustrated in Figure 3.4. You may have to manually connect back to the router if it is not automatically done. -
Page 54: Reset To Factory Default Settings
GigaX1104PS User's Manual 3.4 Reset to Factory Default Settings 3.4.1 Reset to Factory Default Settings using GUI At times, you may want to revert to the factory default settings to eliminate problems resulted from incorrect system configuration. Follow the steps below to reset to the factory default settings: 1. -
Page 55: Reset To Factory Default Settings Using The Reset Button
Sometimes, you may find that you have no way to access GigaX1104PS, e.g. you forget your password or the IP address of GigaX1104PS. The only way out in this scenario is to reset the system configuration to the factory default by pressing the reset button (located on the rear panel of the router) for at least 5 seconds. -
Page 56: Figure 3.7 Firmware Upgrade Page
GigaX1104PS User's Manual 1. Open the Firmware Upgrade page, as shown in Figure 3.7, by double clicking the “Upgrade” tab. Figure 3.7 Firmware Upgrade Page 2. In the Firmware text box, enter the path and name of the firmware image file. Alternatively, you may click on [Browse...] button to open a file manager similar to Figure 3.8, to search for... -
Page 57: Figure 3.9 Firmware Upgrade Confirmation
GigaX1104PS User's Manual 3. Click on the [Apply] button to update the firmware. A dialog window, such as the one below, will pop up to ask for confirmation of the firmware upgrade. Click the [OK] button to proceed; otherwise, click the [Cancel] button to cancel the action. -
Page 58: Figure 3.11 Reboot Confirmation After Firmware Upgrade
GigaX1104PS User's Manual reconnected back to GigaX1104PS when the counter returns to zero. You may need to manually connect back to GigaX1104PS if you are not connected back to GigaX1104PS automatically. Figure 3.11 Reboot Confirmation after Firmware Upgrade Figure 3.12 Firmware Upgrade Count Down Timer 6.
Need help?
Do you have a question about the GigaX1104PS and is the answer not in the manual?
Questions and answers