Advertisement
Quick Links
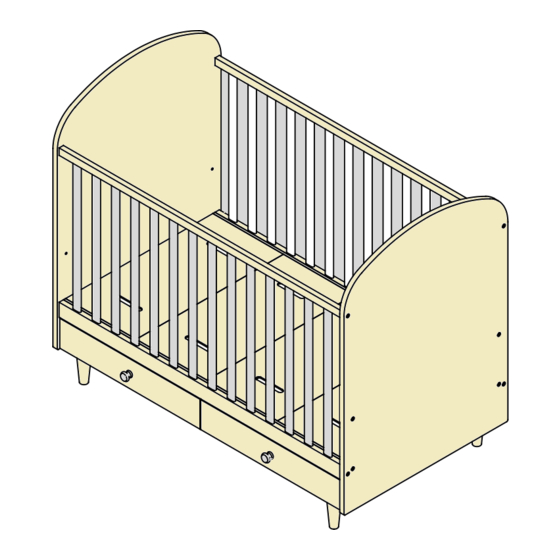
Hobart Storage Cot
Assembly Instructions
Thank you for your purchase.
Please follow the instructions below for correct assembly.
A
B
C
30" bolt
dowel
50" bolt
x28
x12
x16
G
H
left guide
left rail
x2
x3
L
M
screw
knob
30mm screw
x24
x2
Hardware Supplied
Phillips & Flathead screwdrivers required.
For quicker assembly, we recommend the
use of a power drill on a low-speed setting.
mocka.co.nz | mocka.com.au | PO BOX 6171, Maroochydore BC, QLD, 4558
D
E
F
nut
60" bolt
allen key
x16
x6
J
K
right guide
right rail
x3
x2
N
x2
WARNING: TO PREVENT FALLS, THE MATTRESS BASE
OF THIS COT SHOULD BE ADJUSTED TO THE LOWEST
POSITION BEFORE THE CHILD CAN SIT UP
1
Advertisement

Related Manuals for Mocka Hobart Storage Cot


Summary of Contents for Mocka Hobart Storage Cot
- Page 1 OF THIS COT SHOULD BE ADJUSTED TO THE LOWEST Phillips & Flathead screwdrivers required. POSITION BEFORE THE CHILD CAN SIT UP For quicker assembly, we recommend the use of a power drill on a low-speed setting. mocka.co.nz | mocka.com.au | PO BOX 6171, Maroochydore BC, QLD, 4558...
- Page 2 Attach 1 x right rail (J) and 1 x left guide (G) to panel [6] and secure with 6 x screws (L). Tighten with a screwdriver. mocka.co.nz | mocka.com.au | PO BOX 6171, Maroochydore BC, QLD, 4558...
- Page 3 Atach 4 x legs [7] and panel [6] to panel [9] secure with 10 x 30” bolt (A) Attach 2 x panels [4] to assembled frame and secure with 2 x 30” bolt Tighten with an Allen Key (F). (A). Tighten with an Allen Key (F). mocka.co.nz | mocka.com.au | PO BOX 6171, Maroochydore BC, QLD, 4558...
- Page 4 6 x screws (L). Tighten with a screwdriver. panel and secure with 2 x 30” bolts (A) and 3 x 60” bolts (E). Tighten with an Allen Key (F). mocka.co.nz | mocka.com.au | PO BOX 6171, Maroochydore BC, QLD, 4558...
- Page 5 [2] as shown and secure with 2 x 30” bolts (A) and 3 x 60” bolts (E). Tighten with an Allen Key (F). Tighten with an Allen Key (F). mocka.co.nz | mocka.com.au | PO BOX 6171, Maroochydore BC, QLD, 4558...
- Page 6 Attach 1 x left rail (H) and 1 x right rail (K) to panels [11] and [12] as (A). Tighten with an Allen Key (F). shown and secure with 6 x screws (L). Tighten with a screwdriver. mocka.co.nz | mocka.com.au | PO BOX 6171, Maroochydore BC, QLD, 4558...
- Page 7 Insert 4 x nuts (D) into panel [14]. Attach panels [11] and [12] to panel Slide panel [13] into position as shown. [14] and secure with 4 x 50” bolt (C). Tighten with an Allen Key (F). mocka.co.nz | mocka.com.au | PO BOX 6171, Maroochydore BC, QLD, 4558...
- Page 8 1 x screw (N). Attach panel [10] to assembled frame and place, do not drag. You’re done, enjoy! secure with 4 x 50” bolt (C). Tighten with an Allen Key (F) and a screwdriver. mocka.co.nz | mocka.com.au | PO BOX 6171, Maroochydore BC, QLD, 4558...
- Page 9 Repeat steps 7 and 8 by removing the side panel and moving the base to corresponding holes. Securely attach again in the adjusted position. mocka.co.nz | mocka.com.au | PO BOX 6171, Maroochydore BC, QLD, 4558...
Need help?
Do you have a question about the Hobart Storage Cot and is the answer not in the manual?
Questions and answers