Table of Contents
Advertisement
Quick Links
Advertisement
Table of Contents

Related Manuals for elvita CUI4703S


Summary of Contents for elvita CUI4703S
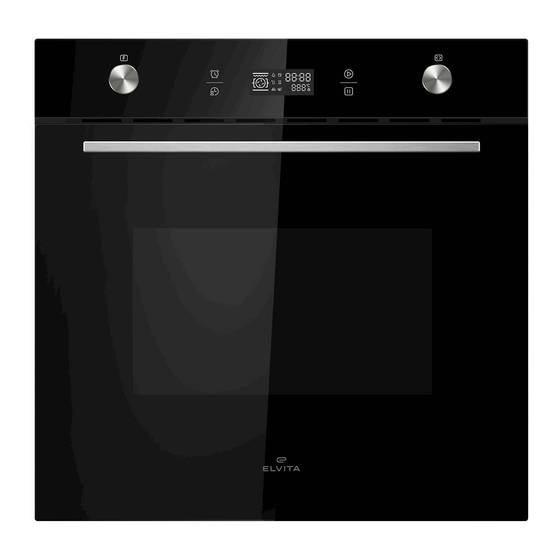
- Page 1 User manual Built-in oven CUI4703S...
- Page 2 Thank you for your trust and the purchase of our product. This user manual is supplied to help you use this product. The instructions should allow you to learn about your new product as quickly as possible. Make sure you have received an undamaged product. If you do find transport damage, please contact the seller from which you purchased the product, or the regional warehouse from which it was supplied.
- Page 3 Warranty Warranty Consumer warranty regarding quality of product applies. © 2020, Elon Group AB. All rights reserved.
-
Page 4: Table Of Contents
Contents Contents SAFETY Admonitions ..........................Intended use ..........................Safety for children and people with disabilities................ General safety........................... Safety during installation ......................Safety during operation ......................Safety during maintenance ...................... Disposal............................. QUICK START Quick start ..........................GETTING STARTED Installation..........................Getting to know your oven ....................... Control panel ............................ - Page 5 Contents Set a reminder........................... Use the energy saving function ....................CLEANING Clean the oven .......................... TROUBLESHOOTING Replace the light bulb ....................... Remove and install the oven door .................... Replace the oven glass panes ....................INSTALLATION Oven placement........................Install the oven .......................... APPENDIX Specifications ..........................
-
Page 6: Safety
Safety SAFETY Carefully read the instructions before you install and use the product. Save the instructions and keep them near the product for future reference. All kinds of warranties shall be invalid if these instructions are not followed. Admonitions WARNING! Used when there is a risk for personal injury. -
Page 7: General Safety
Safety General safety WARNING! • Some parts of the product may retain heat for a long time. Wait for the parts that are directly exposed to heat to cool down before touching them. • If the surface is cracked, switch off the product to avoid the risk of electric shock. CAUTION! Do not place anything on the door of the product when open. -
Page 8: Safety During Maintenance
Safety Safety during maintenance WARNING! • If the power cord is damaged, it must be replaced by the manufacturer, the manufacturer's service agent or similarly qualified person in order to avoid hazards. • Wait for the oven to cool down or use protection when removing an old light bulb to avoid burning yourself. -
Page 9: Quick Start
Quick start QUICK START Quick start Using the oven After using the oven © 2020, Elon Group AB. All rights reserved. -
Page 10: Getting Started
Getting started GETTING STARTED Installation See section "Installation", page Getting to know your oven Control panel Use the controller knobs and the touch symbols to control the oven. A. Reminder B. Display C. Start D. Function selector E. Time F. Stop G. -
Page 11: Cooling Fan
Getting started Shallow trays For baking pastries or as a drip tray. Deep tray For roasting large amounts of vegetables and meat or preserving food. Oven grid For grilling or roasting food, either placed directly on the grid, or in a baking dish. The oven grid has a raised rear edge to ensure that food items do not slide off when you remove the grid from the oven. -
Page 12: Cooking
Cooking COOKING Wire guides Wire guides allow you to choose between 5 different levels when you insert a grid, tray or other accessory into the oven. The levels are counted from the bottom and up. The oven is safe to use both with and without the guides. Insert the oven grid WARNING! •... -
Page 13: Start Cooking
Cooking Start cooking Turn to the desired oven function. 2. To change from the default temperature, turn to the desired temperature. 3. Touch to start cooking. The default cooking time is 9 hours. 4. To change the default cooking time, turn to the desired cooking time and touch within 3 seconds to confirm. -
Page 14: Conventional Cooking
Cooking Conventional cooking Top heater and bottom heater work together to provide conventional cooking. The temperature can be set within the range of 50-250 °C. The default temperature is 220 °C. Conventional cooking with fan Combination of the fan and both heating elements provides more even heat penetration, providing an energy saving of up to 30-40 %. -
Page 15: Set A Reminder
Cooking 4. Turn to the desired cooking time. 5. Turn to the desired temperature. 6. Touch to confirm cooking time and temperature. The reservation is now set and the display shows the current time and 7. Before the starting time is reached you can do any of the following: •... -
Page 16: Cleaning
Cleaning CLEANING Make sure to clean your oven regularly to make it last longer and keep a good appearance. CAUTION! • Do not use harsh abrasive cleaners or sharp metal scrapers to clean the oven door glass as they can scratch the surface, potentially resulting in the glass shattering. -
Page 17: Troubleshooting
Troubleshooting TROUBLESHOOTING Learn how to remove and install the light bulb, the oven door, and the oven glass panes. Replace the light bulb You can easily replace a broken light bulb yourself. WARNING! Wait for the oven to cool down or use protection when you remove the old light bulb to avoid burning yourself. Disconnect power from the mains outlet or switch off the circuit breaker of the unit’s mains outlet. -
Page 18: Replace The Oven Glass Panes
Troubleshooting Open the door fully. 2. Pull the buckle at the door hinge upwards and then towards the door. Repeat for the other door hinge. WARNING! The hinge springs may loosen, causing personal injury. 3. Close the door to an angle of about 30°. 4. -
Page 19: Installation
Installation INSTALLATION Follow the instructions in this section to install your oven. • This oven is only intended to be fully fitted in a kitchen. The oven can either be fitted under a worktop or into a tall cupboard. • This oven is not designed to be used as a tabletop oven or installed behind a decorative door. •... - Page 20 Installation Install the power cord and connect to power mains. WARNING! Make sure the connection parameters of the oven (fuse rating, voltage and frequency) match the mains power supply. If in any doubt, consult a qualified electrician. WARNING! The power cord of the oven must be connected to an earthed socket. WARNING! Electrical parts must be completely insulated.
-
Page 21: Appendix
Appendix APPENDIX Specifications Product code CUI4703S Height 595 mm Width 595 mm Depth (without handle) 575 mm Weight 32.1 kg Oven cavity volume 70 l Power supply 220-240 V, 50-60 Hz Electrical connection rating 3000 W Energy efficiency Energy efficiency index (EEI) Energy efficiency class Energy consumption per cycle for conventional heating 0.99 kWh per cycle... - Page 22 Elvita products are distributed and marketed by Elon Group AB. Elon Group AB Bäcklundavägen 1 | 702 03 Örebro Sweden ELON GROUP | +46(0)10-220 40 00 | ELONGROUP.SE Support and service: ELVITA.SE...
Need help?
Do you have a question about the CUI4703S and is the answer not in the manual?
Questions and answers