Advertisement
®
DR
ROTO-HOG™ Premier Power Tiller
SAFETY & OPERATING INSTRUCTIONS
Serial No. ________________
Order No. ________________
Read and understand this manual and all instructions before operating this DR ROTO-HOG Premier Power Tiller.
Original Language
®
DR
Power Equipment
Toll-free phone: 1-800-DR-OWNER (376-9637)
Fax: 1-802-877-1213
Web site: www.DRpower.com
Advertisement

Related Manuals for DR ROTO-HOG Premier Power Tiller


Summary of Contents for DR ROTO-HOG Premier Power Tiller
- Page 1 SAFETY & OPERATING INSTRUCTIONS ® Power Equipment Toll-free phone: 1-800-DR-OWNER (376-9637) Serial No. ________________ Fax: 1-802-877-1213 Original Language Order No. ________________ Web site: www.DRpower.com Read and understand this manual and all instructions before operating this DR ROTO-HOG Premier Power Tiller.
-
Page 2: Table Of Contents
Table of Contents Chapter 1: General Safety Rules ................................. 3 Chapter 2: Setting Up Your DR ROTO-HOG Premier Power Tiller ......................7 Chapter 3: Operating Your DR ROTO-HOG Premier Power Tiller ......................11 Chapter 4: Maintaining Your DR ROTO-HOG Premier Power Tiller ...................... 15 Chapter 5: Troubleshooting .................................. -
Page 3: Chapter 1: General Safety Rules
Labels Your DR ROTO-HOG Premier Power Tiller carries prominent labels as reminders for its proper and safe use. Shown below are copies of the Safety and Information Labels that appear on the equipment. Take a moment to study them and make a note of their location on your DR ROTO-HOG Premier Power Tiller as you assemble and before you operate the machine. - Page 4 Keep bystanders away from your work area at all times. To be safe, do not operate the DR ROTO-HOG Premier Power Tiller near children or pets, and never allow children to operate the machine. Stop the Tow Vehicle and the DR ROTO-HOG Premier Power Tiller Engine when another person or pet approaches.
- Page 5 Never overlook the hazards of gasoline and always follow these precautions: Never run the DR ROTO-HOG Premier Power Tiller Engine in an enclosed area or without proper ventilation as the exhaust from the Engine contains carbon monoxide, which is an odorless, tasteless, and deadly poisonous gas.
- Page 6 General Safety Safe operation of the DR ROTO-HOG Premier Power Tiller is necessary to prevent or minimize the risk of death or serious injury. Unsafe operation can create a number of hazards for you. Always take the following precautions when operating this machine: ...
-
Page 7: Chapter 2: Setting Up Your Dr Roto-Hog Premier Power Tiller
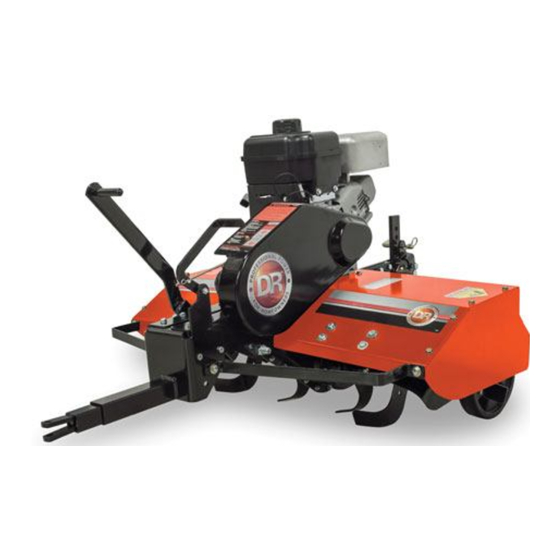
Chapter 2: Setting Up Your DR ROTO-HOG Premier Power Tiller It may be helpful to familiarize yourself with the Controls and Features on your new machine by reviewing Figure 2 before www.DRpower.com beginning the steps outlined in this chapter. For technical assistance, please visit our website at DR ROTO-HOG Premier Power Tiller Controls and Features NOTE: The model shown in Figure 2 may look slightly different from your machine. - Page 8 12 Gauge, 1.5" Tubular Steel Assembling the Machine NOTE: Assembling the DR ROTO-HOG Premier Power Tiller is a two-person job, as the Unit weighs 169 pounds. We recommend you have an extra set of hands available before you begin. Parts Supplied on Shipping Pallet: ...
- Page 9 Adding the Engine Oil and Gasoline You must add Oil before starting the Engine. This machine is shipped without Oil. Traces of Oil may be in the reservoir from factory testing, but you must add Oil before starting the Engine. Fill the reservoir slowly, checking the level frequently, to avoid overfilling.
- Page 10 2. Place the Tiller on level ground and back up your Tow Vehicle so that the Hitch of the Vehicle is in line with and next to the Hitch on the DR ROTO-HOG Premier Power Tiller. Set the Parking Brake on the Tow Vehicle.
-
Page 11: Chapter 3: Operating Your Dr Roto-Hog Premier Power Tiller
Chapter 3: Operating Your DR ROTO-HOG Premier Power Tiller Before Starting the Engine 1. Raise the Tines and place the machine on level ground. 2. Check the Engine Oil level every time you use the machine (Figure 4 on page 9). - Page 12 The DR ROTO-HOG Premier Power Tiller is designed to be used with most ATVs, Lawn\Garden Tractors, and Compact Tractors. The Tiller should never be used with a Truck (2WD or 4WD). Use of a Truck will void the DR ROTO-HOG Premier Power Tiller Warranty.
- Page 13 8. Skip a space equal to the width of the machine then make the return pass. 9. Till the skipped areas. Cultivating Tips You can use the DR ROTO-HOG Premier Power Tiller for cultivating (Figure 8), which requires a minimum of two (2) inches of soil penetration. ...
- Page 14 Slopes and Uneven Terrain Never operate your DR ROTO-HOG Premier Power Tiller on slopes greater than 5 degrees. Doing so could result in serious injury or damage to your machine. When operating the machine over uneven terrain and slopes, use extreme caution to not tip over the machine. Move slowly if the ground has ruts, bumps, and other depressions.
-
Page 15: Chapter 4: Maintaining Your Dr Roto-Hog Premier Power Tiller
When performing any maintenance, you must first shut off the Engine; wait five (5) minutes to allow parts to cool and disconnect the Spark Plug Wire, keeping it away from the Spark Plug. Your DR ROTO-HOG Premier Power Tiller was lubricated at the Factory. However, periodic lubrication of the Engine and Tines Shaft is required. - Page 16 Tines Shaft: Grease the Tines Shaft using a Grease Gun with General Purpose grease every 8-10 hours. Apply about ten (10) pumps of the grease in the Grease Fitting (Figure 9). Perform this lubrication more often in dry and dusty environments. Figure 9 Never oil or grease Pivot Points.
- Page 17 Transmission Lubrication Check the Transmission Oil Level after the first 5 hours of operation. Remove the Oil Fill Plug (Figure 9 on page 16). The Oil level must be even with the Plug Hole (with the Tiller level). Add Oil if necessary. Use SAE 30 non-detergent motor Oil. Replace Oil Fill Plug.
- Page 18 The DR ROTO-HOG Premier Power Tiller drive components are protected from damage by Grade 5 Shear Bolts in the Tine Assemblies. The Shear Bolts hold the Tine Assemblies in proper location on the Drive Axles. Should a Tine Assembly strike or pick up a large hidden object and jam, the Shear Bolt holding the Tine Assembly to the drive shaft will shear or break, protecting the drive components of the DR ROTO-HOG Premier Power Tiller from major damage.
-
Page 19: Chapter 5: Troubleshooting
Chapter 5: Troubleshooting Most problems are easy to fix. Consult the Troubleshooting Table for common problems and their solutions. If you continue to experience problems, visit our website at www.DRpower.com or call: 1-800-DR-OWNER (376-9637) for support. Troubleshooting Table When performing any maintenance, you must first shut off the Engine; wait five (5) minutes to allow parts to cool and disconnect the Spark Plug Wire, keeping it away from the Spark Plug. - Page 20 The Wheels and Depth Stake are incorrectly adjusted. Readjust the Wheels and Depth Stake. If your DR ROTO-HOG Premier Power Tiller still bounces, visit our website at www.DRpower.com. The ground that you are trying to till is too moist. See Tilling Tips on page 13.
- Page 21 Notes: Contact us at www.DRpower.com...
-
Page 22: Chapter 6: Parts Lists, Schematic Diagrams And Warranty
Chapter 6: Parts Lists, Schematic Diagrams and Warranty Parts List - Main Assembly NOTE: Part numbers listed are available through DR Power Equipment. Ref# Part# Description Ref# Part# Description 37680 Engine, B&S CR 9.50 MS 23306 Bolt, Hex, 5/16"-24 x 1"... - Page 23 Schematic Diagram - Main Assembly Contact us at www.DRpower.com...
- Page 24 Parts List and Schematic Diagram -Tine Drive Transmission Assembly NOTE: Part numbers listed are available through DR Power Equipment. Ref# Part# Description Ref# Part# Description 23340 Washer, Felt 23344 Assembly, Idler Shaft 23138 33030 Assembly, Input Shaft 23316 Nut, Hex, Flanged Lock, 5/16"-18...
- Page 25 Notes: Contact us at www.DRpower.com...
- Page 26 Notes: ROTO-HOG™ Power Tiller ®...
- Page 27 The DR ROTO-HOG PREMIER POWER TILLER is warranted for two (2) years against defects in materials or workmanship when put to ordinary and normal consumer use; ninety (90) days for any other use. The Engine Manufacturer warrants the Engine separately.
- Page 28 If your DR ROTO-HOG Premier Power Tiller will be idle for more than 30 days, we recommend using a gas stabilizer. This will prevent sediment from gumming up the Carburetor. If there is dirt or moisture in the Gas or Tank, remove it by draining the Tank.
Need help?
Do you have a question about the ROTO-HOG Premier Power Tiller and is the answer not in the manual?
Questions and answers