Table of Contents
Advertisement
®
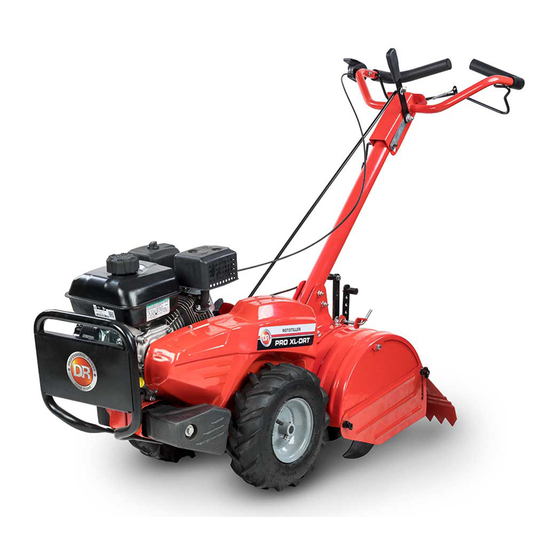
PRO XL-DRT
DR
SAFETY & OPERATING INSTRUCTIONS
Serial No.
Order No.
Read and understand this manual and all instructions before operating the DR
(Dual Rotating Tine Rototiller)
®
DR
Power Equipment
Toll-free phone: 1-800-DR-OWNER (376-9637)
Fax: 1-802-877-1213
Website: www.DRpower.com
®
PRO XL-DRT.
Advertisement
Table of Contents

Related Manuals for DR PRO XL-DRT


Summary of Contents for DR PRO XL-DRT
- Page 1 PRO XL-DRT (Dual Rotating Tine Rototiller) SAFETY & OPERATING INSTRUCTIONS ® Power Equipment Toll-free phone: 1-800-DR-OWNER (376-9637) Serial No. Fax: 1-802-877-1213 Order No. Website: www.DRpower.com ® Read and understand this manual and all instructions before operating the DR PRO XL-DRT.
- Page 2 ® PRO XL-DRT...
- Page 3 Chapter 6: Troubleshooting The DR PRO XL-DRT ..........................25 ® Chapter 7: Parts Lists and Schematic Diagrams DR PRO XL-DRT ....................28 Conventions used in this manual This indicates a hazardous situation, which, if not followed, could result in death or serious injury.
- Page 4 Your DR PRO XL-DRT carries prominent labels as reminders for its proper and safe use. Shown below are copies of all the Safety and Information labels that appear on the equipment. Take a moment to study them and make a note of their location on your ®...
- Page 5 Never place your hands, feet, or any part of your body near or under any moving part while the machine is running. ® To be safe, do not operate the machine near small children or pets, and never allow children to operate the DR PRO XL-DRT. ...
- Page 6 ® Check your DR PRO XL-DRT before starting it. Keep guards in place and in working order. Make sure all nuts, bolts, etc., are securely tightened. Never operate the machine when it is in need of repair or is in poor mechanical condition. Replace damaged, missing, or failed parts before using it.
- Page 7 ® Your DR PRO XL-DRT is equipped with an internal combustion engine. Do not use on, or near, forest-covered or brush- covered land unless the exhaust system is equipped with a spark arrester meeting applicable local, state, or federal laws.
- Page 8 To reduce exposure to vibration, limit the hours of operation and take periodic breaks to minimize repetition and rest your hands. Reduce the speed and force in which you do the repetitive movement. Try to fill each day with jobs where operating hand- held power equipment is not required. ® PRO XL-DRT...
- Page 9 Under California law, and the laws of some other states, you are not permitted to operate an internal combustion engine using ® hydrocarbon fuels without an engine spark arrester. This also applies to operation on US Forest Lands. All DR PRO XL-DRT shipped to California, New Mexico and Washington State are provided with spark arresters.
- Page 10 PRO XL-DRT ® It may be helpful to familiarize yourself with the controls and features of your DR PRO XL-DRT as shown in Figure 2 before beginning these procedures. If you have any questions at all, please feel free to contact us at www.DRpower.com.
- Page 11 Specifications Model PRO XL-DRT Engine Briggs & Stratton Displacement 208 cc Start Type Recoil Fuel Tank Size .75 gal Transmission Chain Gear Speeds 1 Forward / 1 Reverse Tire Size 13" × 5" Tines 10 Tiller, 2 Hammer Tine Direction...
- Page 12 Compare the contents of the shipping crate with Figure 3 and Figure 4 and the “Parts Supplied in Product Package” list above. If you have any questions please contact us at Figure 4 www.DRpower.com or call 1-800-DR-OWNER (376-9637) for assistance. ® PRO XL-DRT...
- Page 13 Operation Handle 1. The M8×75 bolts and nuts have been fixed in the guide bracket for shipping. First, remove the M8x75 bolts and nuts from the guide bracket. 2. Align the holes in the operation handle shaft with the holes in the guide bracket and re-insert the M8x75 bolts and screw nuts to tighten.
- Page 14 Hold the bolt hole in place with 13mm wrench while fastening the limiter bolt in with 10mm wrench. (See Figure 9) Rubber Cap Limiter Pin Spring Washer Figure 8a Bolt Hole Limiter Transport Shallow Tilling Deep Tilling Figure 8b Figure 9 ® PRO XL-DRT...
- Page 15 Chapter 3: Operating The DR PRO XL-DRT ® It may be helpful to better familiarize yourself with the features of your DR PRO XL-DRT by reviewing Figure 2 in Chapter 2 before beginning the steps outlined in this chapter. Definitions...
- Page 16 ® 1. Make sure the DR PRO XL-DRT is on a flat, level surface. 2. Remove the oil fill cap/dipstick to add oil. 3. Using a funnel, add oil up to the FULL mark on the dipstick. (See engine manual for oil capacity, oil recommendation, and location of fill cap.).
- Page 17 IMPORTANT: DO NOT OVERFILL! This equipment and/or its engine may include evaporative emissions control system components, required to meet EPA and/or CARB regulations, that will only function properly when the fuel tank has been filled to the recommended level. Overfilling may cause permanent damage to evaporative emissions control system components.
- Page 18 The drag stake (see Figure 11) should be raised when tilling Raised Position in the counter rotating ( ) till position. The drag stake Drag Bar Pin Lever should be lowered when tilling in the forward rotating ) till position. Figure 11 ® PRO XL-DRT...
- Page 19 TILLING Tilling is digging in, turning over and breaking up garden soil and prepare a seedbed for planting. Best tilling depth is 4” (100mm) to 6” (150mm). A tiller will also clear the soil of unwanted vegetation. The decomposition of this vegetation matter enriches the soil.
- Page 20 ) position. Sudden stopping at a high speed under a heavy load is not recommended. Engine damage may result. Do not move the choke control to CLOSE to stop the engine. Backfire or engine damage may occur. ® PRO XL-DRT...
- Page 21 Never use a “pressure washer” to clean your DR PRO XL-DRT. Water can penetrate tight areas of the machine and its transmission case and cause damage to spindles, gears, bearings, or the engine. The use of pressure washers will result in shortened life and reduce serviceability.
- Page 22 REPLACING THE TINES 1. Remove the outer side shield. (see Figure 14) 2. Remove the whole blade assembly. (see Figure 14) Remove tine. (see Figure 15) Wing Nut (x4) Outer Side Shield Pin (x2) Figure 15 Figure 14 ® PRO XL-DRT...
- Page 23 REPLACING THE BELT 1. Securely prop the machine up so that the wheel on the opposite side of the engine is 1 inch off the work surface. Remove the shear pin and wheel from belt guard side of the machine, opposite side of the engine. (see Figure 16) 2.
- Page 24 ® PRO XL-DRT will not be used for a period longer than 30 days, follow the steps below to prepare your unit for storage. 1. Drain the fuel tank completely. Stored fuel containing ethanol or MTBE can start to go stale in 30 days. Stale fuel has high gum content and can clog the carburetor and restrict fuel flow.
- Page 25 Most problems are easy to fix. Consult the Troubleshooting Table below for common problems and their solutions. If you continue to experience problems, contact us at www.DRpower.com or call toll-free 1-800-DR-OWNER (376-9637) for support. When performing any maintenance, you must first shut off the engine, set the parking brake, wait five minutes to allow parts to cool and disconnect the spark plug wire, keeping it away from the spark plug.
- Page 26 Stop tiller completely, check and discard foreign object. Tine clevis pin(s) missing. Replace tine clevis pin(s). Belt worn and/or stretched. Replace belt. Pulley and idler not in correct Contact dealer. adjustment. ® PRO XL-DRT...
- Page 27 contact us at www.DRpower.com...
- Page 28 ® Chapter 7: Parts Lists and Schematic Diagrams DR PRO XL-DRT Schematic ® PRO XL-DRT...
- Page 29 Parts List Note: Part numbers listed are available through DR Power Equipment. Not all parts appear on all diagrams. Ref# Part# Description Ref# Part# Description 41522 Gear Box Assembly 41573 End Cap 25 41686 Bolt M8X20 41574 Upper Handle Sleeve...
- Page 30 Label, Main Branding #1 41519 Label, Gear Tine 41514 Label, Branded Info 41520 Label, Throttle 41515 Label, Warning #1 41521 Label, Branding 3 Round Logo 41546 Label, Warning #2 41627 Label, Serial Number 41517 Label, Branding #2 ® PRO XL-DRT...
- Page 31 The DR PRO XL-DRT is warranted for two (2) years against defects in materials or workmanship when put to ordinary and normal consumer use; ninety (90) days for any other use. For the purposes of all the above warranties, “ordinary and normal consumer use” refers to non-commercial residential use and does not include misuse, accidents or damage due to inadequate maintenance.
- Page 32 If your DR PRO XL-DRT will be idle for more than 30 days, we recommend using a gas stabilizer or draining the fuel system. This will prevent sediment from gumming up the carburetor. If there is dirt or moisture in the gas or tank, remove it by draining the tank.
Need help?
Do you have a question about the PRO XL-DRT and is the answer not in the manual?
Questions and answers
When I push down on the forward lever the times go in reverse and when I pull up on the reverse lever the tubes don’t go around
When the shift lever is moved to the "F" (Forward) position and the drive control bar is engaged, the tines rotate clockwise for tilling soft or pre-tilled soil. In the "R" (Reverse) position, the tines rotate counter-clockwise for tilling hard ground. The tines' rotation direction is controlled by the shift lever position, not by pushing or pulling on the lever. If the tines don’t rotate in reverse, it may be due to not engaging the drive control bar, or a mechanical issue. Always release the drive control lever before shifting to avoid damage.
This answer is automatically generated
How do i check the oil on a DR. ProXLDRT garden Tiller. The oil lipstick has no markings on the lipstick to tell how full the oil is
To check the oil level on a DR® PRO XL-DRT garden tiller:
1. Ensure the tiller is on a flat, level surface.
2. Remove the oil fill cap/dipstick.
3. Wipe the dipstick clean and reinsert it. On Briggs & Stratton engines, screw the dipstick down before checking.
4. Remove the dipstick again and check the oil level. It should reach the FULL mark.
5. Add oil if necessary, but do not overfill.
This answer is automatically generated
What are the instructions for starting the engine
1. Check Oil: Ensure the engine has oil before starting. The machine is shipped without oil, so add oil if necessary. Check the oil level with the dipstick while the machine is on a level surface.
2. Throttle Control: Set the throttle control to the desired speed (FAST or SLOW).
3. Choke Control: If starting a cold engine, move the choke control to the CHOKE CLOSED position.
4. Fuel Shut-Off Valve: Ensure the fuel shut-off valve is open.
5. Recoil Starter: Pull the recoil starter handle firmly to start the engine.
6. Choke Adjustment: Once the engine starts, gradually move the choke control to the CHOKE OPEN position as the engine warms up.
7. Engine Stop: To stop the engine, move the throttle control to the STOP position.
This answer is automatically generated
The marking on the throttle doesn't match witch one should I use
What is the hub size or axle on the tires
What is the part number I need to order for DR Rear Tine Rototiller PRO XLDRT shear pin
The part number for the shear pin is not provided in the given context.
This answer is automatically generated