
Related Manuals for natus Madsen AccuScreen


Summary of Contents for natus Madsen AccuScreen
- Page 1 Madsen® AccuScreen OAE & ABR Screener User Manual Doc. No. 7-50-0920-GB/14 Part No. 7-50-09200-GB...
- Page 2 Rx only Copyright notice © 2010, 2021 Natus Medical Denmark ApS. All rights reserved. ® Natus, the Natus Icon, Aurical, Madsen, HI-PRO 2, Otoscan, ICS and HORTMANN are registered trademarks of Natus Medical Denmark ApS in the U.S.A. and/or other countries.
-
Page 3: Table Of Contents
Table of Contents TABLE OF CONTENTS ........................3 INTRODUCTION ........................5 Brief description ............................. 5 Docking station ............................... 5 AccuLink software program ..........................5 Printing ................................5 Intended Use / Clinical Benefit ........................6 Physical operating principle ..........................6 Typographical conventions ..........................6 General Safety Information .......................... - Page 4 PRINTING ..........................54 Printing from AccuScreen ..........................54 Printouts from label printer ........................... 57 QUALITY TESTS ........................58 Performing Quality Tests ..........................58 Probe test ..............................58 Electrode cable test ............................60 Ear coupler cable test ............................ 61 Combined (Electrode Cable - Ear Coupler Cable) .................... 63 ACCUSCREEN SETTINGS ......................
-
Page 5: Introduction
Madsen AccuScreen OAE & ABR Screener User Manual Introduction Brief description Thank you for purchasing the AccuScreen handheld Otoacoustic Emissions and Automated ABR Screener. Note: This manual is your guide to the use and maintenance of AccuScreen. We strongly recommend that you read it carefully before using AccuScreen for the first time. -
Page 6: Intended Use / Clinical Benefit
The device is intended for use by audiologists, ENT's and other healthcare professionals. Note: Natus Medical Denmark ApS does not guarantee the accuracy of the test results or the tests themselves, if accessories other than those supplied by Natus Medical Denmark ApS are used for this device (e.g., eartips, electrodes, ear couplers, etc.). -
Page 7: Safety Information
Madsen AccuScreen OAE & ABR Screener User Manual Safety Information Warning: The following conditions or practices might present possible injury or danger to the patient and/or the user: • Do not connect any external device (e.g., printer) to AccuScreen during testing. -
Page 8: Safety Information - Docking Station
You should read this manual before operating AccuScreen so that you become familiar with the device before testing on a client. Note: To obtain a free printed copy of the user documentation, contact Natus Medical Denmark ApS (www.natus.com). Maintenance and cleaning... -
Page 9: Device Symbols
Madsen AccuScreen OAE & ABR Screener User Manual 1.12 Glossary of Symbols Symbol Standard Reference Standard Title Symbol Title Explanation 93/42/EEC EU Medical Device Regulation CE marking Signifies European Medical Device Directive technical conformity. (Notified body XXXX number appears under symbol.) - Page 10 Madsen AccuScreen OAE & ABR Screener User Manual Symbol Standard Reference Standard Title Symbol Title Explanation Medical devices — Symbols to be used ISO 15223-1 Catalogue number Indicates the manufacturer’s Symbol 5.1.6 with medical device labels, labelling and information to be supplied...
-
Page 11: Unpacking And Installation
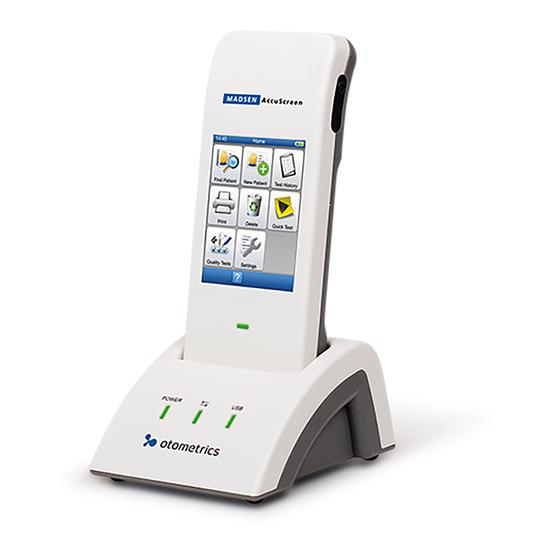
Madsen AccuScreen OAE & ABR Screener User Manual Unpacking and Installation Unpacking 1. Unpack the device carefully. When you unpack the device and accessories, keep the packing material in which they were delivered. If you need to send the device in for service, the original packing material will protect against damage. - Page 12 Madsen AccuScreen OAE & ABR Screener User Manual 2.2.2 Top and bottom of MADSEN AccuScreen A. Electrode cable socket B. Probe socket and ear coupler cable socket Bottom C. Docking Station connectors 2.2.3 The docking station Front Indicators POWER Lit when power is supplied to the docking station.
- Page 13 Madsen AccuScreen OAE & ABR Screener User Manual Rear Sockets PC/USB USB connection to the PC socket Printer/Modem Printer/modem connection socket Power adapter socket 2.2.4 Display The touchscreen display has icons and fields. Note: Never use any type of sharp instrument on the display. If you do, reliable operation of AccuScreen can no longer be...
- Page 14 Madsen AccuScreen OAE & ABR Screener User Manual 2.2.5 Ear probe A. Probe tip B. Probe body C. Probe cable Probe cable plug...
- Page 15 Madsen AccuScreen OAE & ABR Screener User Manual 2.2.6 Electrode cable (ABR only) A. Electrode cable plug B. Electrode clips C. Electrode cable 2.2.7 Ear coupler cable A. Cable connector B. Ear coupler cable C. Blue ear coupler adapter for left ear D.
-
Page 16: Storage
Madsen AccuScreen OAE & ABR Screener User Manual Storage Store AccuScreen and accessories in the soft case provided to protect the equipment from damage. See also Operating environment in Technical Specifications. Assembly Before you connect the probe perform the following steps: 1. - Page 17 Madsen AccuScreen OAE & ABR Screener User Manual 2.5.2 Inserting the battery in AccuScreen 1. Push the button of the battery compartment upwards. The battery compartment pops out. 2. If needed, remove the battery. 3. Place a new, charged battery in the compartment.
- Page 18 Madsen AccuScreen OAE & ABR Screener User Manual 2.5.3 Battery status • The battery symbol is shown in the top right corner of the display, enabling you to view the status of the battery at all times. • When less than 25% of the battery capacity remains, you should change the battery and recharge it as soon as possible.
- Page 19 2.5.6 Charging the battery with the external charger Caution: Use only the charger supplied by Natus Medical Denmark ApS. The battery for AccuScreen can be charged by an external charger (optional accessory). Note: See the charger manufacturer’s documentation for specifications and instructions for use.
-
Page 20: Getting Started With Accuscreen
Madsen AccuScreen OAE & ABR Screener User Manual Getting Started with AccuScreen In the following, you will find quick instructions for how to use AccuScreen: • Switching on AccuScreen • Adding new patients • Finding patients • Editing patient data You will find detailed instructions for preparing and testing in: •... - Page 21 Madsen AccuScreen OAE & ABR Screener User Manual 3.1.2 The AccuScreen screens AccuScreen screen display depends on the configuration. The screen default selection and sequence is shown below. See the AccuLink User Manual to configure these screens. – Instructions for data entry screens are in...
- Page 22 Madsen AccuScreen OAE & ABR Screener User Manual 3.1.4 Entering password Password 1. In the screen you are prompted for a password. – Enter your password. Passwords and the use of passwords are configurable (see the AccuLink User Manual). OK ( 2.
-
Page 23: Patient Handling In Accuscreen
Madsen AccuScreen OAE & ABR Screener User Manual Patient handling in AccuScreen Note: If you want to perform a Quick Test, adding or finding a patient is not necessary. You can download patient data in advance from AccuLink (see the AccuLink User Manual for instructions). - Page 24 Madsen AccuScreen OAE & ABR Screener User Manual The NICU Status screen NHSP England only NICU Status In the screen, select the Neonatal Intensive Care Unit (NICU) status of the baby. Yes. • The baby is/has been in a Neonatal Intensive Care Unit.
- Page 25 Madsen AccuScreen OAE & ABR Screener User Manual 3.2.2 Finding a patient Find Patient Home 1. To find a patient, press ) on the screen. The Find Patient screen appears. Change sort order ( 2. You can change the sort order. Press until the list is sorted.
- Page 26 Madsen AccuScreen OAE & ABR Screener User Manual 3.2.3 Editing patient data 1. Find a patient as described in Finding a patient, Patient Details 2. In the screen press the field you wish to edit. 3. Edit the field. OK ( 4.
-
Page 27: Preparing For Testing
Madsen AccuScreen OAE & ABR Screener User Manual Preparing for testing Preparing AccuScreen • Follow the instructions in Getting Started with AccuScreen, • You can download patient data in advance from the AccuLink database (see the AccuLink User Manual). •... - Page 28 Madsen AccuScreen OAE & ABR Screener User Manual 4.2.3 Connecting the electrode cable for ABR testing 1. Place AccuScreen face down. The electrode cable plug sleeve and the coloring around the electrode plug socket on AccuScreen are green. 2. Align the ridge on the electrode cable plug with the notch in the green-bordered socket on the top end of AccuScreen.
- Page 29 Madsen AccuScreen OAE & ABR Screener User Manual 4.2.4 Connecting the ear coupler cable for ABR testing For ABR-measurements you can use either the ear probe or the ear coupler cable with ear couplers. A major advantage in using the ear coupler cable is that once the test starts, both ears can be tested simultaneously or consecutively. For ABR measurement, use the ear coupler cable.
-
Page 30: Preparing The Test Environment
Madsen AccuScreen OAE & ABR Screener User Manual Preparing the test environment Physical environment • Make sure that the test environment is as quiet as possible. The quieter the room is, the more accurate and quick your testing will be. - Page 31 Madsen AccuScreen OAE & ABR Screener User Manual 4.4.1 Preparing the patient for insertion of the ear probe General preparations of the patient 1. Position the patient so that you can easily access the ear to be tested. 2. Grasp the pinna and gently pull back and slightly away from the patient's head.
- Page 32 Madsen AccuScreen OAE & ABR Screener User Manual 4.4.3 Inserting the probe with eartip in the patient’s ear canal 1. When you have fitted an eartip on the probe, gently pull the pinna back and slightly down and insert the probe in the ear canal, with a slight pressure, twisting the probe slightly as you insert it.
- Page 33 Madsen AccuScreen OAE & ABR Screener User Manual 4.4.4 Placing the electrodes for ABR testing Skin preparation Note: Do not use alcohol pads or other cleaning agents that contain alcohol to prepare the skin as they may cause the skin to dry out, leading to a higher skin impedance.
- Page 34 Madsen AccuScreen OAE & ABR Screener User Manual 4.4.5 Fitting the ear couplers Caution: Do not place the red and blue ear coupler adapters directly in the ear canal. Use them only with the ear couplers fitted. Note: Use the ear couplers only with the ear coupler cable - not with the ear probe.
-
Page 35: Testing With Accuscreen
Madsen AccuScreen OAE & ABR Screener User Manual Testing with AccuScreen Before you begin to test: 1. Decide on which ear you wish to perform the test. 2. Decide which test you wish to perform. – TEOAE test, 36 –... -
Page 36: Teoae Test
Madsen AccuScreen OAE & ABR Screener User Manual Regular testing 1. Find a patient (see Finding a patient, 25) or add a new patient (see Adding a new patient, 23). OK ( New Patient Patient Details 2. Press in the screen or the screen. - Page 37 Madsen AccuScreen OAE & ABR Screener User Manual 5.2.2 TEOAE test The test progression displays. Stop (… Press to stop the test. The test will be saved as an incomplete test. Test details Shows which ear is being tested. Valid peaks...
- Page 38 Madsen AccuScreen OAE & ABR Screener User Manual Test details Noise Noise Noise Current noise level. Make sure the level is as low as possible. A high level may indicate a high level of environmental noise or a noisy patient.
- Page 39 Madsen AccuScreen OAE & ABR Screener User Manual Refer/No Clear Response If the result is a Refer/No Clear Response , the detailed results are shown imme diately below the graph. Refer/No Clear Response Refer/No Clear Response Artifact Stimulus • is “good” when the...
-
Page 40: Dpoae Test
Madsen AccuScreen OAE & ABR Screener User Manual DPOAE test DPOAEs are responses generated by the inner ear to a two-tone stimulation. For each frequency that is tested, a pair of tones is presented. The frequency of one of the tones presented is called F1 and the level of that tone is called L1. The other tone is called F2 and its level is L2. - Page 41 Madsen AccuScreen OAE & ABR Screener User Manual 5.3.3 DPOAE test The test as it progresses is shown on the display. The test ear and the frequency currently being tested is shown at the top of the screen. Test details...
- Page 42 Madsen AccuScreen OAE & ABR Screener User Manual Test details DPOAE Response at current test frequency. Noise Current noise level. Make sure the noise level is low. Progress Shows the time elapsed for the current test frequency. If a Pass/Clear Response for the current frequency is not achieved the test frequency will time out.
- Page 43 Madsen AccuScreen OAE & ABR Screener User Manual Refer/No Clear Response Refer/No Clear Response result indicates that in at least 2 frequency bands out of 4, no significant DPOAE response could be detected. The DPOAE result specifies each frequency tested. This facilitates decisions concerning Pass/Clear Response further procedures.
-
Page 44: Abr Test
Madsen AccuScreen OAE & ABR Screener User Manual ABR test The ABR tests are identical, except for the dB level at which the tests are performed. The level is indicated by the name of ABR 30, ABR 35, ABR 40, and ABR 45. - Page 45 Madsen AccuScreen OAE & ABR Screener User Manual 5.4.2 Impedance testing and calibration Electrode impedance testing followed by calibration are performed before the actual test starts. All stimulus, forehead, nape impedance, and balance indicators should be green (see Impedance testing and calibration, 45).
- Page 46 Madsen AccuScreen OAE & ABR Screener User Manual If impedance values are high 1. Make sure that the electrode cable is connected to AccuScreen. 2. Make sure that the electrodes are positioned correctly. 3. Make sure that the skin locations are clean.
- Page 47 Madsen AccuScreen OAE & ABR Screener User Manual Test details Shows which ear is being tested. Single ear testing Binaural testing Shows the ABR response. Is an indication of the amplitude of the total registered potential. The lower this value is, the easier the test will be. If the electrode signals are significantly high (disturbances, muscular artifacts) the data measured during this time will be ignored.
- Page 48 Madsen AccuScreen OAE & ABR Screener User Manual 5.4.4 ABR test results When the test is completed, the test data is saved and the result appears. 1. See Options in the test result screens, 49 for a description of the buttons available.
-
Page 49: Options In The Test Result Screens
Madsen AccuScreen OAE & ABR Screener User Manual Incomplete test If the test was stopped, an error message is shown. Options in the test result screens Test result options Add Comments Comments If you wish to add comments to the test results, press the button. -
Page 50: Adding Comments To A Test
Madsen AccuScreen OAE & ABR Screener User Manual Adding comments to a test You can either select from a list of standard comments or add a comment of your choice. You can edit the predefined comments from AccuLink and then download them to AccuScreen. -
Page 51: Continuing Testing On The Other Ear
Madsen AccuScreen OAE & ABR Screener User Manual 5.6.3 Viewing comments Test Menu You can view comments from the individual test result screens and from the patient’s View Comments ( 1. To view a comment, press Comment screen appears. If comments have already been added to a test, they are listed here. -
Page 52: Test View Screen
Madsen AccuScreen OAE & ABR Screener User Manual 5.10 Test View screen Test View screen shows the tests that have been made on a particular patient. The tests are listed according to date, with the most recent tests at the top of the list. -
Page 53: Quick Test
Madsen AccuScreen OAE & ABR Screener User Manual Quick Test With Quick Test you can perform a quick test without having to assign the test to a specific patient. It is useful for AccuScreen demonstration or testing. Note: These test results are not stored. Consequently, the data from these tests is not available in the Test View and Print screens. -
Page 54: Printing
Madsen AccuScreen OAE & ABR Screener User Manual Printing You can print results from AccuScreen on a label printer (see Printing from AccuScreen, 54). If a printer is connected to your PC, you can also use the AccuLink software to print AccuScreen results (see the AccuLink User Manual). - Page 55 Madsen AccuScreen OAE & ABR Screener User Manual Selecting the patient Print ( 1. Switch on AccuScreen and press . The Print list appears. Test View 2. Select a patient. The screen appears. If needed, see Finding a patient,...
- Page 56 Madsen AccuScreen OAE & ABR Screener User Manual Printing Test View Print ( 1. To print the entire list from the screen, press Patient comments are printed. Result 2. To access a test result, press the button next to the test you wish to print.
-
Page 57: Printouts From Label Printer
Madsen AccuScreen OAE & ABR Screener User Manual Printouts from label printer The printouts show: • Patient name (first, last) • Patient ID • Date of testing • Examiner name • Test type • Left and/or right ear result, date, and time •... -
Page 58: Quality Tests
Madsen AccuScreen OAE & ABR Screener User Manual Quality Tests From the Quality Tests menu you can test the probe and cables connected to AccuScreen. You should test the probe and cables at the beginning of each workday. Note: You should always comply with local regulations and routines. - Page 59 Madsen AccuScreen OAE & ABR Screener User Manual 8.2.1 Performing the probe test 1. Insert the probe tip without eartip in the test cavity. The test starts automatically. Note: The probe test does not start automatically e.g. when a patient is being created.
-
Page 60: Electrode Cable Test
Madsen AccuScreen OAE & ABR Screener User Manual 8.2.2 From the Quality Tests menu 1. Insert the probe tip without eartip in the test cavity on the device, or in an external test cavity. 2. Press Probe ( on the Quality Tests screen. -
Page 61: Ear Coupler Cable Test
Madsen AccuScreen OAE & ABR Screener User Manual Ear coupler cable test Before you start testing on patients, you should test the ear coupler cable to ensure that it functions correctly. The ear coupler cable test consists of two parts: 1. - Page 62 Madsen AccuScreen OAE & ABR Screener User Manual Manual listening test Note: To ensure that the cables are working properly, you should perform a daily Listening Test. 1. Remove the ear coupler adapters from the ABR Tester. To remove an ear coupler adapter, do not pull on the cable. Instead, hold on to the ear coupler adapter.
-
Page 63: Combined (Electrode Cable - Ear Coupler Cable)
Madsen AccuScreen OAE & ABR Screener User Manual Combined (Electrode Cable - Ear Coupler Cable) Every day before you start testing on patients, you can test the electrode cable and ear coupler cable to make sure that they function correctly. The combined test consists of two parts: 1. - Page 64 Madsen AccuScreen OAE & ABR Screener User Manual Manual listening test 1. Remove the ear coupler adapters from the ABR Tester. To remove an ear coupler adapter, do not pull on the cable. Instead, hold on to the ear coupler adapter.
-
Page 65: Accuscreen Settings
Madsen AccuScreen OAE & ABR Screener User Manual AccuScreen Settings You can configure AccuScreen and from AccuLink (see the AccuLink User Manual). AccuScreen Go to Settings ( ) to set time / date, language, sound, and brightness. You can also view system info. -
Page 66: Display Brightness
Madsen AccuScreen OAE & ABR Screener User Manual Display Brightness Go to Settings ( ) > Display Brightness. Press (dark) or (bright). Note: A bright display influences power consumption. Note: Press Default to use the default display setting. System Info Go to Settings ( ) >... -
Page 67: Handling Data In Accuscreen
Madsen AccuScreen OAE & ABR Screener User Manual Handling Data in AccuScreen 10.1 Entering data in AccuScreen 10.1.1 Keypad To enter or edit data, select the characters and digits from the keypad. Tap Shift ( ) to type uppercase letters. -
Page 68: General Buttons
Madsen AccuScreen OAE & ABR Screener User Manual 10.3 General buttons Use the main function buttons to return to a previous screen, view help, go home, confirm an action, or toggle search criteria. Press return ( ) to return to the previous screen. -
Page 69: Maintenance And Cleaning
Madsen AccuScreen OAE & ABR Screener User Manual Maintenance and Cleaning 11.1 Probe tip and probe body Be sure to follow any established infection control procedures for the setting in which you are working. Never place the probe tip in the ear canal without using a clean eartip. - Page 70 Madsen AccuScreen OAE & ABR Screener User Manual 11.1.2 Cleaning the probe body Note: For periodic cleaning of the probe body, contact your authorized service department. Note: The probe body contains sensitive components. Never clean the sound apertures in the probe body mech anically or with liquids.
-
Page 71: Eartips
11.1.3 Probe calibration Note: Natus Medical Denmark ApS recommends that an annual calibration be performed on AccuScreen and probe. Natus Medical Denmark ApS also recommends that calibration be performed if the equipment has suffered any potential damage. The AccuScreen probe is calibrated at the factory prior to delivery. This is why there may not be a full year to the next cal- ibration date stated on the calibration certificate when you receive AccuScreen. -
Page 72: Cleaning Accuscreen
Madsen AccuScreen OAE & ABR Screener User Manual 11.3.2 Ear coupler cable calibration The MADSEN AccuScreen ear coupler cable is calibrated at the factory prior to delivery. Calibration frequency The ear coupler cable should be calibrated annually by authorized service personnel at an authorized workshop. -
Page 73: Battery Safety And Maintenance
Keep the battery's terminals clean. Clean with a soft cloth if necessary. Battery renewal Caution: The battery capacity will gradually degrade by many charging/discharging cycles and by ageing. Natus Medical Denmark ApS recommends that you replace the battery every 12 to 18 months. - Page 74 Madsen AccuScreen OAE & ABR Screener User Manual 11.5.3 Disposal of old batteries Note: Li-Ion batteries can be recycled! Note: Dispose of used battery promptly. Note: Keep away from children. Environmental protection When the Li-Ion rechargeable battery loses its capacity to be charged, make sure that it is disposed of according to...
-
Page 75: Appendix 1 Standards And Safety
Madsen AccuScreen OAE & ABR Screener User Manual Appendix 1 Standards and Safety This manual contains information and warnings that must be followed to ensure safe performance of AccuScreen. Note: Local government rules and regulations, if applicable, should be followed at all times. -
Page 76: Appendix 2 Status And Error Messages
Madsen AccuScreen OAE & ABR Screener User Manual Appendix 2 Status and Error Messages Device related messages Error message Cause Solution • The battery charge is low. • Recharge AccuScreen or replace the battery with a spare. Low battery voltage The last device con- •... - Page 77 Madsen AccuScreen OAE & ABR Screener User Manual Usage and test related messages Error message Cause Solution Reset This user account is blocked • A wrong password has been entered 3 • An AccuLink user with the because of too many times.
-
Page 78: Appendix 3 Technical Specifications
Madsen AccuScreen OAE & ABR Screener User Manual Appendix 3 Technical Specifications Accessories Standard accessories and optional accessories may vary from country to country - please consult your local distributor. Standard accessories Carrying case Docking station, including power adapter and USB cable Probe (except ABR w/ear coupler cable) (Cable Approx. -
Page 79: Device
Statistical graph, impedances, EEG-level and overall Refer/No Clear Response Electrodes: Disposable hydrogel electrodes Device MADSEN AccuScreen is type 1077 from Natus Medical Denmark ApS. Dimensions Approx. 200 x 73 x 34 mm (7.9 x 2.9 x 1.3 inches) Weight Approx. - Page 80 2000 meters), it is recommended to recalibrate the OAE probes and ABR ear coupler cable (if used). < 20 seconds. Warm-up time Note: Warm-up time should be extended if MADSEN AccuScreen has been stored in a cold environment.
- Page 81 WEEE is reused or recycled safely. In line with that commitment Natus Medical Incorporated may pass along the obligation for take back and recycling to the end user, unless other arrangements have been made. Please contact us for details on the collection and recovery systems available to you in your region at natus.com.
-
Page 82: Power Supply And Battery
80% charged: 4½ hours station: Battery Warning: Use only the rechargeable battery supplied by Natus Medical Denmark ApS, Part no. 8-73-02400. Use of any other battery may present a risk of fire or explosion. Battery type: Rechargeable Li-ion 3.7 V/1800 mAh (6.7 Wh), fully charged... -
Page 83: Oae Probe
Madsen AccuScreen OAE & ABR Screener User Manual Power adapter Input voltage/range: 100-240 V AC, 50-60 Hz Output voltage: 5.0 V DC Output current: Minimum 1.0 A Mains plug types: US, UK, Europe and Australia OAE probe TEOAE Type: EP-TE from PATH Medical GmbH... -
Page 84: Notes On Emc (Electromagnetic Compatibility)
IEC 60601-1-2:2014 and EN 60601-1-2:2015 Guidance and manufacturer's declaration - electromagnetic emissions for all equipment and systems MADSEN AccuScreen is intended for use in the electromagnetic environment specified below. The user of MADSEN AccuScreen should ensure that it is used in such an environment. - Page 85 Madsen AccuScreen OAE & ABR Screener User Manual Guidance and manufacturer's declaration - electromagnetic immunity for all equipment and systems MADSEN AccuScreen is intended for use in the electromagnetic environment specified below. The user of MADSEN AccuScreen should ensure that it is used in such an environment.
- Page 86 Guidance and manufacturer's declaration - electromagnetic immunity - for equipment and systems within Professional Healthcare use environment MADSEN AccuScreen is intended for use in the electromagnetic environment specified below. The user of MADSEN AccuScreen should ensure that it is used in such an environment.
- Page 87 IEC 60601-1-2:2007 and EN 60601-1-2:2007 Guidance and manufacturer's declaration - electromagnetic emissions for all equipment and systems MADSEN AccuScreen is intended for use in the electromagnetic environment specified below. The user of MADSEN AccuScreen should ensure that it is used in such an environment.
- Page 88 Guidance and manufacturer's declaration - electromagnetic immunity - for equipment and systems that are NOT life-supporting MADSEN AccuScreen is intended for use in the electromagnetic environment specified below. The user of MADSEN AccuScreen should ensure that it is used in such an environment.
- Page 89 Recommended separation distances between portable and mobile RF communications equipment and MADSEN AccuScreen The MADSEN AccuScreen is intended for use in an electromagnetic environment in which radiated RF disturbances are controlled. The customer or the user of the MADSEN AccuScreen can help prevent electromagnetic interference by maintaining a minimum distance between portable and mobile RF communications equipment (transmitters) and the MADSEN AccuScreen as recommended below, according to the maximum output power of the communications equipment.
Need help?
Do you have a question about the Madsen AccuScreen and is the answer not in the manual?
Questions and answers